The Hidden Life of Texas Orchids: A Mycorrhizal Mystery
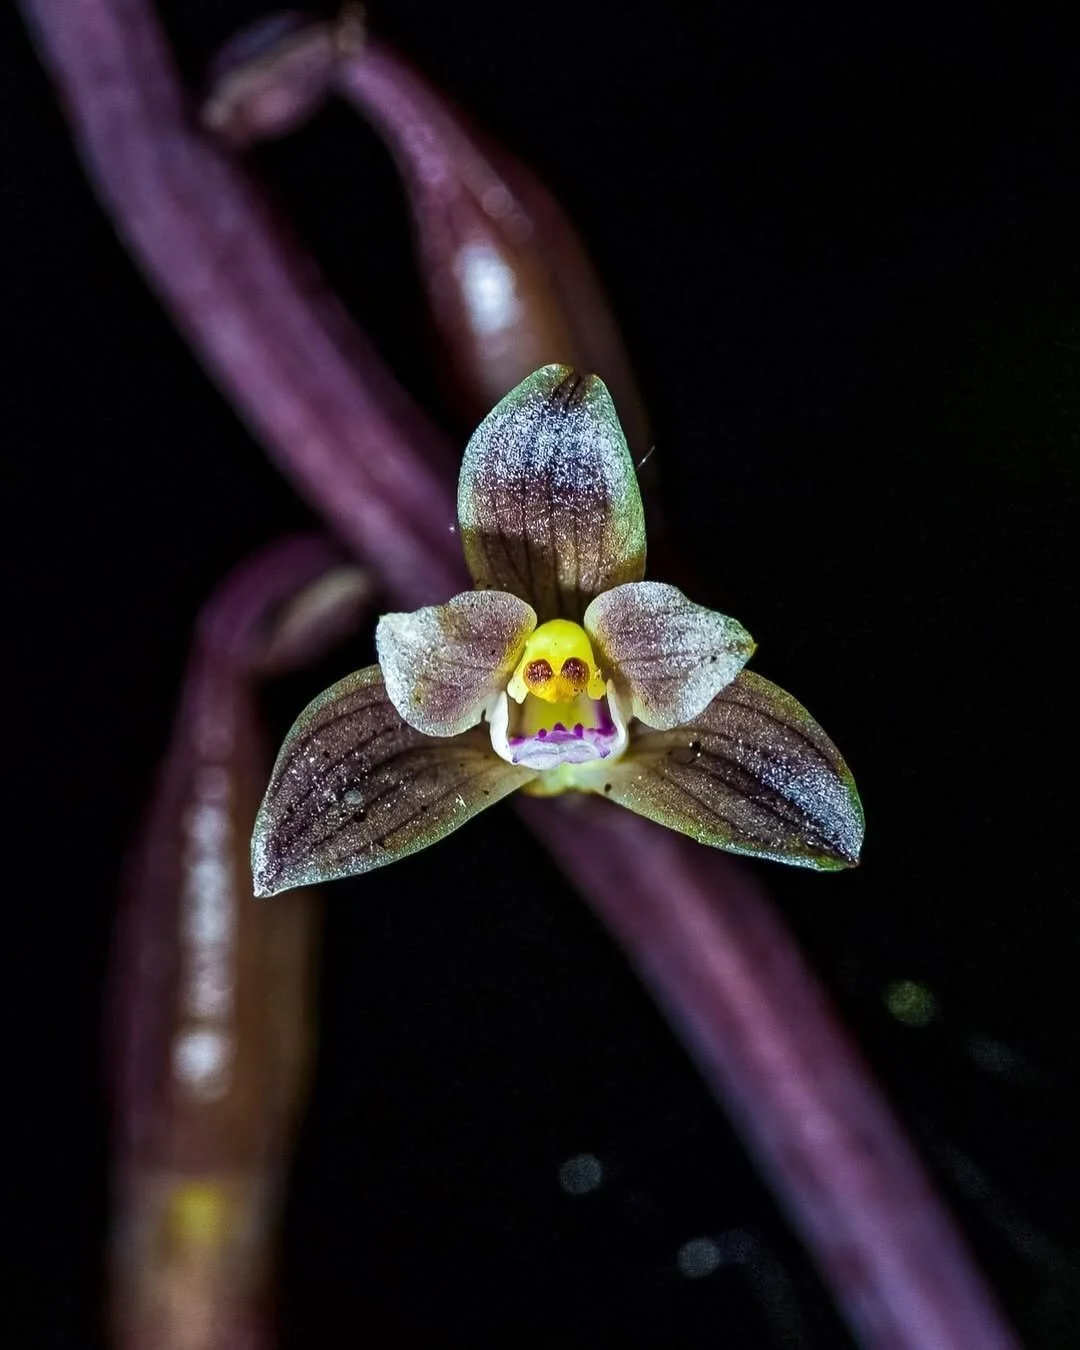
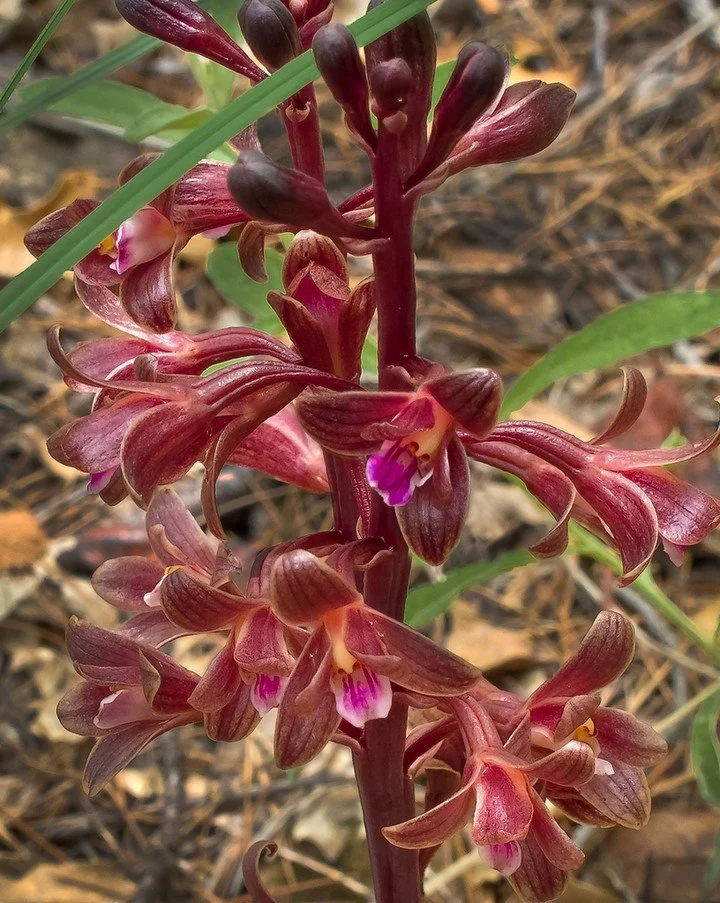
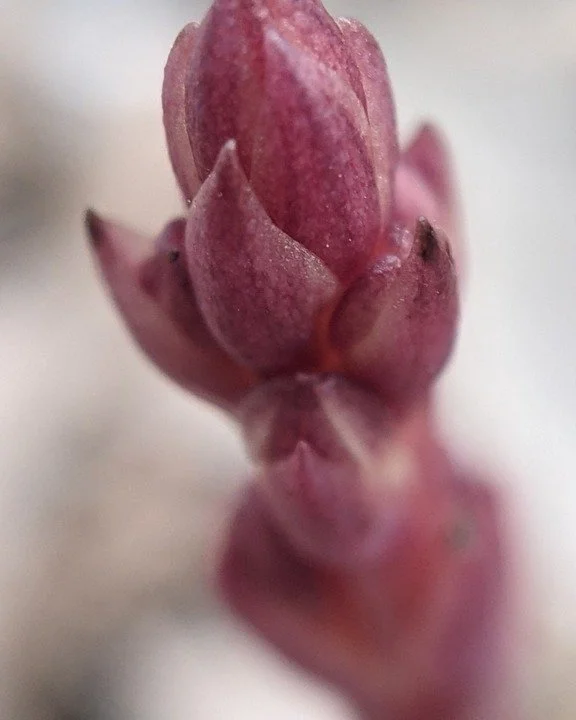
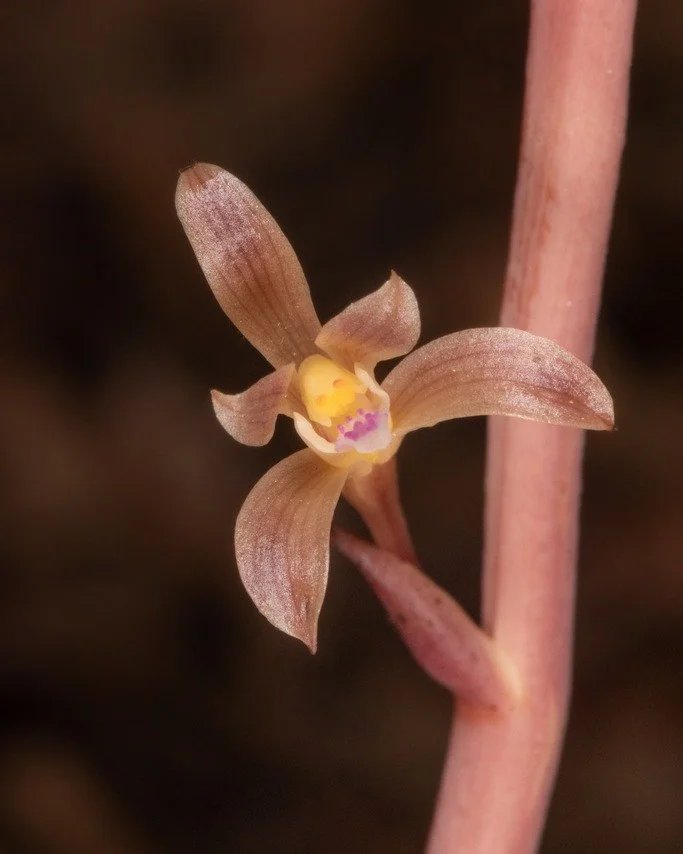
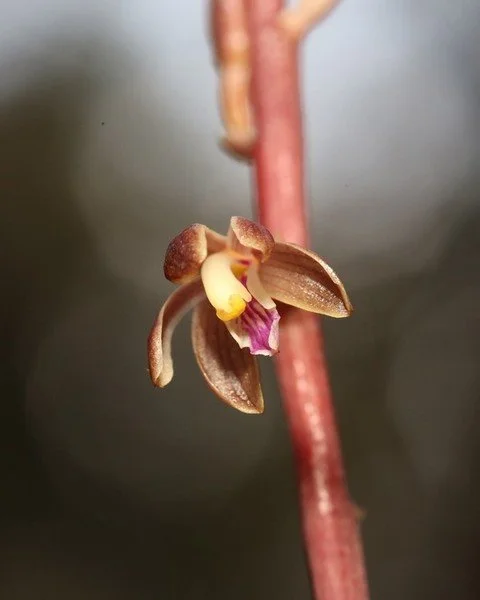
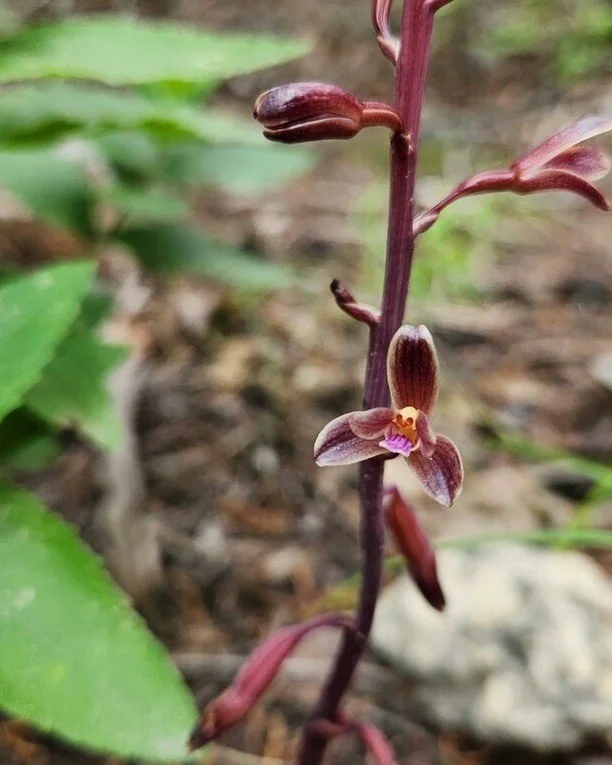
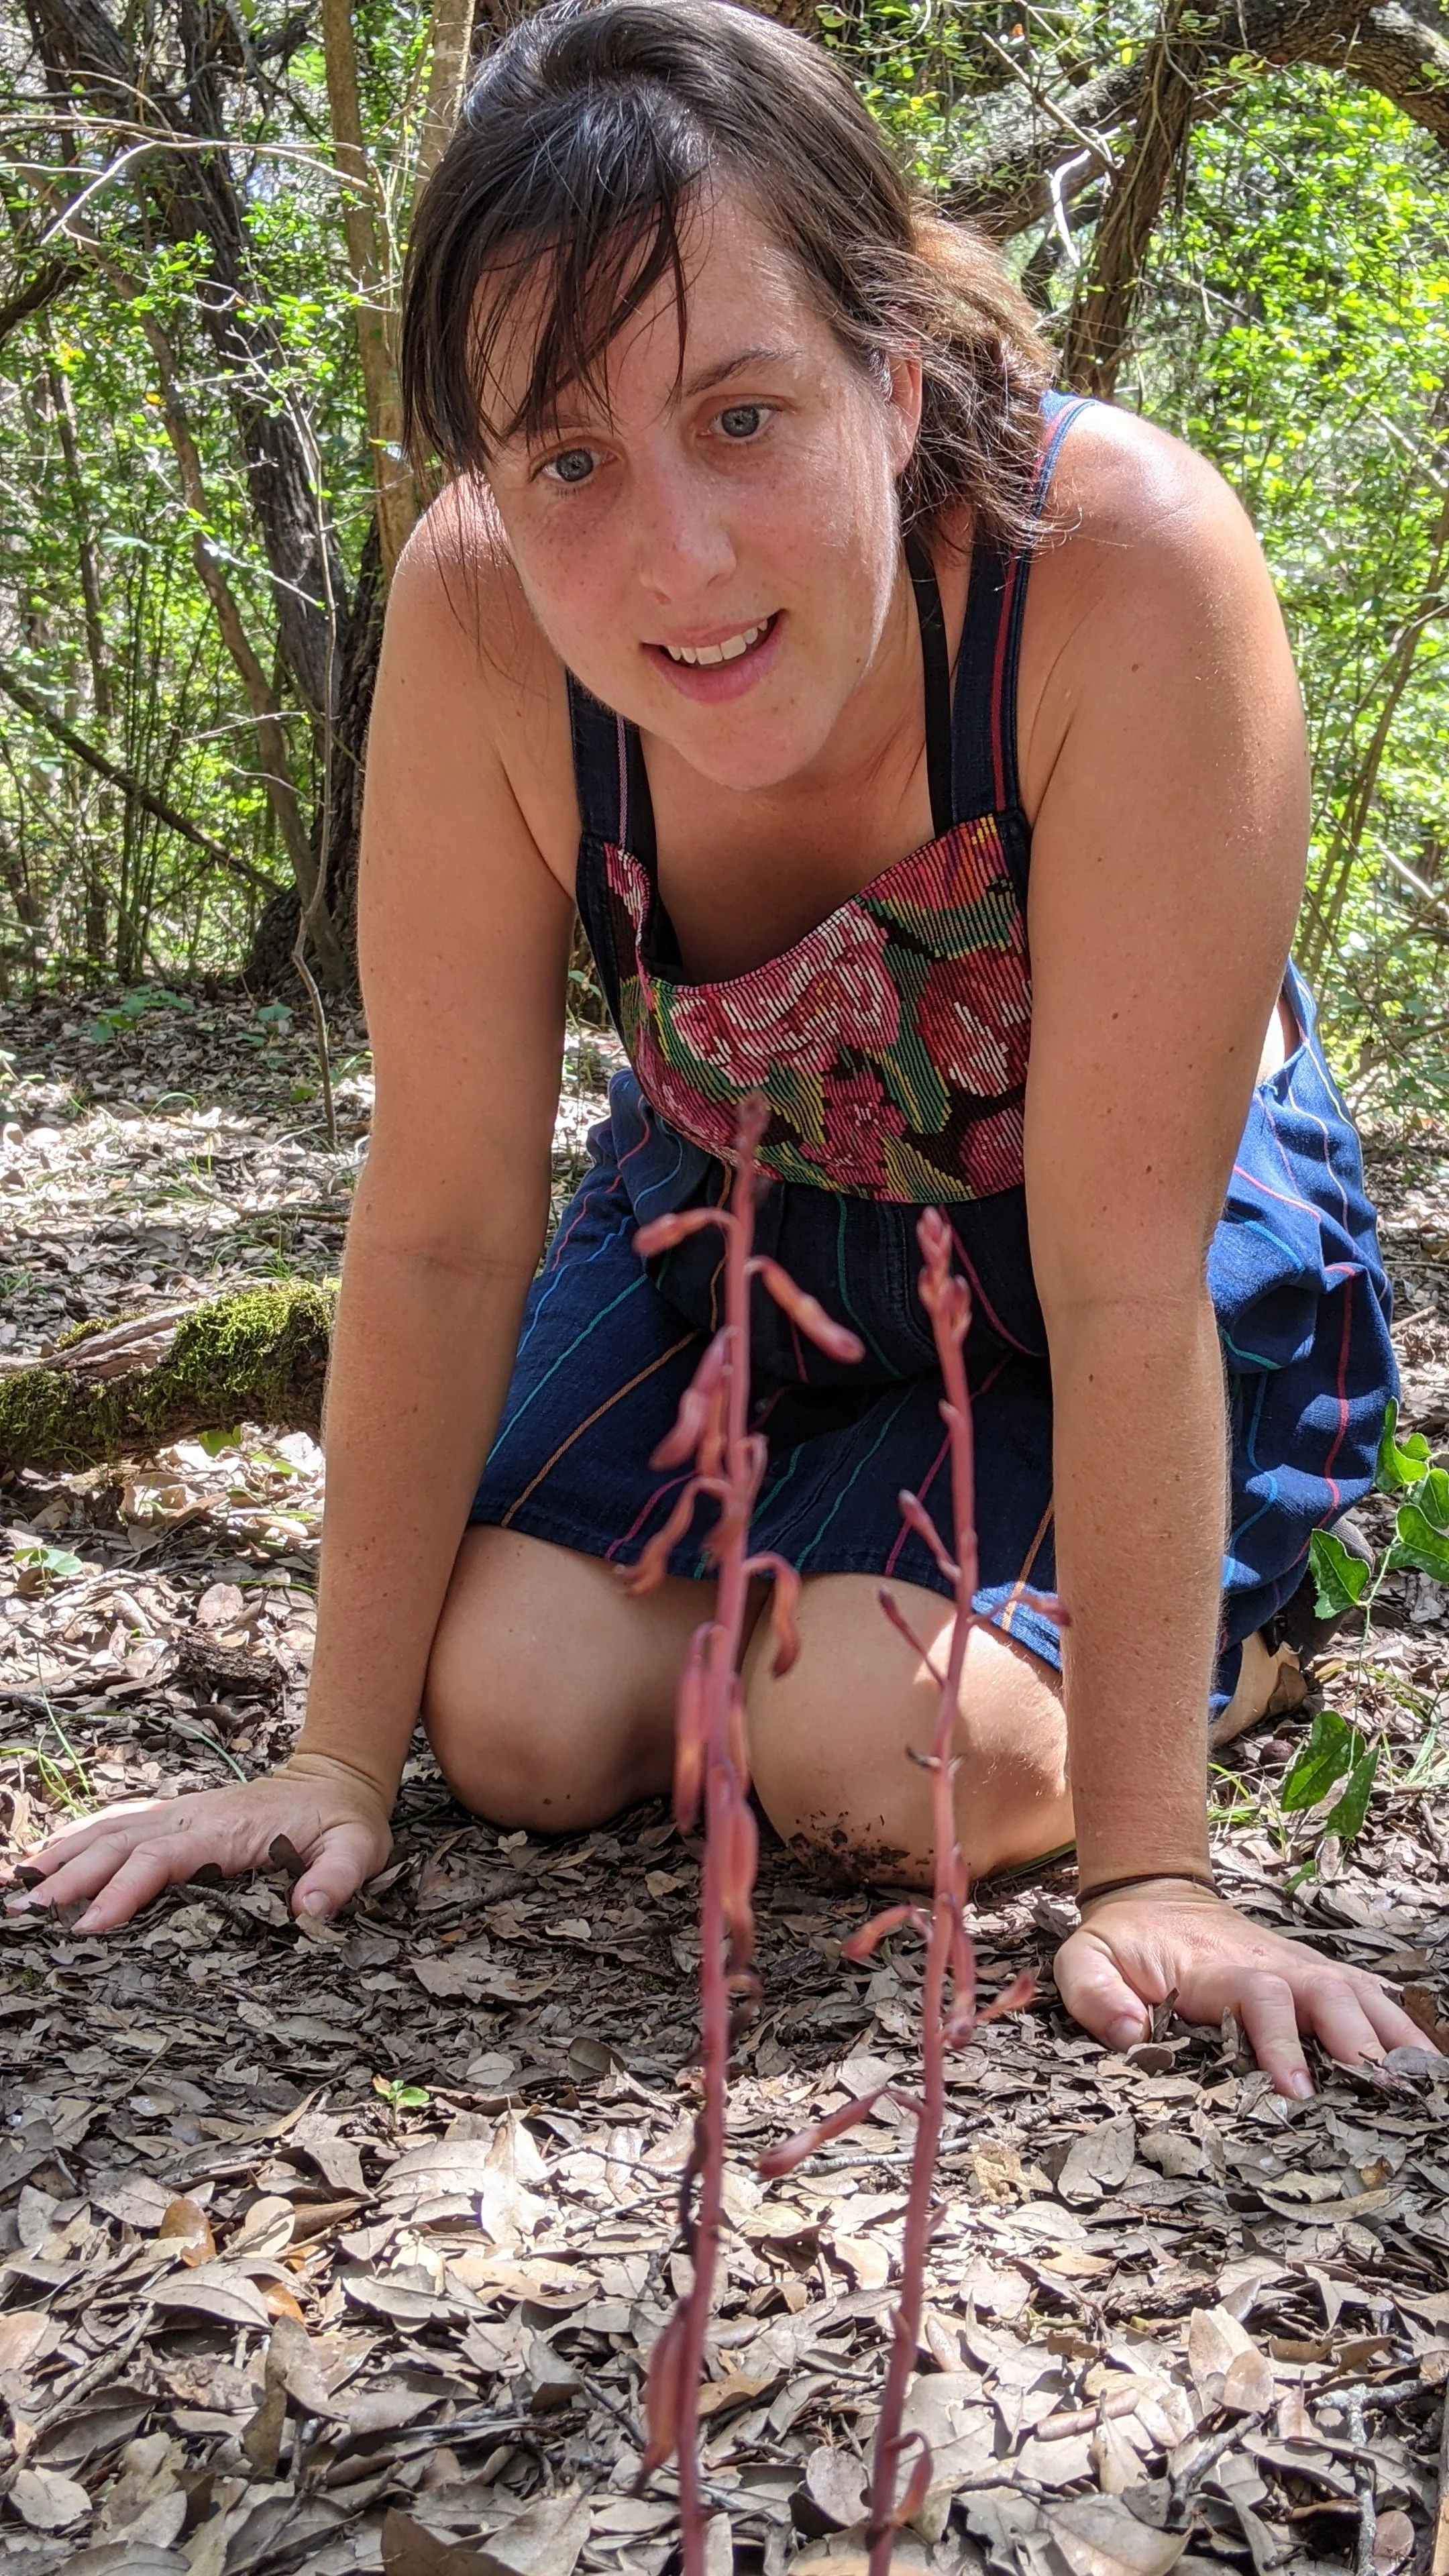
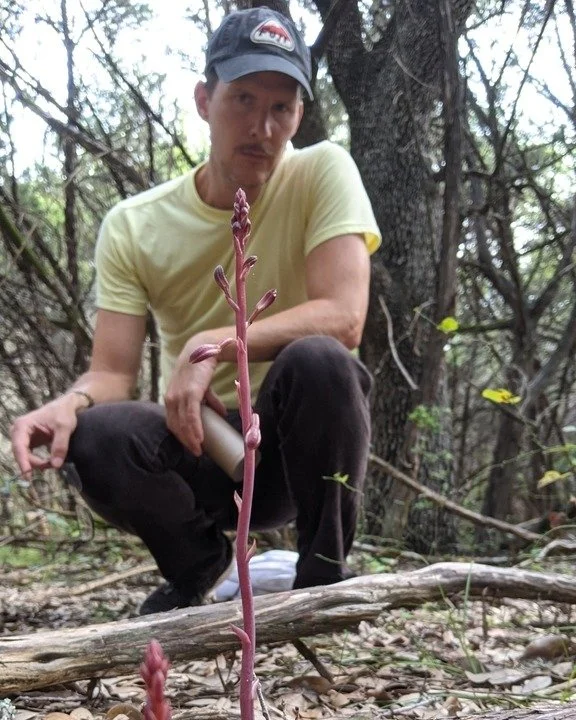
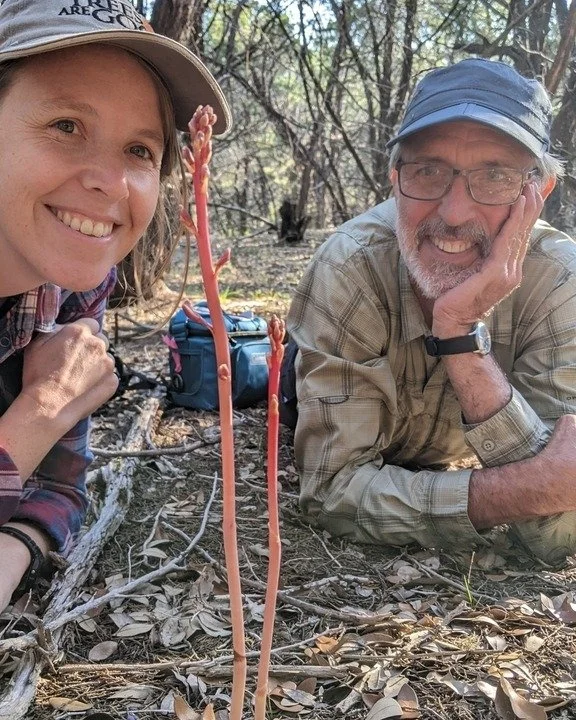
If you joined us for our recent orchid mycology walk, you might recall the thrill of spotting the rare and beautiful Bletia nitida—or as many of you know it, the Glass Mountain Crested Coralroot. It was a special treat to see them blooming, a testament to the right combination of rain and humidity that creates their perfect microclimate. For those who missed it, you can see the stunning photos from our walk here.
by Angel Schatz
If you joined us for our past orchid mycology walk, you had the thrill of spotting the rare and beautiful Bletia nitida—commonly known as the Glass Mountain Crested Coralroot. It was a special treat to see them blooming, a testament to the right combination of rain and humidity that creates their perfect microclimate. For those who missed it, you can see the stunning photos from our walk here.
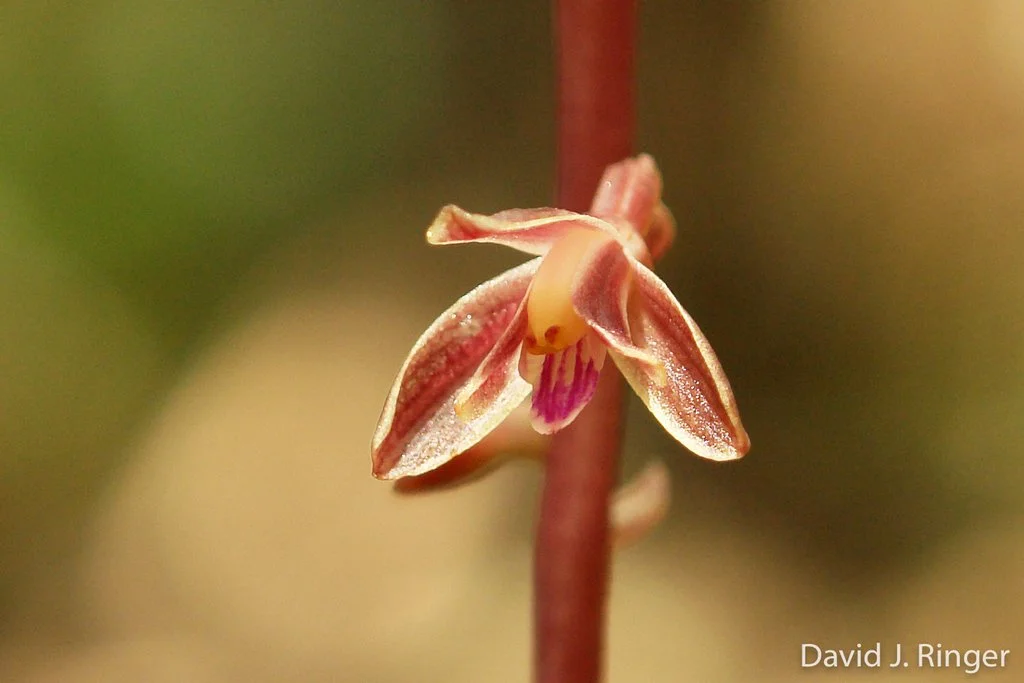
But the true wonder of these orchids isn't just in their delicate, waxy rose-brown flowers. It's in the secret life they lead underground, a life so bizarre it challenges our very understanding of what a plant is.
What's in a Name? The Science of Reclassification
First, a bit of botanical housekeeping. You might remember this orchid as Hexalectris nitida, which sounds like a superhero name. Recent molecular analyses have led scientists to reclassify it. It now officially resides in the genus Bletia, making it Bletia nitida. This isn't just a name change; it reflects a deeper understanding of its evolutionary relationships. The expanded genus Bletia now includes orchids that are completely myco-heterotrophic, meaning they have little to no chlorophyll and rely almost exclusively on fungi for their nutrition. Our Bletia nitida is a prime example of this fascinating group.
A Plant That Doesn't Photosynthesize
Most plants are autotrophs—they use sunlight, water, and carbon dioxide to create their own food through photosynthesis. Bletia nitida is an achlorophyllous plant. It has no leaves and contains no chlorophyll. So, how does it survive? It has evolved a strategy called mycoheterotrophy.
In this relationship, the orchid acts as a parasite upon its fungal partner. It doesn't offer the fungus sugars in return for nutrients like most mycorrhizal partnerships. Instead, it obtains all of its carbon and mineral nutrients by parasitizing the fungus.
A Web of Deception and Dependency
The process is a remarkable example of subterranean sleight-of-hand. The mycoheterotrophic orchid connects to fungi that are, themselves, mycorrhizal with a nearby autotrophic tree. This creates a three-way network:
The tree photosynthesizes, producing sugars.
The fungus taps into the tree's roots, absorbing these sugars in exchange for minerals like phosphorus and nitrogen.
The orchid taps into the fungus, diverting the sugars and nutrients for its own use.
In essence, Bletia nitida is a "cheater" in this ecological network, bypassing the need to photosynthesize by stealing resources from the fungus, which originally acquired them from another plant.
Extreme Fungal Specificity
One of the most remarkable aspects of this relationship is the extreme specificity Bletia nitida shows toward its fungal partners. Research has demonstrated that Bletia nitida associates exclusively with a very narrow range of ectomycorrhizal fungi .
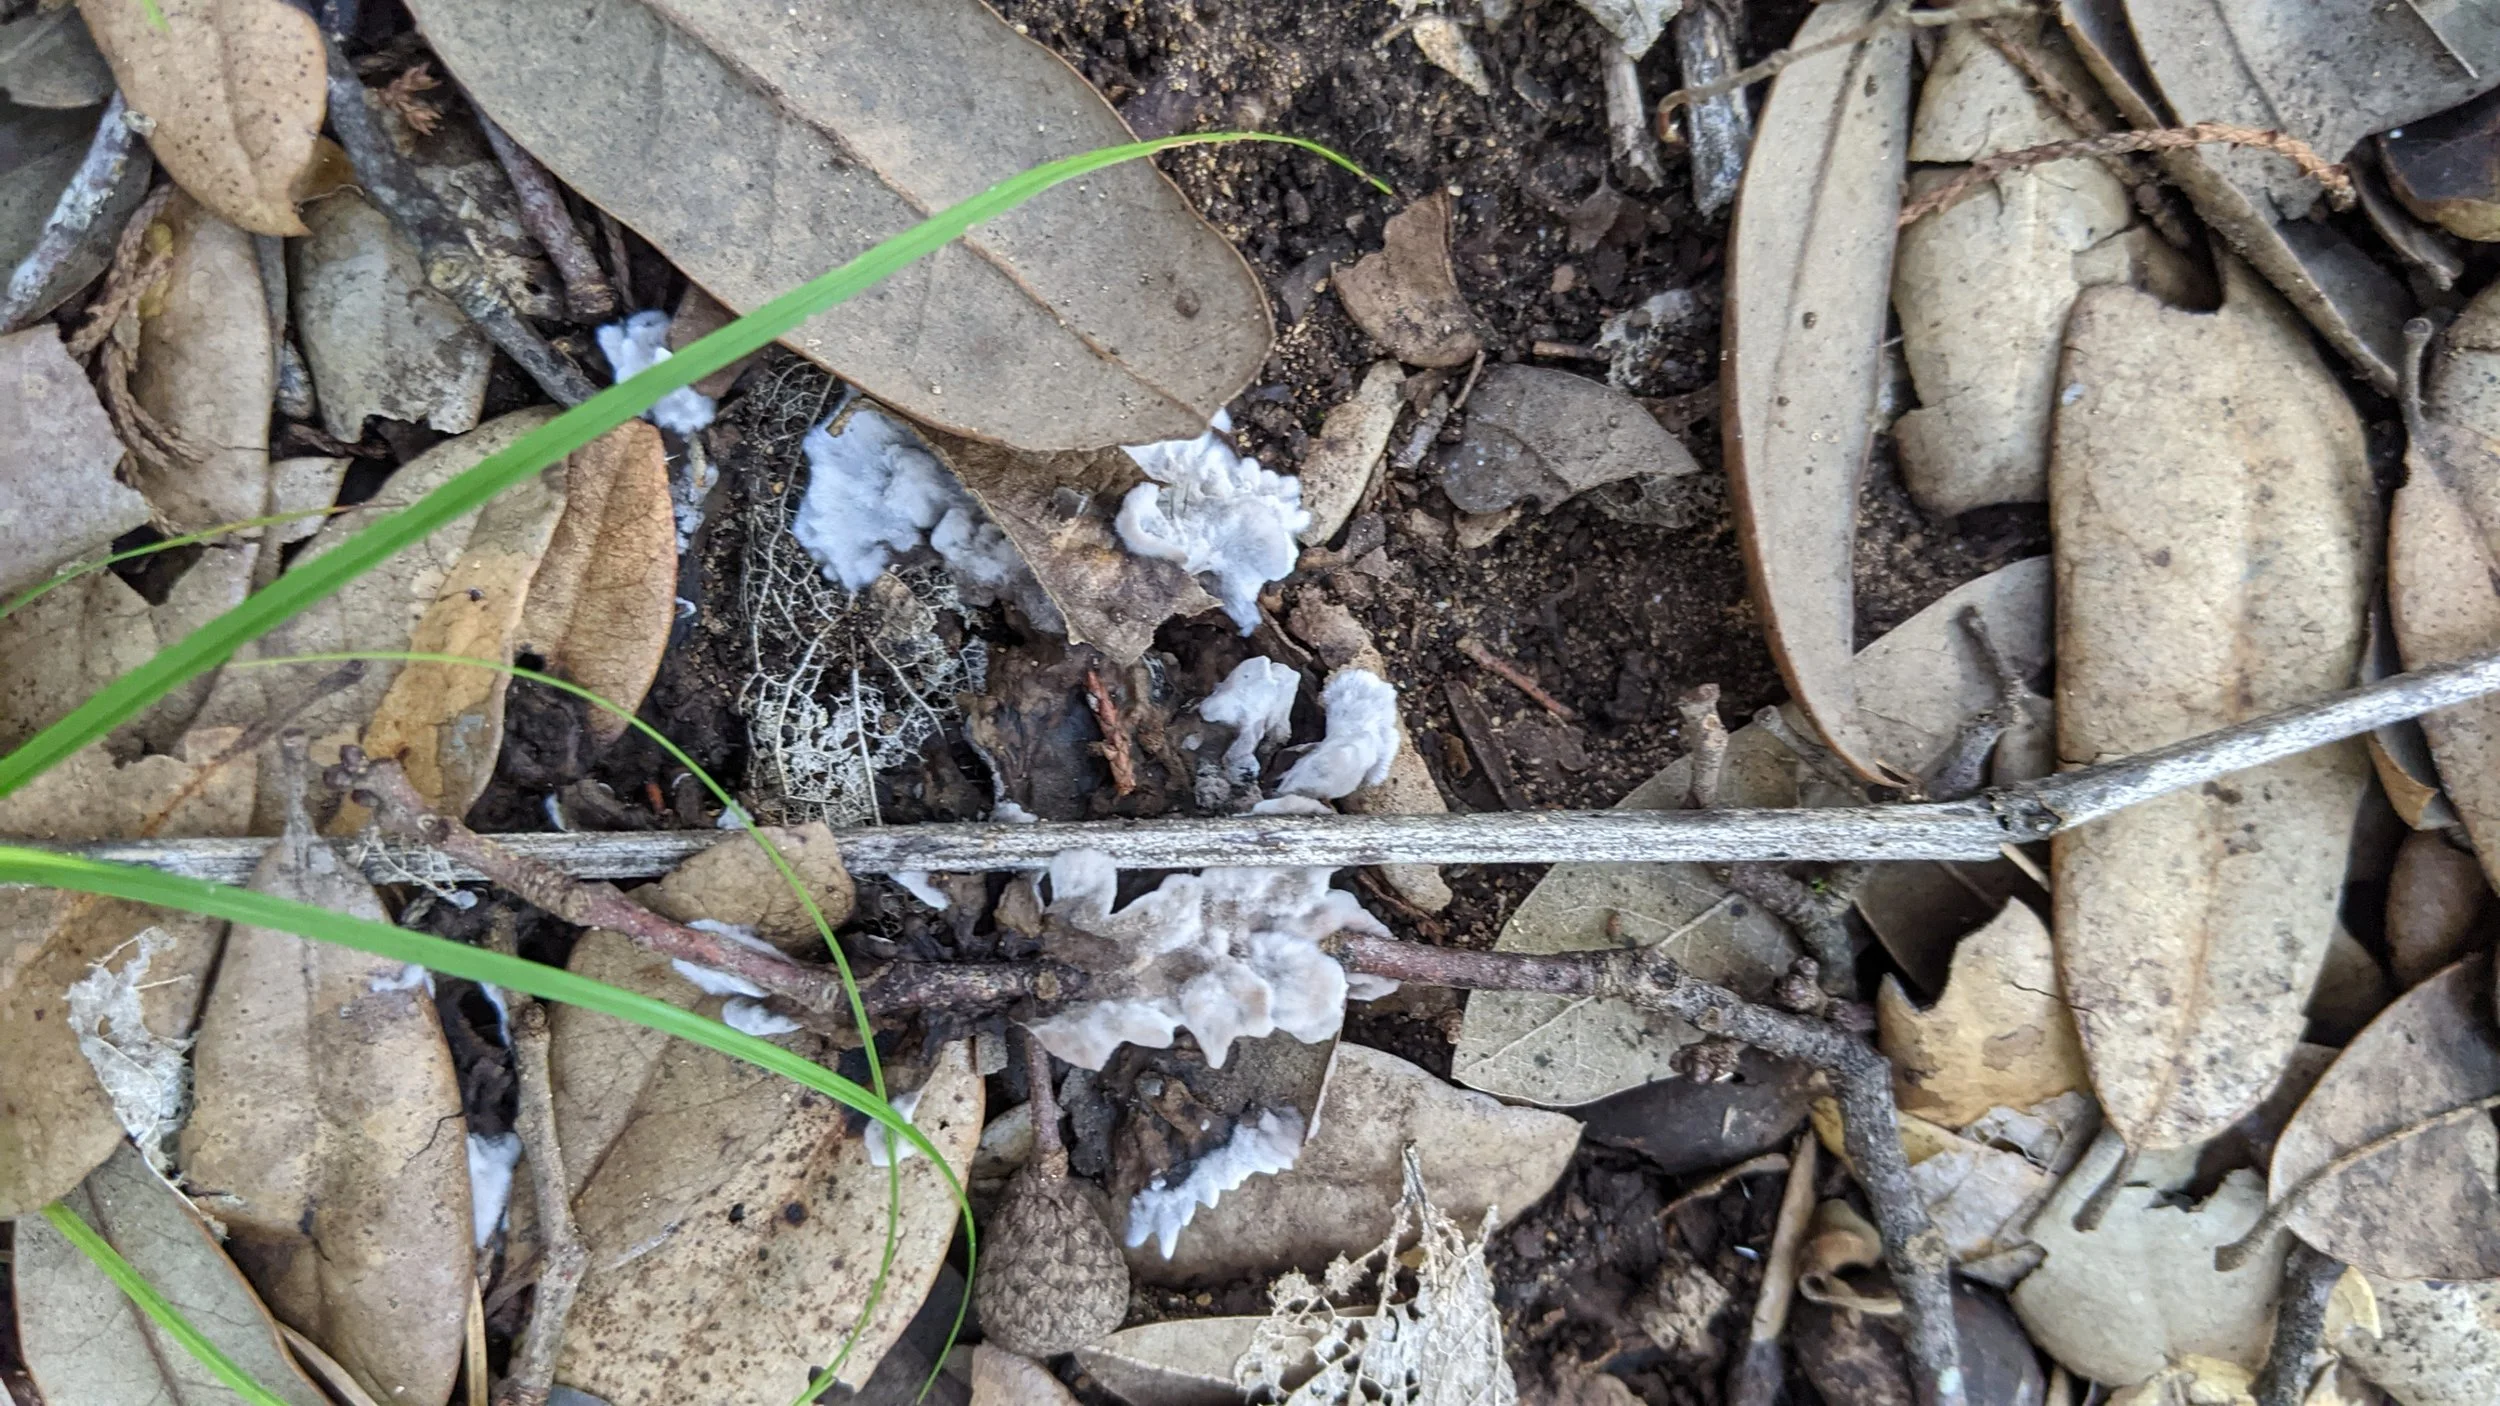
Specifically, the fungi identified in association with Bletia nitida belong primarily to the Sebacinaceae family (subgroup A), a group of fungi that form ectomycorrhizal relationships with trees . These aren't just random soil fungi—they are the very same fungi that connect to the roots of oaks and junipers in the shaded canyons where the orchids grow . Here’s some media of this fungi growing near the Orchid from rainy years.
This specificity is so precise that Bletia nitida and related species in the H. spicata complex appear to associate strictly with members of the Sebacinaceae subgroup A, with each orchid species often targeting a distinct subclade within that group . In fact, studies of B. nitida show the highest fidelity toward their fungal partners, rarely associating outside their primary fungal clade. This means when you spot a Bletia nitida, you're not just seeing a rare orchid—you're looking at evidence of a highly specialized, ancient partnership with a specific underground fungus.
Texas: A Hotspot for Bletia
Our state is a biodiversity hotspot for this unusual group. Texas is home to more species of the Hexalectris genus (now largely folded into Bletia) than any other state in the world. You can find them in three main hotspots: the mountains of far West Texas, the shaded canyons of the Edwards Plateau, and the White Rock Escarpment in north-central Texas.
A Closer Look at Bletia nitida
First Discovery: It was first observed by Barton Warnock in 1940 in the Glass Mountains of West Texas, which is how it gets its common name.
Rarity: This orchid is considered vulnerable throughout its range. It is a shy bloomer, often self-pollinating (cleistogamous) and rarely displaying fully open flowers .
Growth: It typically grows to about 20 cm or less, bearing a dense cluster of 12-20 flowers on a short inflorescence. It prefers the rocky, shaded sides of canyons under oaks and junipers.
The Big Picture: A Scientific Frontier
The story of Bletia nitida and its mycoheterotrophic cousins is far more than a botanical curiosity. It's a powerful window into the complex, hidden networks that sustain life in our woodlands.
The next time you walk through a Texas oak-juniper woodland or canyon, remember that the most fascinating life might not be the trees towering above you, but the coral orchids and their fungal partners carrying out a silent, parasitic drama right beneath your feet.
📸 Help Us Document These Wonders
Have you spotted Bletia nitida or other fascinating orchids and fungi on your hikes? We'd love to see your observations!
Add your sightings to iNaturalist: Your observations help scientists track populations and better understand these rare species. We've been monitoring known locations and discovering new ones , and your contributions make a real difference. Be sure to obscure your observations since these species are vulnerable.
Share your photos with us: Tag us in your posts or send us your best shots from the trail.
Every observation adds to our collective knowledge and helps protect these incredible organisms for future generations. Happy exploring!
Reference Links
https://www.inaturalist.org/observations?taxon_id=1269436
https://www.instagram.com/explore/search/keyword/?q=Hexalectris%20spicata
https://goorchids.northamericanorchidcenter.org/species/bletia/nitida/
https://www.wildflower.org/plants/result.php?id_plant=heni2

A Detailed Guide: Collecting Mushrooms for DNA Barcoding
This guide covers the essential steps for community scientists, as presented in the April 21, 2026, live stream with Walker Moore of the Longhorn Mycological Society.
Before You Go: The Golden Rules for Science
Goal: Your collection is not just for ID—it’s for a fungarium (a preserved mushroom collection) and potentially DNA sequencing. Every detail matters.
One Mushroom = One Voucher: You are not just taking a sample; you are creating a permanent scientific record.
Safety First: Never eat or even taste a mushroom for identification. Some are deadly.
Step 1: Find a Good Specimen
Choose wisely: Look for a fresh, intact, mature mushroom. Avoid old, waterlogged, bug-eaten, or rotting specimens. The DNA degrades quickly in poor specimens.
Get the whole thing: You need both the cap and the base of the stem (where it attaches to the wood or ground). This underground part often has crucial features for ID.
Step 2: Record Vital Field Notes (Do This FIRST)
Before you pick the mushroom, document where it lives. Use a notebook, camera, or a field data app like iNaturalist. Key info:
Date
Precise location (GPS coordinates are best).
Habitat/Substrate: What is it growing on? Be specific:
On soil (bare, leafy, mossy?)
On wood (dead log, living tree, stump, fallen branch? What tree species, if known?)
On dung, other fungi, or debris.
Associated plants/trees: Note the dominant trees within 10 meters (e.g., "under live oak and juniper").
Light/moisture: Shady, full sun, recently rained, dry.
Take Photos – The Required Angles (See this visual guide)
Wide habitat shot
Step back 2–5 meters
Show the mushroom in its surroundings (forest floor, log, or tree base)
Proves ecological context and nearby plant life
Mid-range shot
Stand 0.5–1 meter away
Show the mushroom and its immediate substrate (e.g., "growing from that crack in the dead log")
Captures relationship between mushroom and what it grows on
Top of cap shot (directly overhead)
Hold camera perpendicular (straight down) over the cap
Capture cap shape, color, texture, and any patterns (scales, streaks, warts)
Do not tilt the camera – shoot flat to the cap surface
Underside shot (gills/pores/spines) – in situ
Do not pick the mushroom yet
Carefully brush away leaves or flip camera at ground level
If impossible to see without picking, note "underside not visible in situ" in your journal
(After picking in Step 3, take another clean underside shot)
Side profile shot (ground level)
Crouch or lie down at ground level
Show the stem (stipe) and how it joins the cap
Also show the base of the stem entering the substrate
Stem base shot (taken AFTER picking – see Step 3)
After carefully digging up the mushroom
Photograph the intact base that was underground
Shows basal bulb, root-like structures (rhizomorphs), or attached debris
Scale reference (include in at least one shot)
Place a coin, key, field ruler, or known object next to the mushroom
If no scale object, write in your notes: "cap approx ___ cm wide"
Pro Tips (from Walker Moore's class)
Do not rearrange nature. Take "before" shots before moving any leaves or grass
Take more photos than you think you need – digital film is free
Use natural light when possible; flash washes out color and texture
If using flash, write "flash used" in your journal
After Photographing – Then Collect
After picking, take one additional photo of the intact stem base (the part that was underground) and the underside now that you can see it clearly.
Step 3: Collect the Mushroom
Clean hands/tools: Ideally, wear disposable gloves. Use a clean knife. You want to avoid contaminating the mushroom with your own DNA or other fungi.
Dig, don’t pull: Gently dig around the base to get the entire stem base intact. You can cut the very bottom dirty part off, but keep the rest of the stem base.
One specimen per bag: Place only one mushroom species per bag (paper bag or wax paper bag is best). Never use plastic bags – they trap moisture, causing the mushroom to rot and mold, destroying DNA.
Step 4: Preserve for DNA (The Critical Part)
DNA breaks down quickly at room temperature, especially in heat.
Within 1-2 hours of picking: You must dry the specimen.
Dehydrator: Use a food dehydrator at low temperature (below 45°C / 113°F) until cracker-dry.
Silica gel drying (best for DNA): Place the fresh mushroom in a small, sealable container (like a Ziploc) completely covered with indicating silica gel (the kind that changes color when saturated). The mushroom should be dry and crackly in 1-3 days.
NO heat sources like ovens or direct sun, as high heat fragments DNA.
Step 5: Package for the Lab
Once cracker-dry (it snaps, doesn't bend), put the dried mushroom into a labeled paper envelope or zip bag with a tiny silica gel pack.
Label MUST include: Your collector name, a unique specimen number (e.g., iNaturalist ID), the date, and GPS coordinates. This ties your physical collection to your field notes. Use the iNaturalist ID if possible because it contains all this meta data.
What Happens Next at a Lab Like Mycota Labs?
A tiny piece of the dried mushroom is taken for DNA extraction.
A specific "barcode" gene (usually the ITS region – Internal Transcribed Spacer) is amplified using a process called PCR.
The DNA is sequenced and compared to a giant online reference library (like GenBank or UNITE).
Final Tips from Walker Moore’s Talk
Don’t worry if you can’t ID it. You aren't expected to know the species. Your job is excellent collection and preservation. The DNA will reveal its identity.
Beware of cross-contamination. Don't touch one mushroom and then another without changing gloves. If you drop a mushroom on the ground, you can still collect it (just note "dirty" in your notes).
Connect with a local fungarium or mycology society (like Central Texas Mycology or Longhorn Mycological Society). They can provide you with silica gel, collection kits, and a place to send your dried specimens.
Your simple kit:
Notebook & pen
Small trowel or knife
Paper bags or wax paper bags
Silica gel + small airtight container
Camera & GPS (your smartphone works)
By following this guide, your mushroom hunt turns into real scientific discovery – one sample at a time.

The Easy Guide to Cold Water Pasteurization for Straw (Using Lime, Calc, or Ash)
Skip the hassle of boiling water for your mushroom straw. Cold water pasteurization uses high pH to kill contaminants with zero energy. Simply mix 2 grams of hydrated lime (pickling lime or Calc) per liter of water and soak for 24 hours. It’s cheap, easy, and perfect for home growers.
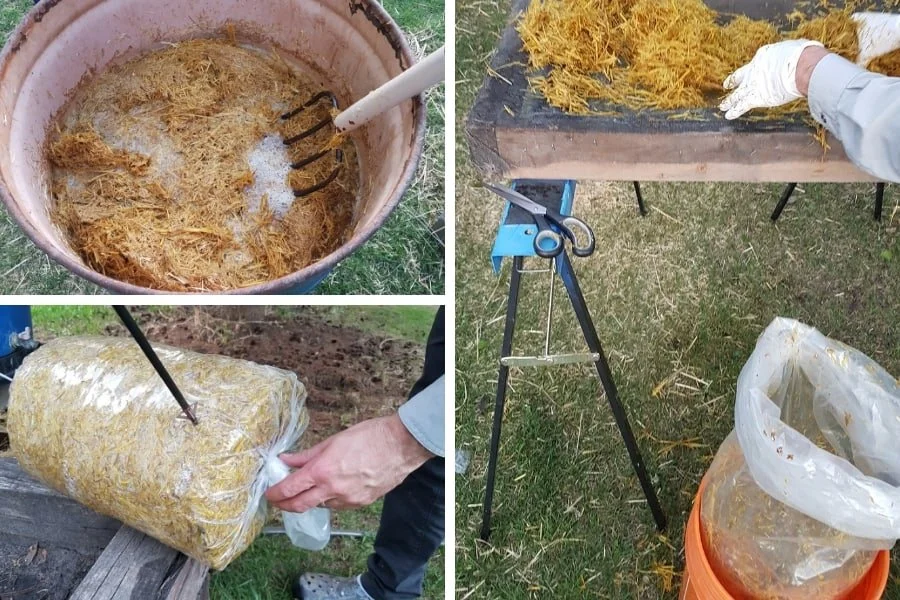
If you are growing mushrooms on straw, especially oysters, wine caps, or stropharia, you have probably heard about pasteurization. The goal is simple: give your mushroom spawn a head start by knocking back the mold and bacteria that naturally live on straw, without sterilizing it completely.
While hot water pasteurization is the gold standard for many, Cold Water Pasteurization (also known as Lime Pasteurization) is a fantastic, low-energy alternative. You don't need a giant pot, a burner, or a propane tank. All you need is a bucket, some cold water, and a source of alkalinity.
Let’s dive into how to do it, and what you can use to get that pH high enough to do the job.
Why Does It Work?
Cold water pasteurization relies on high pH (alkalinity) rather than heat to kill contaminants. By soaking straw in highly alkaline water (pH 11 or higher), you create an environment where most competing molds and bacteria cannot survive. However, mushroom mycelium, specifically fast-growing species like Oyster, can handle the high pH long enough to colonize the straw. Once colonized, the mushroom mycelium lowers the pH naturally and takes over.
What You'll Need: The "Alkalinity" Options
You have a few choices when it comes to the ingredient that raises the pH. Here are the three most common:
Hydrated Lime (Calcium Hydroxide): This is the most reliable and commonly recommended option. It is also known as pickling lime (sometimes sold in grocery stores for canning) or builders lime (available at hardware stores).
Crucial Warning: Do not use agricultural or garden lime (Calcium Carbonate). It will not dissolve well and will not raise the pH high enough to pasteurize. You need the hydrated stuff.
"Calc" (Calcium Hydroxide): If you are in Europe or reading forums, you will see the term "Calc." This is simply the German word for lime, and it refers to the same chemical: Calcium Hydroxide. If you buy "Calc" or "Weisskalk" at a European hardware store, you have the right stuff.
Wood Ash (The "Back to Basics" Option): If you can't find lime, or you want a truly rustic approach, you can use hardwood ash. Ash is alkaline (it contains potash and some residual calcium oxide). However, it is less predictable than lime.
How to use it: You need a lot more ash than lime. A common ratio is to fill a mesh bag with ash and let it soak in the water, or simply mix a high volume of ash directly into the water until it turns "slippery" to the touch (indicating high pH). Because ash is weaker, soaking times may need to be extended, and the success rate can vary depending on the type of wood burned. It works, but for consistency, lime is the winner.
The Recipe: Measurements That Work
The golden ratio for hydrated lime (pickling lime or Calc) is:
2 grams of lime per 1 liter of water.
Here is how that translates for different sized buckets:
Water Volume Lime Required (by weight) Approx. Volume (Cups/Spoons)
1 Liter ( ~1 Quart) 2 grams ~ ¾ teaspoon
10 Liters (~2.5 Gallons) 20 grams~ 2 Tablespoons
20 Liters (~5 Gallons) 40 grams~ ¼ Cup + 1 Tbsp~
200 Liters (55-Gallon Drum) 400 grams ~ 2.5 to 3 Cups
Pro Tip: A kitchen scale is your best friend here. Measuring lime by volume (teaspoons/cups) can be tricky because it compacts differently depending on the brand. If you can, weigh it!
Step-by-Step: The Process
Step 1: Safety First!
Hydrated lime (and ash water) is caustic. It has a high pH, meaning it can dry out and burn your skin. Wear gloves, safety glasses, and a dust mask when handling the powder.
Step 2: Prepare the Straw
Chop your straw into 1-3 inch pieces if it is long and stringy. This makes it much easier to mix with spawn later. Stuff the straw into a mesh bag, pillowcase, or a plastic laundry basket that fits inside your bucket.
Step 3: Mix the Lime Bath
Fill your container with cold water. Sprinkle your measured lime (or ash) into the water and stir vigorously until it dissolves. The water will look milky or cloudy.
Step 4: The Soak
Submerge the straw completely. You must keep it underwater. Put a heavy plate, a brick, or a clean rock on top to weigh it down.
Let it soak for 16 to 24 hours.
Step 5: Drain and Rinse? (The Great Debate)
After soaking, pull the straw out and let it drain.
Do I need to rinse? Some growers rinse the straw with fresh water to neutralize the pH before adding spawn, worried the high lime will hurt the mycelium. Others do not rinse, believing the high pH acts as a "protective shield" until the mycelium takes over.
The Consensus: If you are growing Oysters, you generally do not need to rinse. If you are growing a more sensitive species, a quick rinse with clean water won't hurt. The most important thing is that the straw is at field capacity—moist but not dripping when you squeeze a handful.
Step 6: Inoculate
Mix in your grain spawn immediately. Your straw is now clean, wet, and ready for the mushrooms to take over!
Final Tips for Success
Don't Reuse the Water: The lime water will be full of dead bacteria and mold spores by the end of the soak. Do not use it for a second batch, as it is no longer "clean."
Check the Smell: When you open the bucket after 24 hours, the straw should smell clean, perhaps a little earthy. If it smells sour or rotten, something went wrong (likely not enough lime or the straw wasn't fully submerged). Toss it and try again.
Hydrated Lime vs. Quicklime: Make sure you have Hydrated Lime (Calcium Hydroxide). Do not use Quicklime (Calcium Oxide), which is much more dangerous to handle and creates a violent exothermic reaction when mixed with water.
Cold water pasteurization is a game-changer for the home grower. It is cheap, requires no energy input, and is surprisingly effective. Whether you use pickling lime from the supermarket, Calc from the hardware store, or a bucket of foraged ash, you are on your way to a bountiful mushroom harvest.
Happy growing

How Find the Texas Star Mushroom
By following these steps, you can increase your chances of finding our elusive and fascinating official state mushroom. Happy hunting!

Also know as Devil’s Cigar, Kirinomitake, Chorioactis geaster
By following these steps, you can increase your chances of finding our rare and fascinating state mushroom. Happy hunting!
Step 1: Understand the Ecoregion
Geographic Range: The Texas Star Mushroom is primarily found in Central Texas, with sightings reported as far south as San Antonio and as far north as the Oklahoma border in Choctaw County. It has also been observed in Wharton County near Houston. It has also been found in Japan an Taiwan. It is rare because it has a very limited geographic distribution compared to many species of mushrooms that are found all over the world.
Ecoregion: Focus on areas within the Central Texas ecoregion, particularly those with a mix of woodlands and open spaces. The mushroom is often found in areas with dead or decaying cedar elm trees.
Step 2: Identify the Right Habitat
Tree Association: Look for dead cedar elm stumps in forests where they grow. Identify cedar elm (Ulmus crassifolia) by its small, rough, serrated leaves with a sandpapery feel, corky ridged bark, and compact form. In fall, its leaves turn orange and fall after the first frost. Decomposing stumps appear as black, hollow crowns with jagged edges due to fungal decay. Search for these stumps and examine their edges and roots for cigar or star-like formations.
Season: The mushroom typically fruits from late fall into early spring after rains. Plan your search during these months for the best chance of finding it.
Step 3: Visit Known Locations
State Parks: Check out Inks Lake State Park and McKinney Falls State Park, where the mushroom has been observed.
City of Austin Parks: Zilker Botanical Garden, Shoal Creek Greenbelt, Southeast Metro Park, and the Barton Creek Greenbelt are hotspots.
Other Locations: Brushy Creek in Cedar Park, Meadow Center and Purgatory Creek in San Marcos, Landa Park in New Braunfels, and McAllister and Olmos Park in San Antonio.
PRO TIP: Check out where and when it has been historically observed on iNaturalist.
Step 4: Look for Specific Features
Initial Appearance: When the mushroom initially fruits it resembles a dark brown cigar with a long stem connected to the cedar elm roots or stump.
Dehiscence: When the mushroom detects a change in humidity it splits open radially into a star-like arrangement of three to eight leathery rays. When the mushroom detects the wind it releases of a smoky cloud of spores accompanied by a hissing sound.
Step 5: Listen and Observe
Hissing Sound: The hissing sound is a unique feature of the Texas Star Mushroom. Only a few mushrooms are known to create an audible sound when spores are released. It sounds like a fizzing noise, like the bursting of bubbles in a glass of soda. Be very quiet!
Spore Release: Look for the release of spores, which can be seen as a smoky cloud. This happens after the mushroom splits open and there are multiple spore releases over a few days until the mushroom get eaten by insects and wildlife.
Step 6: Document Your Findings
Photographs: Take clear photographs of the mushroom, noting its stage of development (closed cigar shape or open star shape).
Location Data: Record the exact location where you found the mushroom. Use GPS coordinates if possible.
Share Observations: Consider sharing your findings on platforms like iNaturalist or Mushroom Observer to contribute to community science efforts and help others find them.
Step 7: Respect the Environment
Leave No Trace: Avoid disturbing the habitat. Do not remove the mushrooms or damage the surrounding area.
Follow Regulations: Ensure you have any necessary permits if you are collecting samples for scientific purposes.
Step 8: Join a Community
Central Texas Mycological Society (CTMS): Join local mycological societies or groups like CTMS to connect with other enthusiasts and participate in organized forays.
Online Resources: Utilize online resources to learn more about the Texas Star Mushroom and share your experiences.
Tag us with your photos on social media and add your observations to iNaturalist.org
Videos of the Texas Star Mushroom on Texas Country Reporter
2025: Cheers to Another Year of Mushroom Magic!
Just as resilient mycelium thrives in Texas’s chaotic weather, our community’s underground growth has culminated in this celebratory year-end review.
As Texas weather served up another year of dramatic swings—from drought deluge to sudden freezes—the fungal kingdom thrived in the chaos. Just like resilient mycelium, our community adapted, connected, and flourished underground. This year-end review is our fruiting body: the visible, celebratory result of that persistent, hidden growth.

Record Membership
Membership has grown to over 1,380 supporters from 168 cities in 21 different states. You can support us by with a individual or family membership, by volunteering, or making a one-time donation. Volunteers become automatic members and also get 30% discount on merch and event tickets.
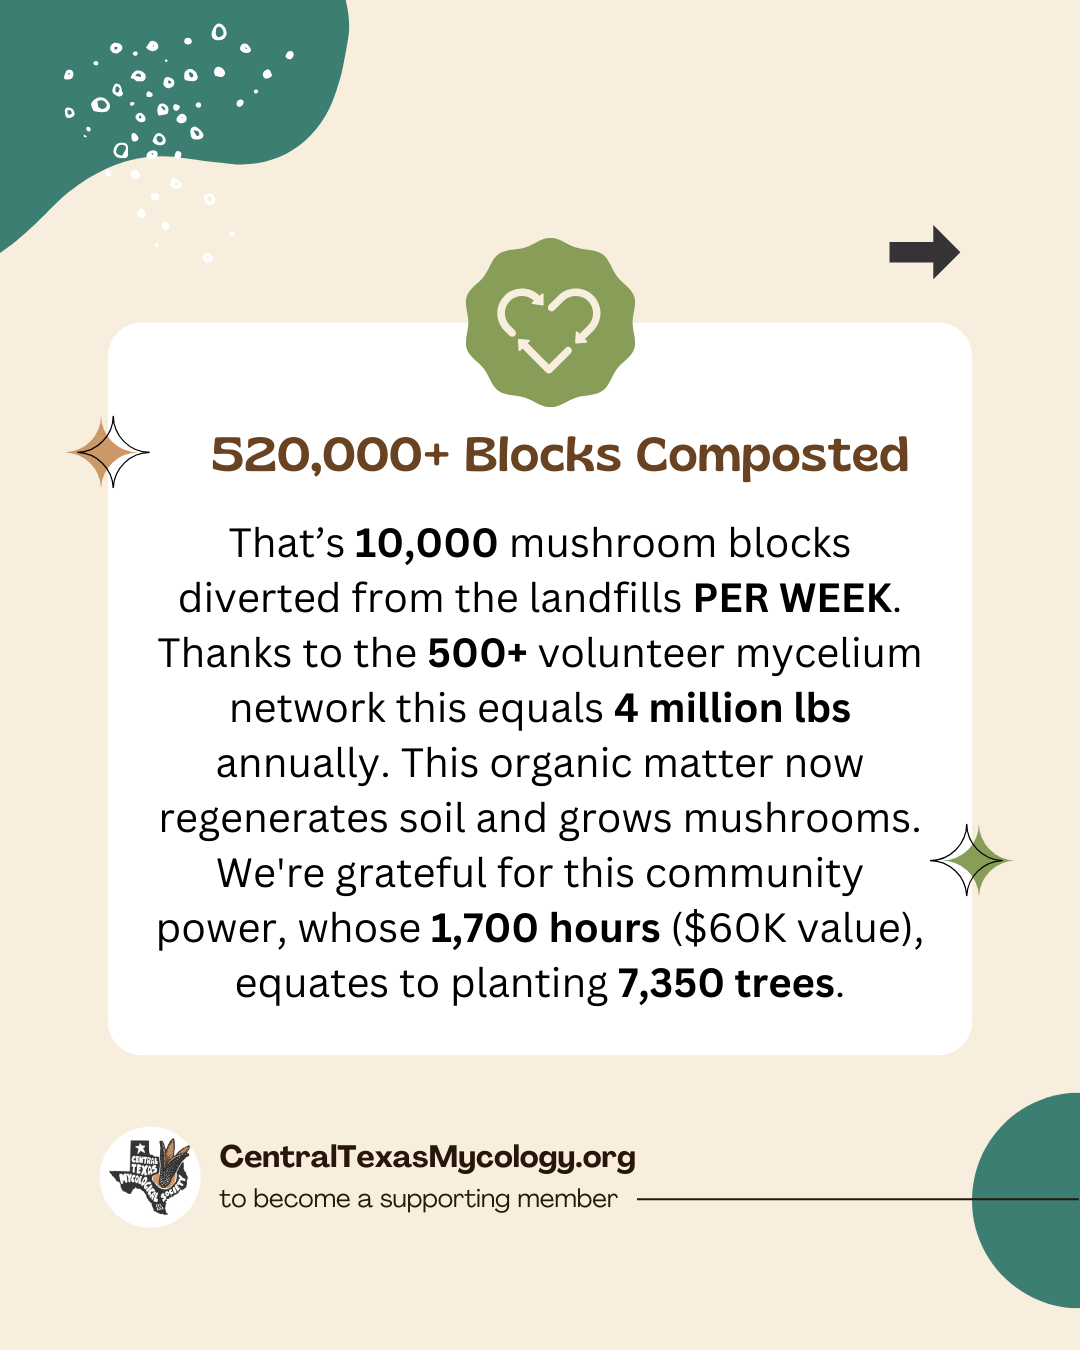
520,000+ Blocks Composted
That’s 10,000 mushroom blocks diverted from the landfills PER WEEK. Thanks to the 500+ volunteer mycelium network this equals 4 million lbs annually. This organic matter now regenerates soil and grows mushrooms. We're grateful for this community power, whose 1,700 hours ($60K value), equates to planting 7,350 trees.
Record No. of Education Events
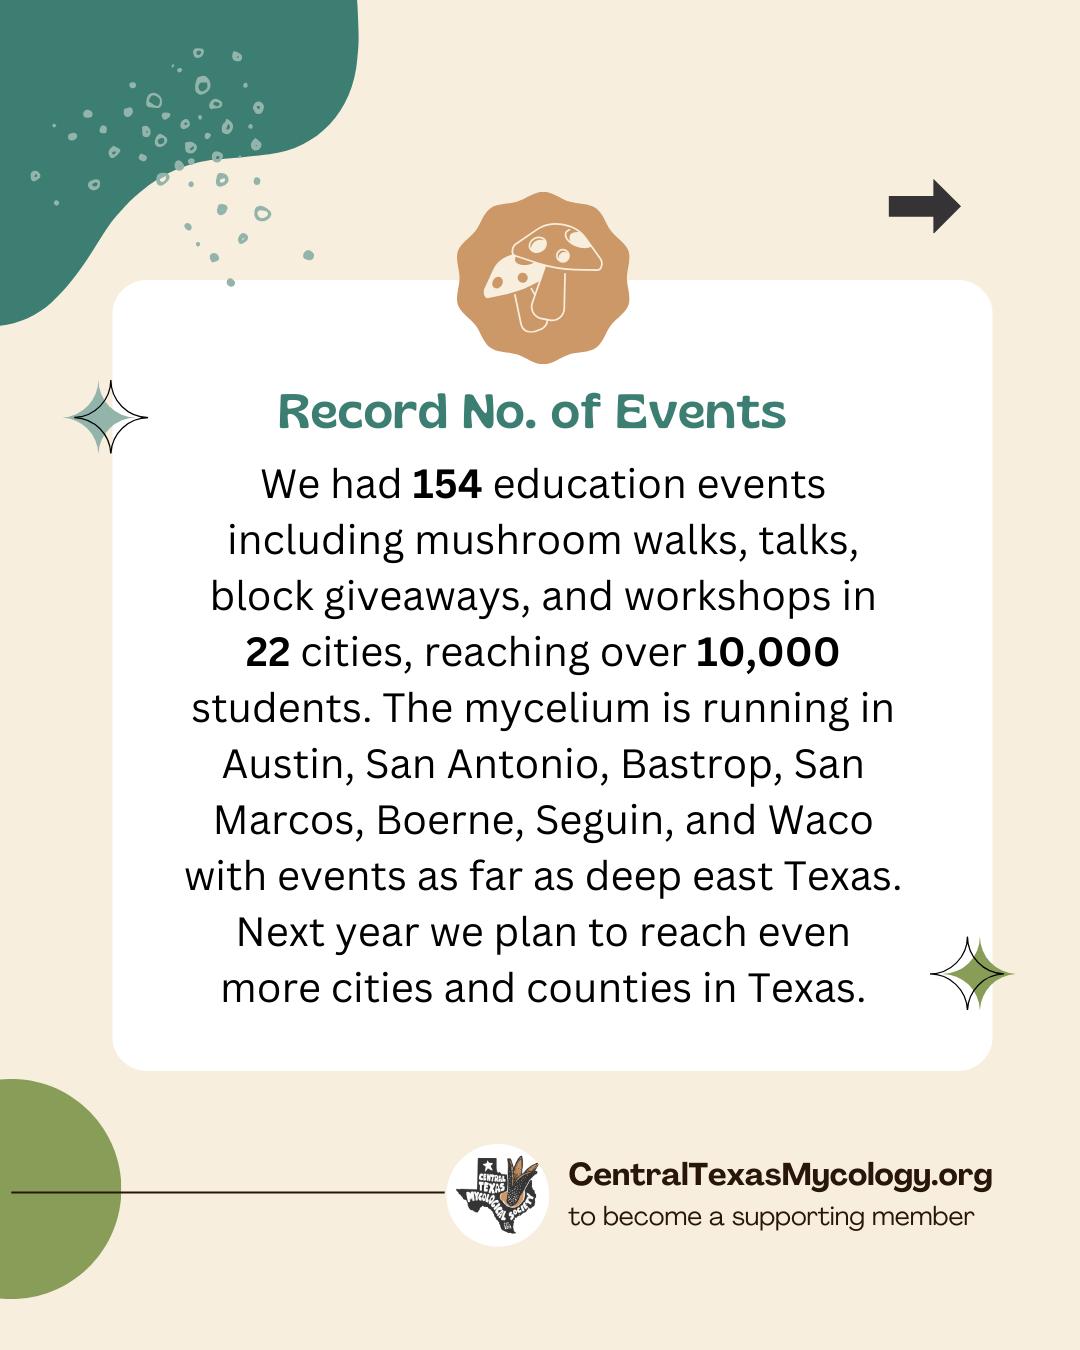
We had 154 education events including mushroom walks, talks, block giveaways, and workshops in 22 cities, reaching over 10,000 students. The mycelium is running in Austin, San Antonio, Bastrop, San Marcos, Boerne, Seguin, and Waco with events as far as deep east Texas. Next year we plan to reach even more cities and counties in Texas.
SporeCorps Launched
This year we launched a community lab in Austin in a vintage 1968 Shasta Airflyte. We kicked off with a flow-hood workshop and a three-part, online, cultivation series. Anyone can learn the skills to to create their own lab space and grow mushrooms at their own pace with our on-demand course.
Health Soils, Healthy Trees
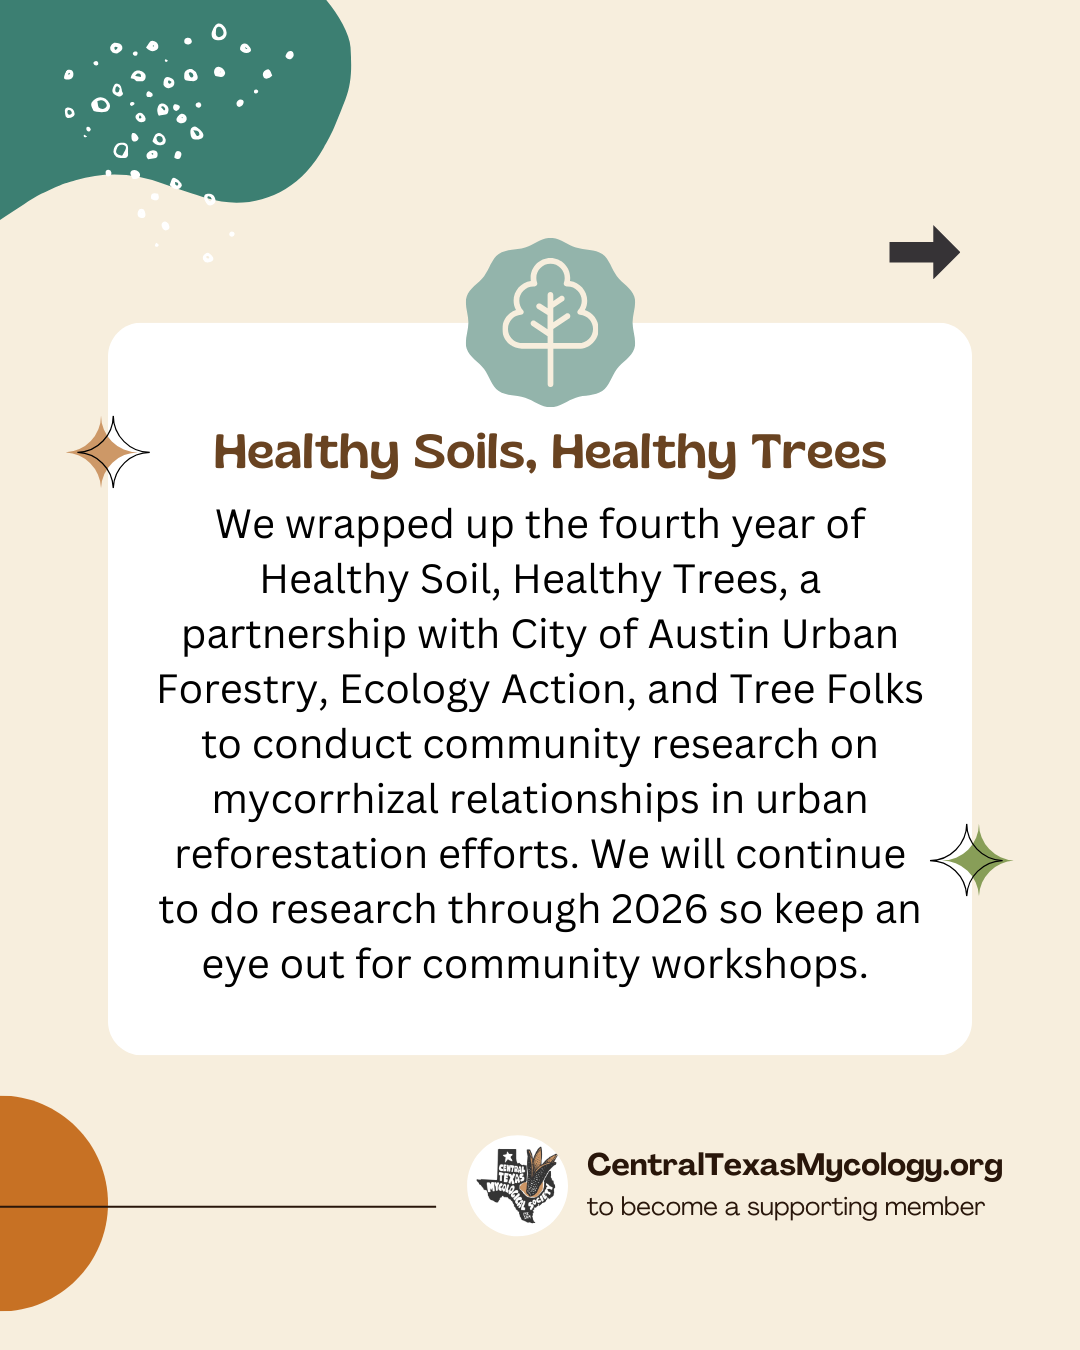
We wrapped up the fourth year of Healthy Soil, Healthy Trees, a partnership with City of Austin Urban Forestry, Ecology Action, and TreeFolks to conduct community research on mycorrhizal relationships in urban reforestation efforts. We will continue to do research through 2026 so keep an eye out for community workshops.
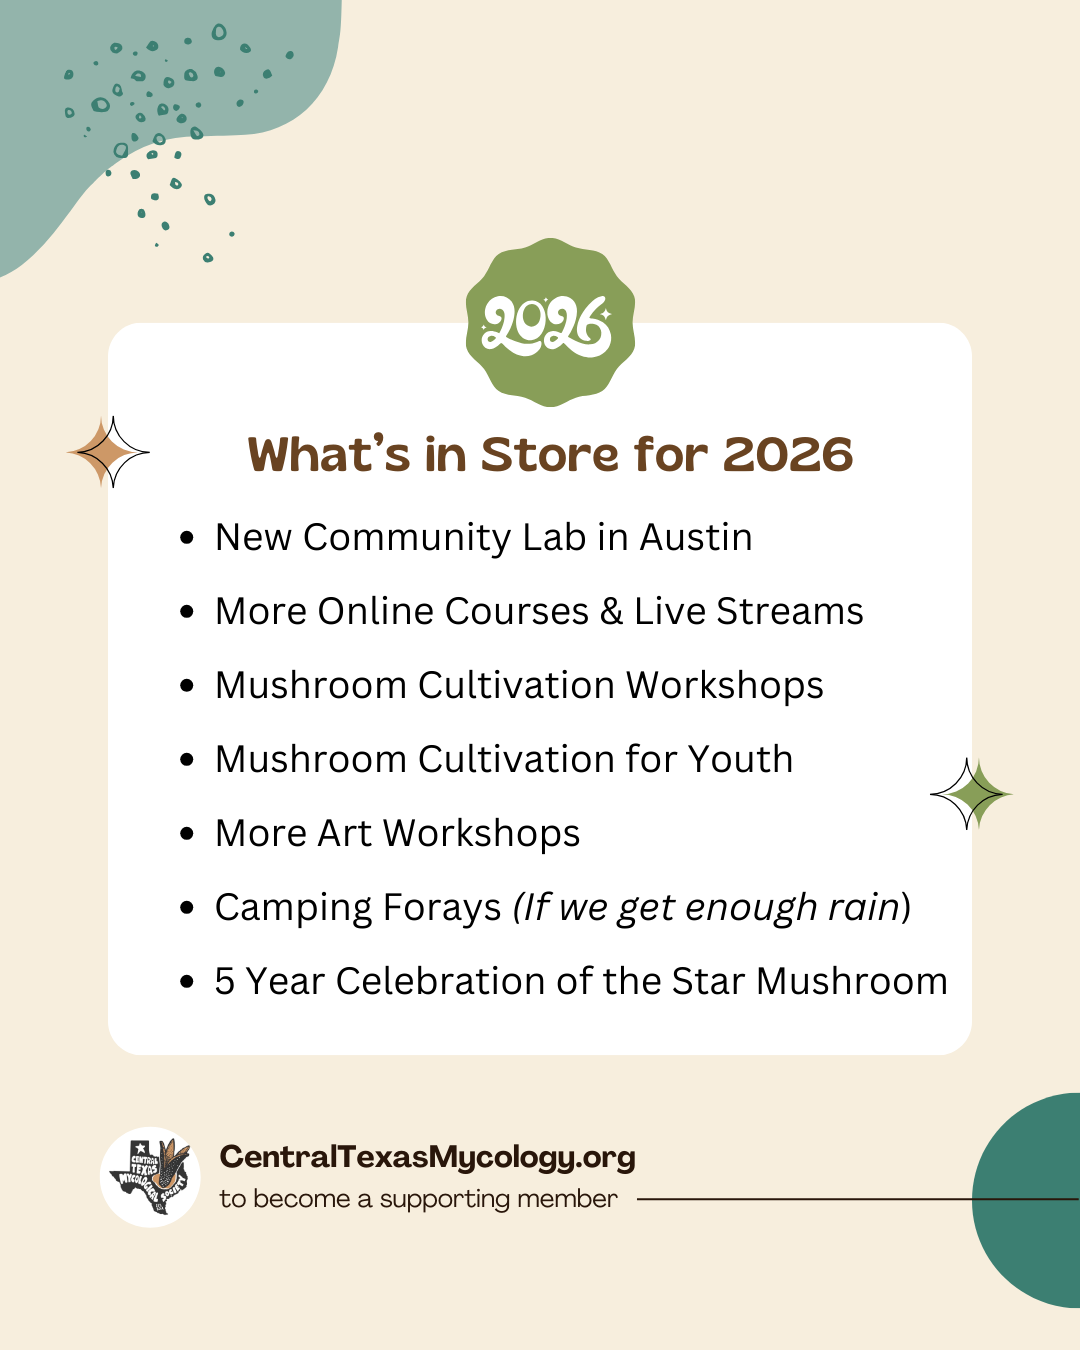
What’s in Store for 2026:
New Community Lab in Austin
More Online Courses & Live Streams
Mushroom Cultivation Workshops
Mushroom Cultivation for Youth
More Art Workshops
Camping Forays (If we get enough rain)
5 Year Celebration of the Star Mushroom
Let’s hope for more rain and then mushrooms! Join us in becoming a supporting member as we continue to be mesmerized by fungi!



Enter to Win a Texas Mushroom Tee
Your feedback is essential to us. Take a few moments to share your thoughts on this year’s educational events and be entered to win. Your response will help us improve future events and create a better experience for all!
How You Can Support
🧧Become a supporting member or give a membership gift card.
👕Purchase merch including our new Texas mushrooms tee with a design from Mystic Multiples.
✋Volunteer and help us keep organic matter out of the waste.
🍄 Give a ♻️🍄🧱 underneath your trees to protect them this coming winter.
💸 Make a donation to support mycology education and the recycling program.