How to Grow Your Own Halloween Myco-Skull
Grow your own Myco skull for spooky season!
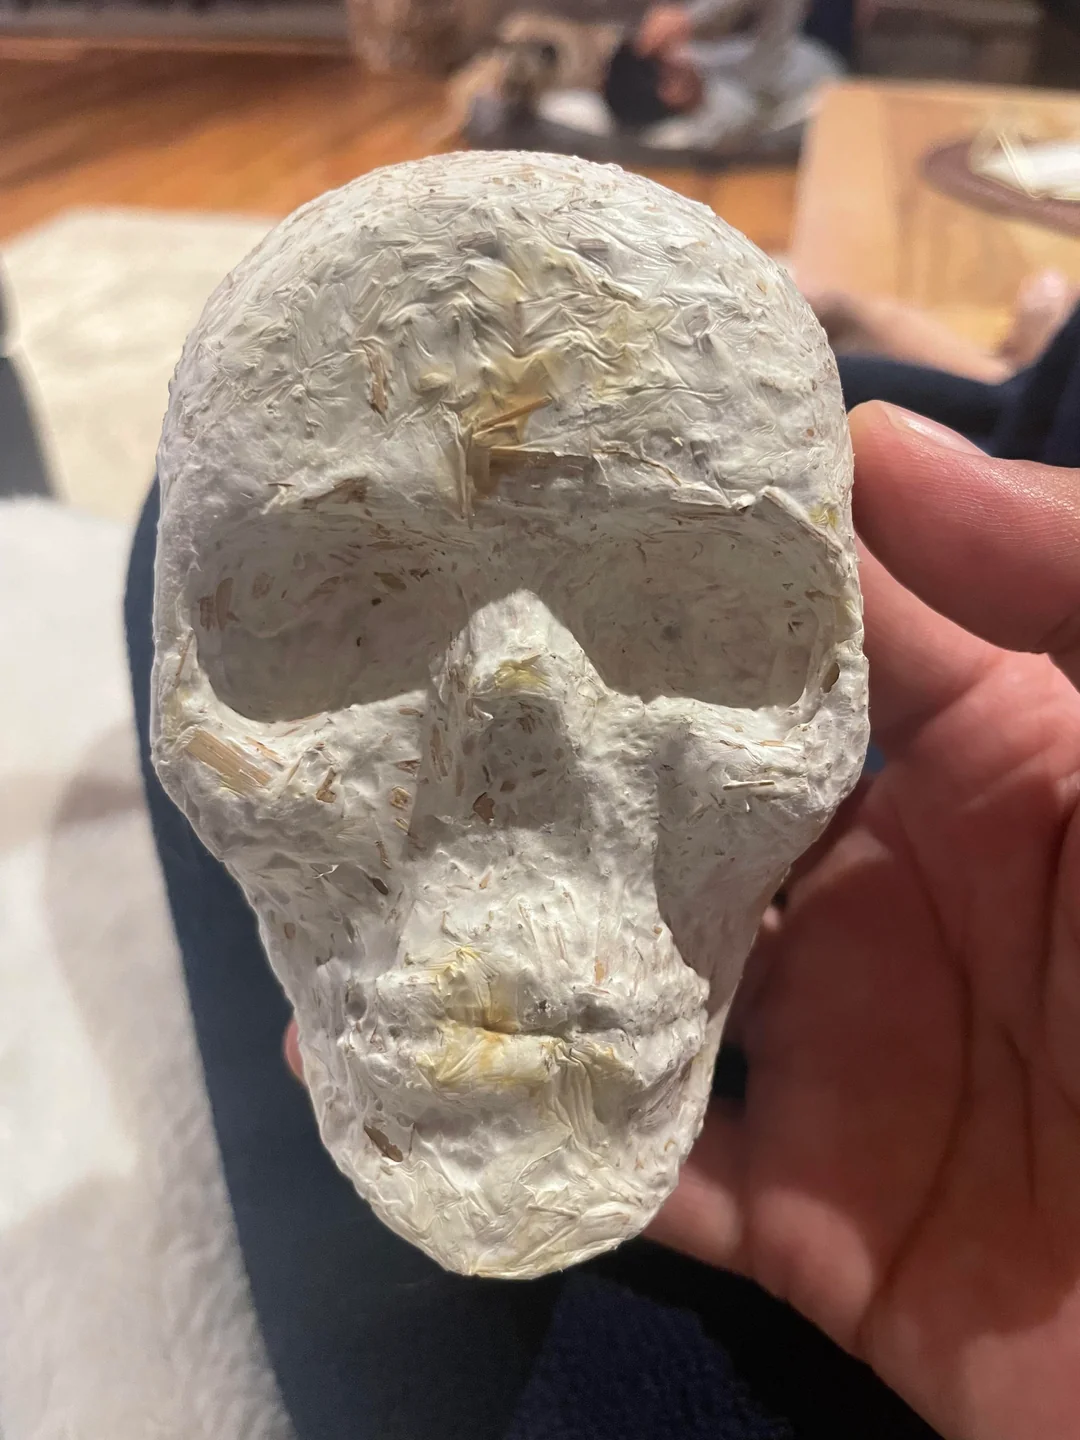

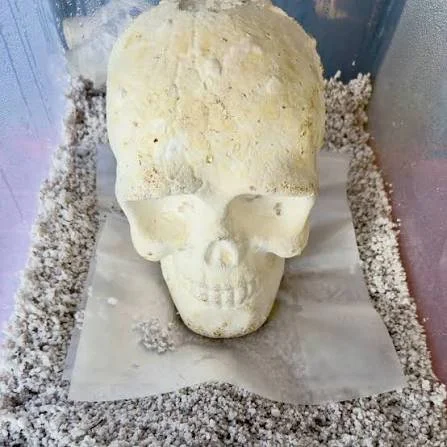
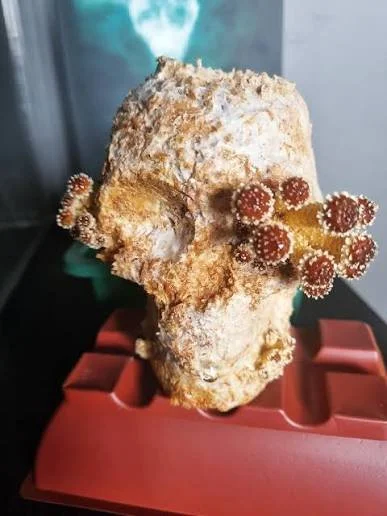


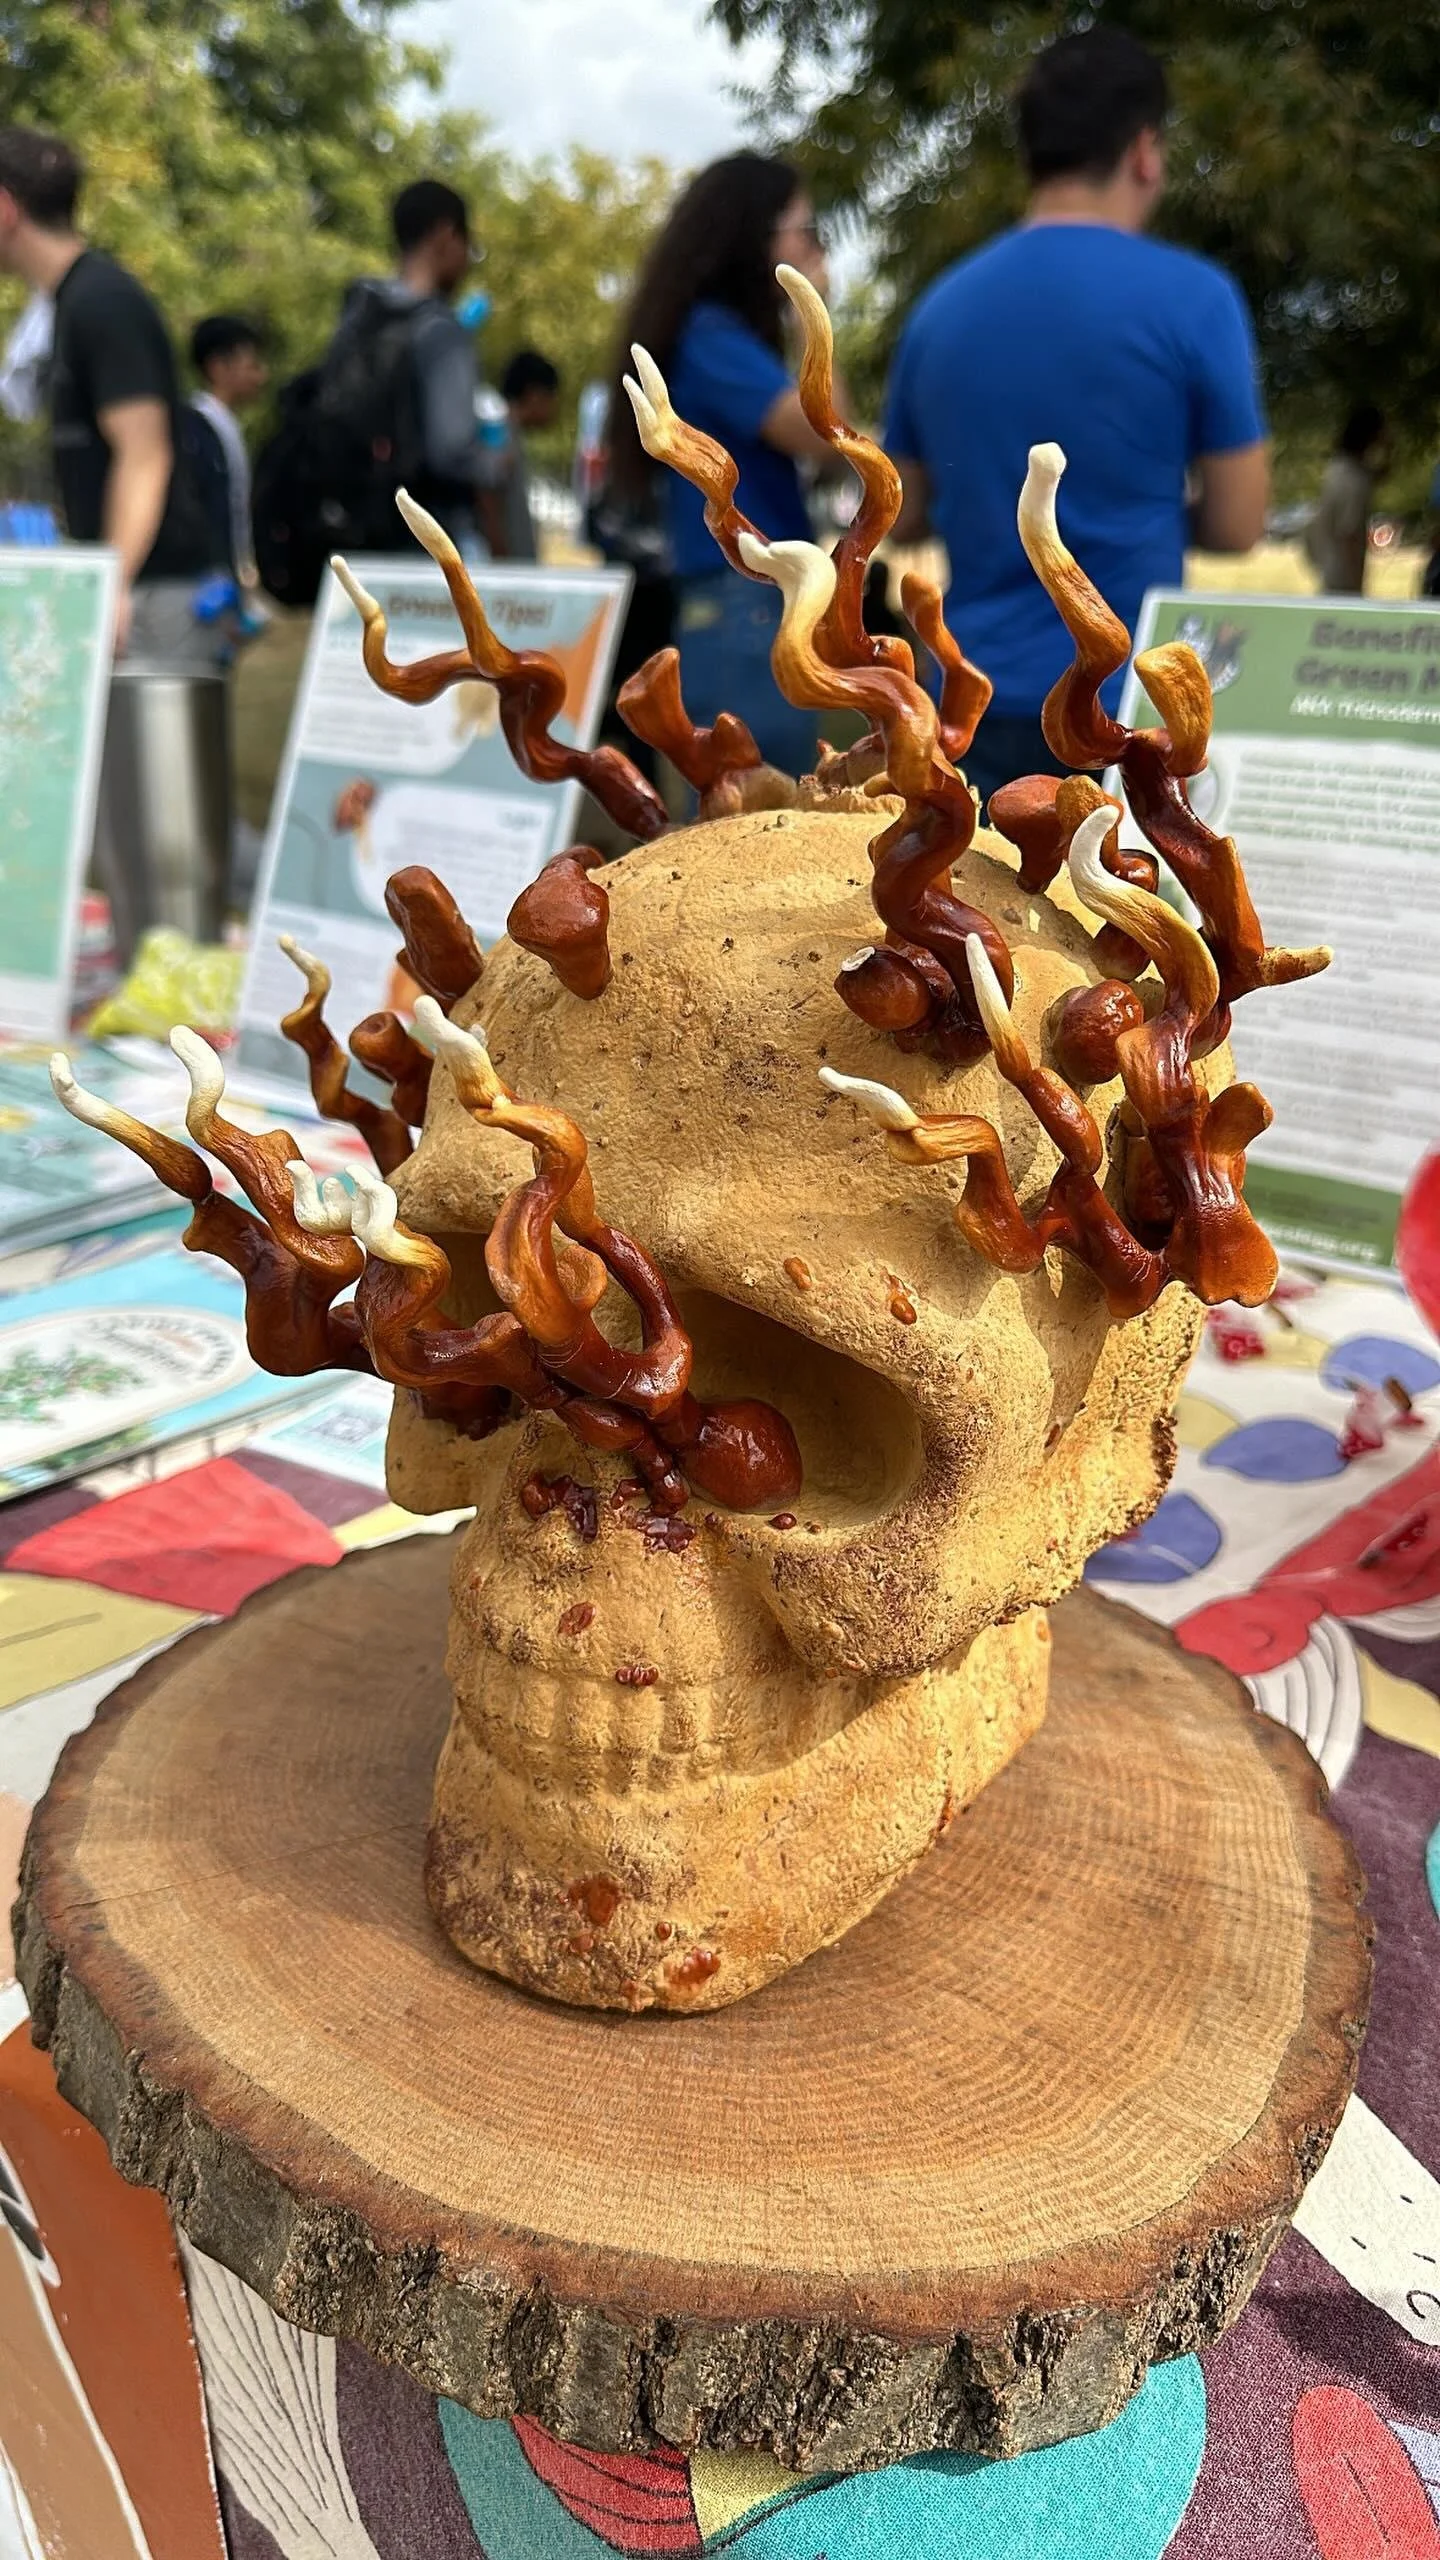
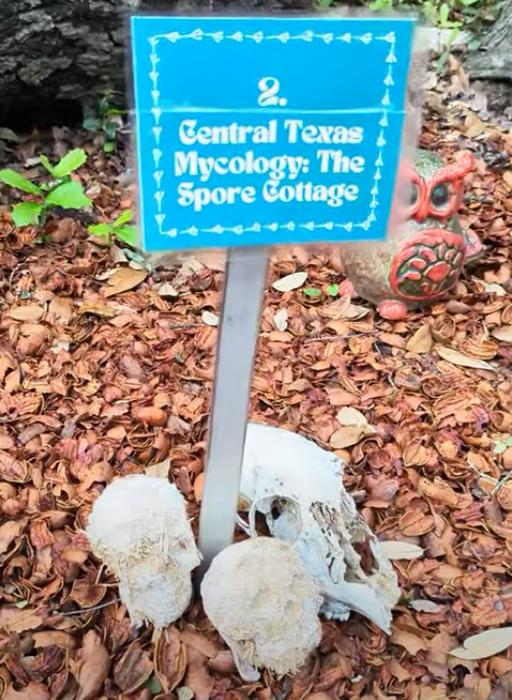
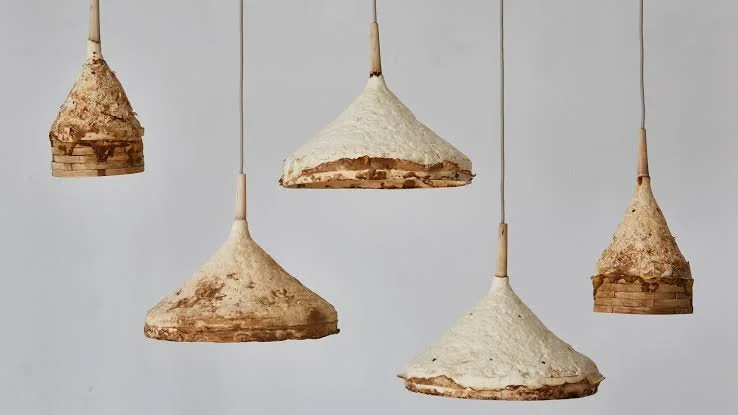

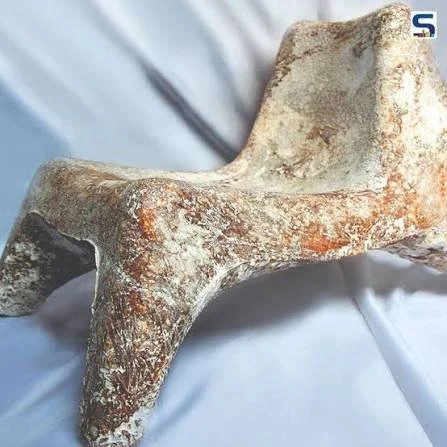
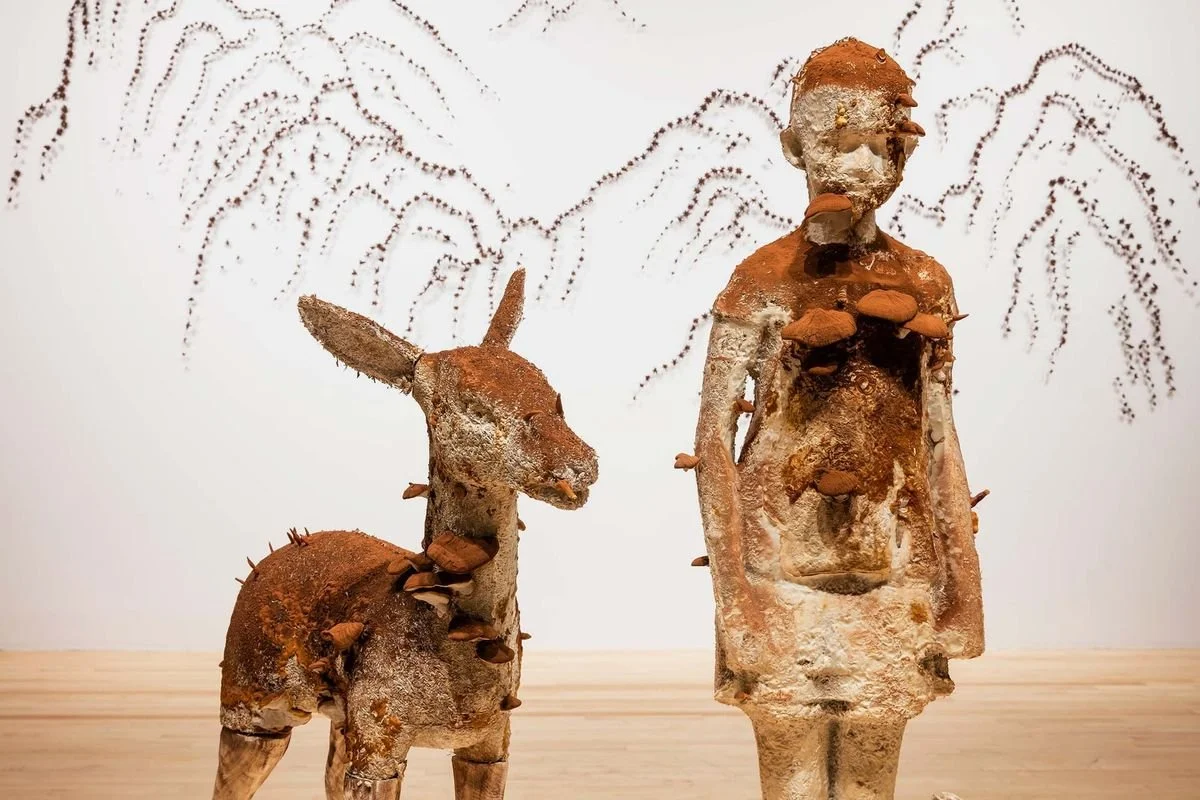
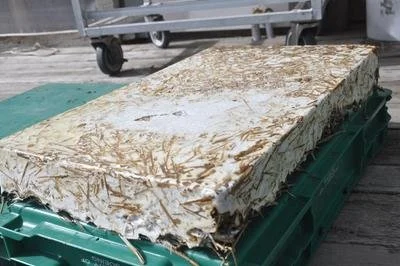
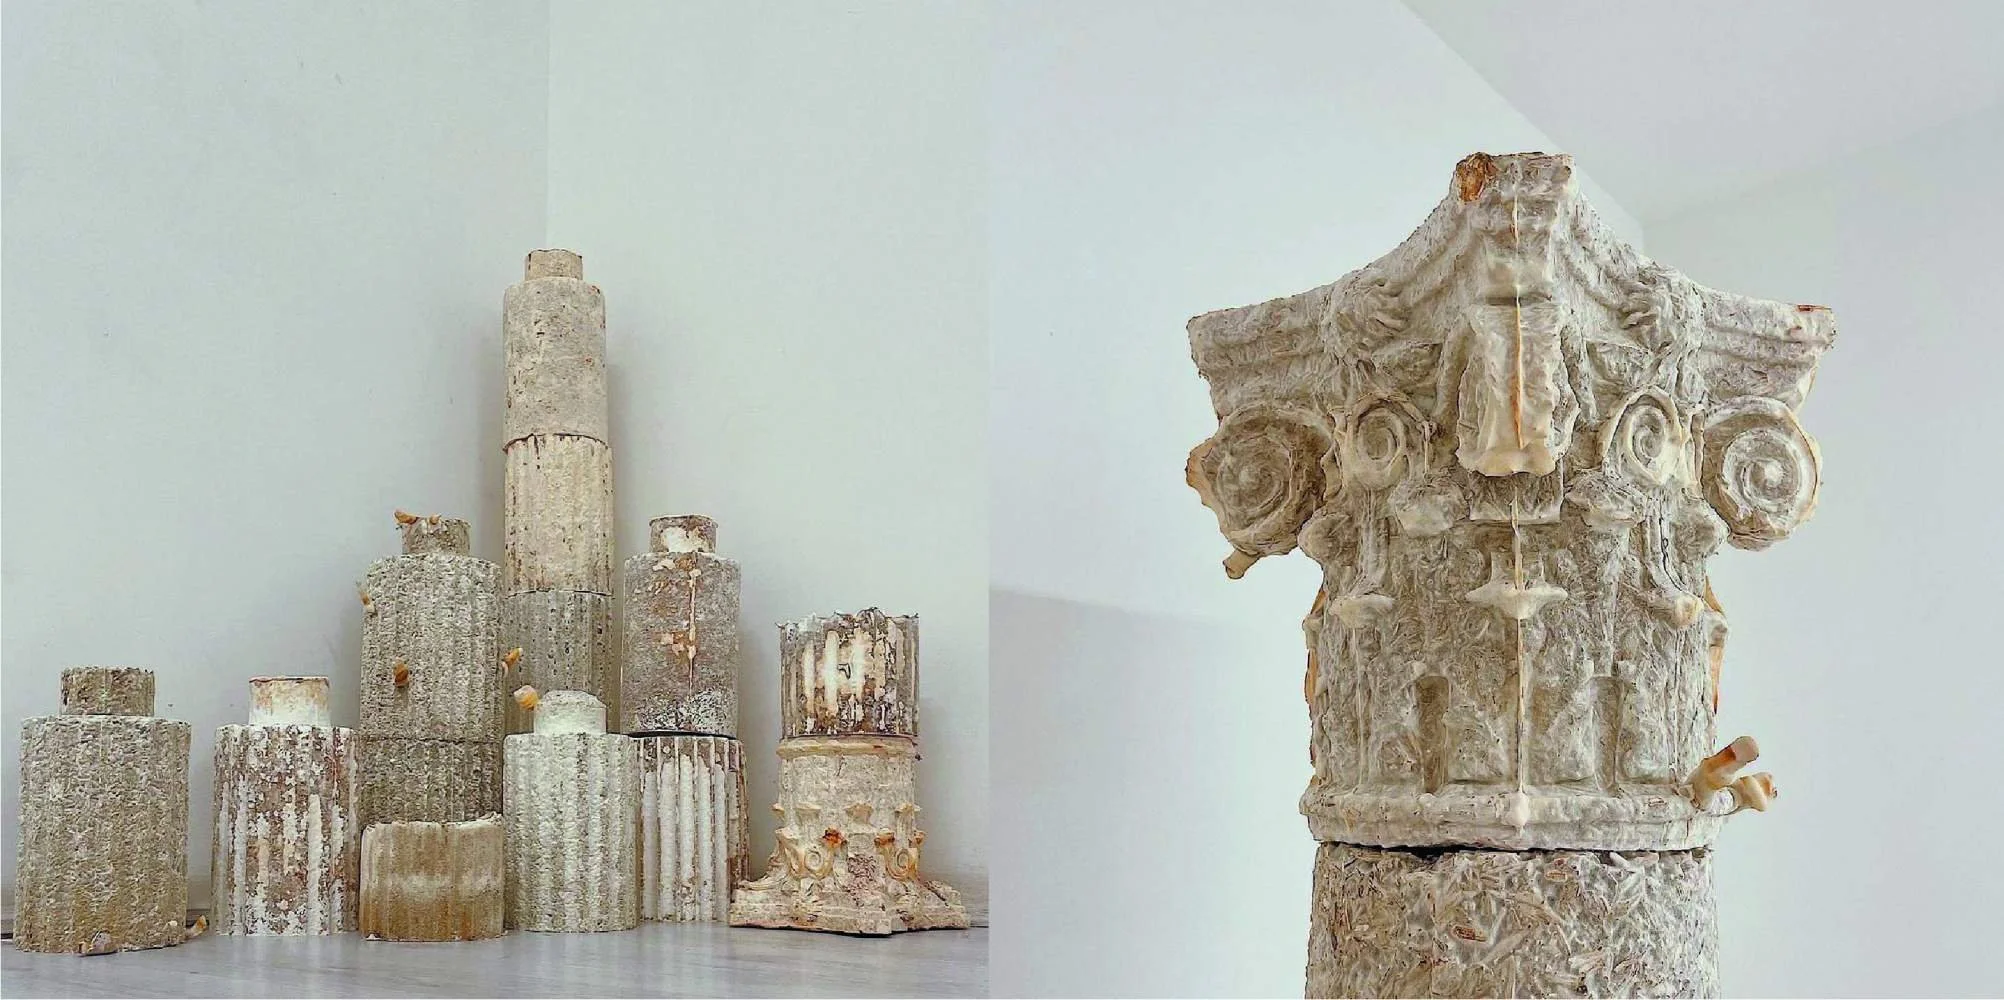
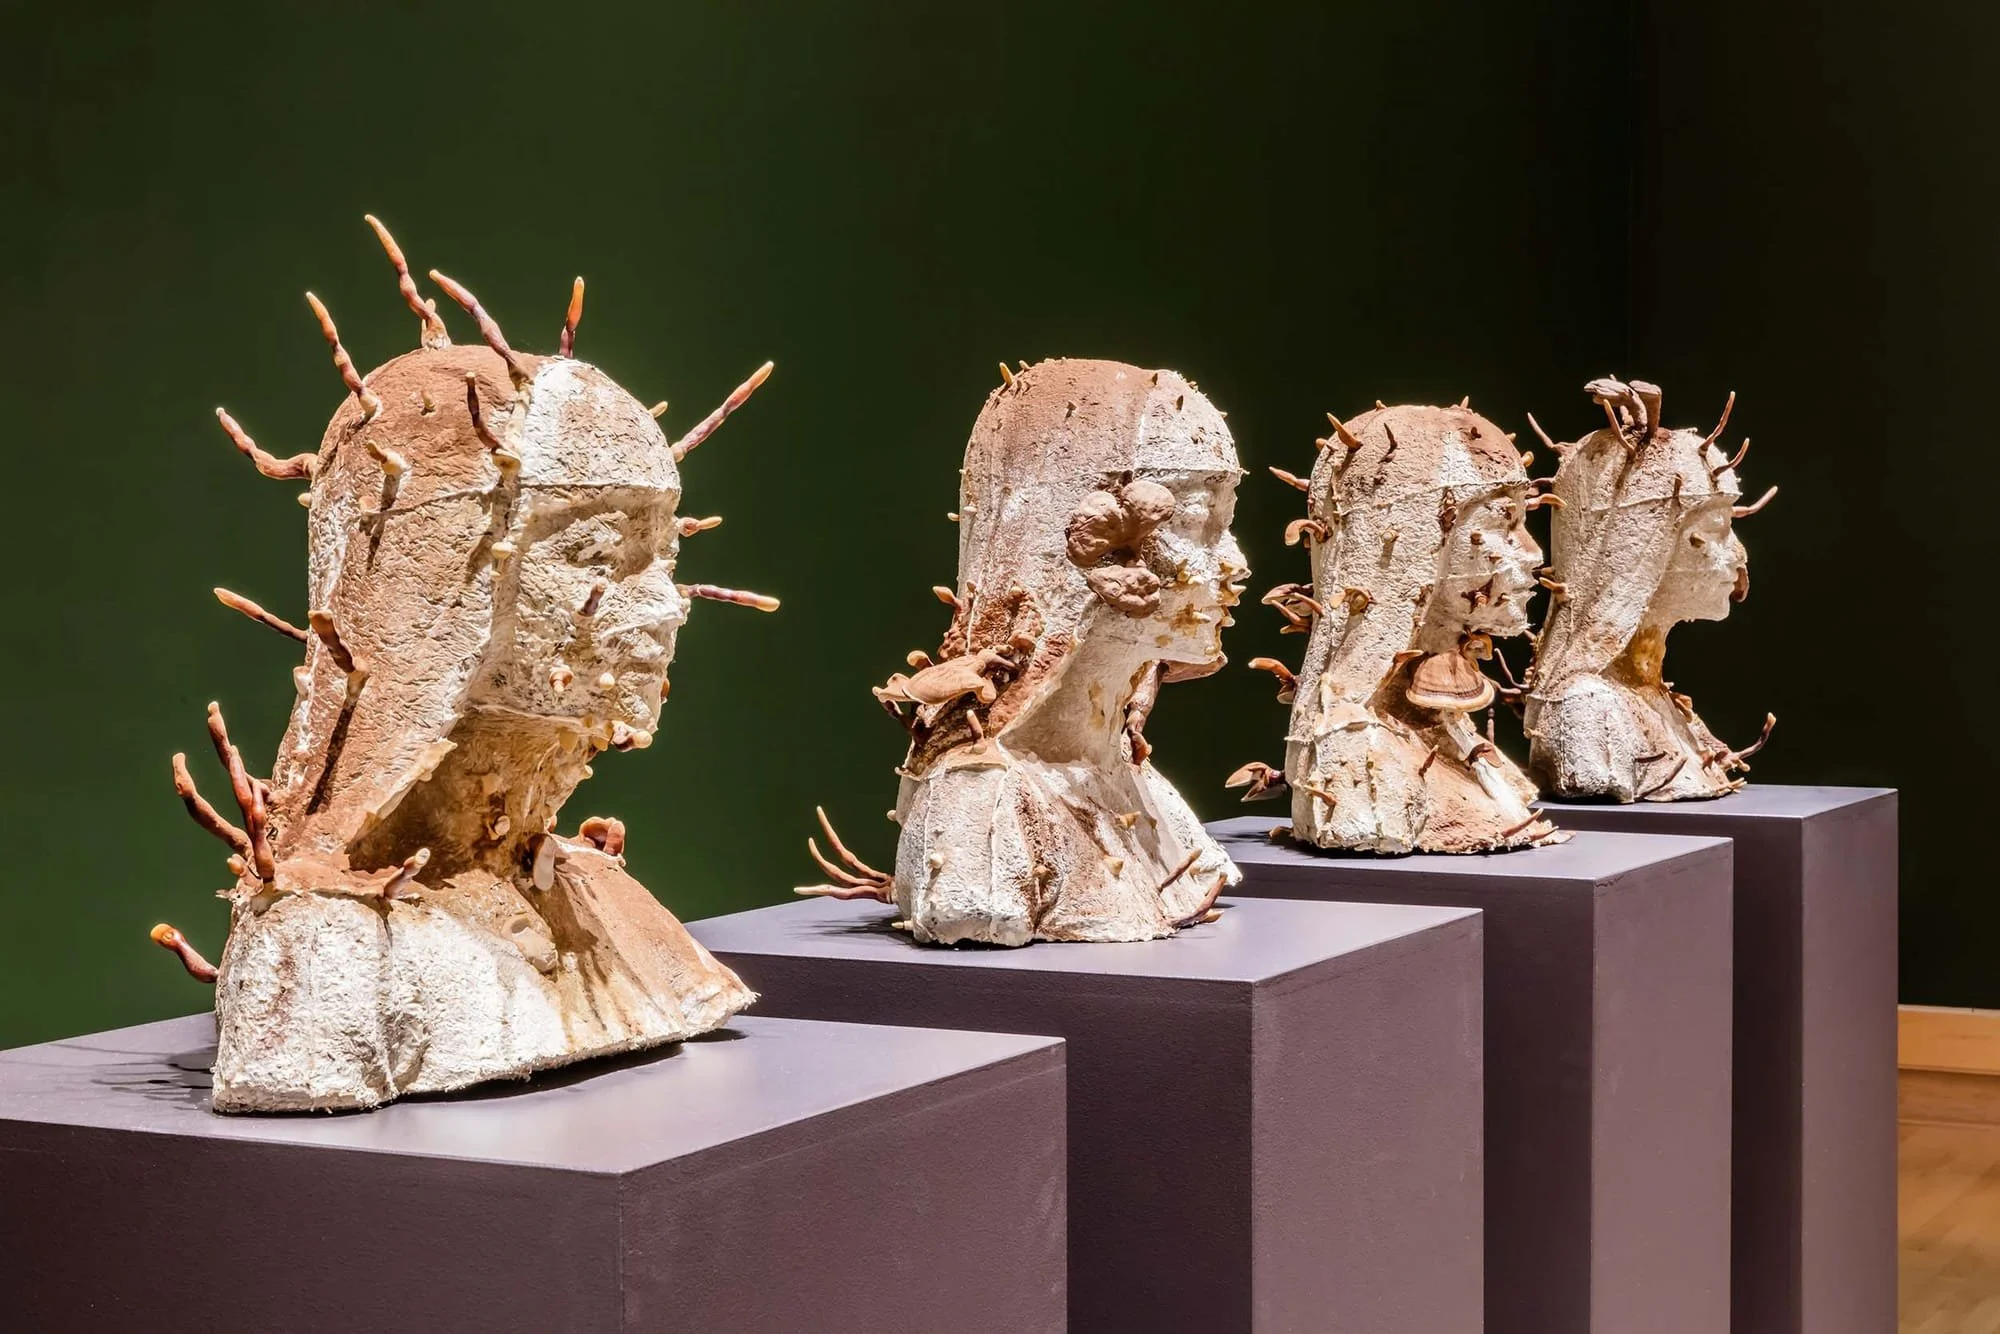
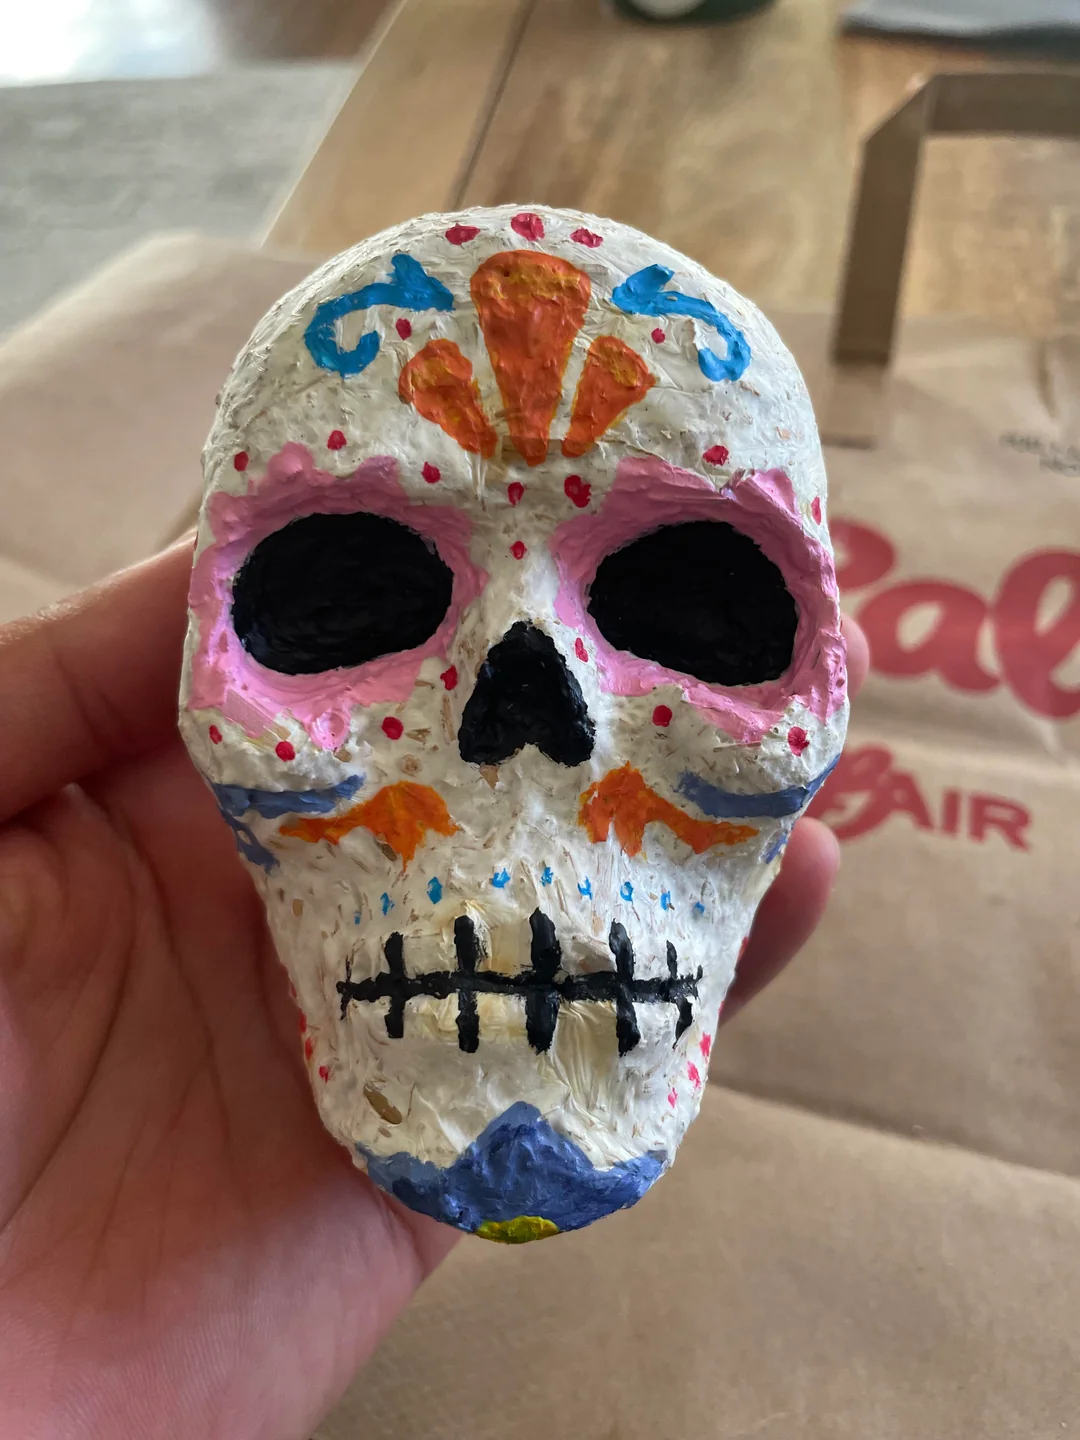
At our Mushroom Monday: Myco-Skull Workshop at Stargazer Cocktails and Coffee, we watched a room full of curious creatives, Halloween lovers, and fungi fanatics pack living mycelium into skull molds while sipping mushroom cocktails. The best part? Everyone left with all the materials to keeps growing a skull at home.
But we know not everyone could make it to the workshop. So here's the good news: you can absolutely do this at home. All it takes is a 5 lb bag of substrate, some grain spawn, a skull mold, and a little patience. This guide walks you through every step, from sourcing supplies to drying your finished skull just in time for spooky season.
What You'll Need
The Substrate (for one 5 lb batch)
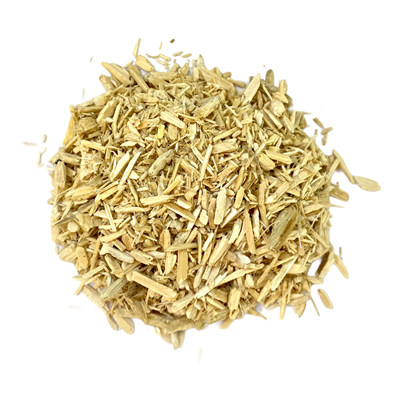
Hardwood pellets — 3.5 lb — Hardware store, farm supply, or online
Hemp hurd — 1.5 lb — Callahan's General Store or online (sold as animal bedding in 12 lb bags for $27)
Flour — ~68 g (½ cup) — Your kitchen
Water — ~18–22 cups — Your tap
PRO TIP: If you are building a larger form (ie: canoe or coffin) use more hemp herds to make the form lighter. More hardwood pellets are better for smaller forms with tighter edges and detail.
The Spawn
Ganoderma grain spawn — 0.75–1 lb
Why Reishi? Ganoderma species are ideal for mycelium materials. They bind substrate firmly, resist contamination better than many other species, and create a dense, woody finished object. In Texas, Ganoderma sessile is native and heat-adapted — a great choice if you can find it. If you want your art to have antlers (see photos above) use Ganoderma multipileum. We used Gandoderma lucidum grain spawn from North Spore. You can find a diverse amount of genetics online.
The Mold and Tools
Skull mold — plastic or silicone, reusable (Feel free to use this recipe for any mold).
Filtered grow bag — 5 lb capacity or larger (Hack: Use large freezer bag and polyfill as a filter)
Large Mixing bowl — large enough for 5 lb of substrate
Plastic wrap or lid
Baking sheet — for drying
70% isopropyl alcohol — for cleaning
Nitrile Gloves — for keeping things sterile
Step 1: Mix Your Substrate
Combine Dry Materials
In a large container, mix:
3.5 lb hardwood pellets
1.5 lb hemp hurd
Break up any clumps. If your pellets need hydration to expand, follow the manufacturer's instructions first.
Add Flour and Water
Mix ~68 g (½ cup) flour into ~18 cups water to make a slurry.
Pour the slurry over the dry mix.
Moisture target: 65–70% by wet weight.
Squeeze test: Grab a handful and squeeze firmly.
Few drops only → too dry (around 50–55%)
Steady stream and substrate holds together → ideal (65–70%)
Water pours out → too wet (75%+)
Start with 2–3 cups less water than the target. Mix, let rest 10–15 minutes, then add more as needed. Hardwood and hemp absorb water at different rates.
Seal and Shake
Seal your container or grow bag. Shake or mix for 1 minute to hydrate thoroughly.
Sterilize
Sterilize your hydrated substrate using your preferred method. If you don't have a pressure cooker, pasteurization (holding substrate at 160–180°F for 1–2 hours) is sufficient for Reishi on hardwood and hemp.
Cool and Store
Allow substrate to cool completely. Seal tightly. Store at room temperature, away from direct sunlight. Use a
Do not add grain spawn yet. Let the substrate rest for 1–2 days to stabilize.
Step 2: Add Grain Spawn
Clean Your Workspace
Spray your work surface, hands, and tools with 70% isopropyl alcohol. Wear gloves.
Add Spawn
Open your substrate bag above the filter patch.
Add 0.75–1 lb grain spawn — roughly 15–20% of substrate weight.
Mix Thoroughly
Seal the bag and shake vigorously for 1 minute. Every grain should be distributed evenly.
Seal and Label
Reseal tightly above the filter patch. Label with the date and species.
Incubate
Place the bag in a clean, dark area at 70–80°F.
Let it grow for 4–5 days until you see visible white mycelium spreading through the substrate. The substrate should still be loose and crumbly, not hardened.
Step 3: Pack Your Skull Mold
Break Up the Material
Open your colonized bag and dump the substrate into a large bowl.
Break up all chunks with clean hands. This is called "regrinding."
Add Fresh Flour
Mix in ~68 g (½ cup) flour. This provides fresh nutrition and reactivates the mycelium for vigorous growth in the mold.
Mix well for 1 minute. Drizzle a little extra water if the mix feels dry.
Pack the Mold
Add substrate to your skull mold. Pack down firmly as you add layers.
Fill corners and edges completely. Air pockets create weak spots.
Place a sturdy flat sheet on top and tap all over to smooth the fill surface.
Grow for 5–6 Days
Cover the mold with plastic wrap or a lid. Poke a few small holes for respiration.
Grow until fully white again in a clean area at 70–80°F, out of direct sun.
Step 4: Pop, Pod, and Dry
Pop
Flip the mold upside down. Tap until the grown skull "pops" out.
Pod (Optional)
Seal the skull in a roomy plastic bag with a cup of water. Grow for 1 day to create a white, fuzzy overgrowth on the mycelium.
Dry
Place the skull on a baking sheet.
Dehydrate at 180°F for 4–8 hours, checking every 30 minutes until dry.
The skull is ready when it feels light and hard — roughly 30% of its original weight.
Tips for Success
Start with less water. You can always add more, but it's hard to remove excess moisture. The squeeze test is your final guide.
Keep it clean. Work with clean hands and tools. Reishi is contamination-resistant, but cleanliness always helps.
Warmth matters. Colonization slows dramatically below 70°F. Find a warm spot — on top of the fridge, near a heater, or in a closet.
Patience pays off. Don't rush the colonization phases. Let the mycelium fully white before moving to the next step.
Flour is your friend. Adding fresh flour at the mold-packing stage reactivates the mycelium and ensures vigorous growth.
Join Us at the Next Workshop
Want to learn hands-on? Join us for Mushroom Mondays at Stargazer Cocktails and Coffee. We'll walk you through the process, provide all materials, and send you home with a living skull kit and a mushroom cocktail in hand.
Follow us for upcoming events, foraging walks, and more ways to connect with fungi.
Happy growing — and happy spooky season.
This guide is adapted from the Ecovative GIY protocol.
How to Create a Spore Story
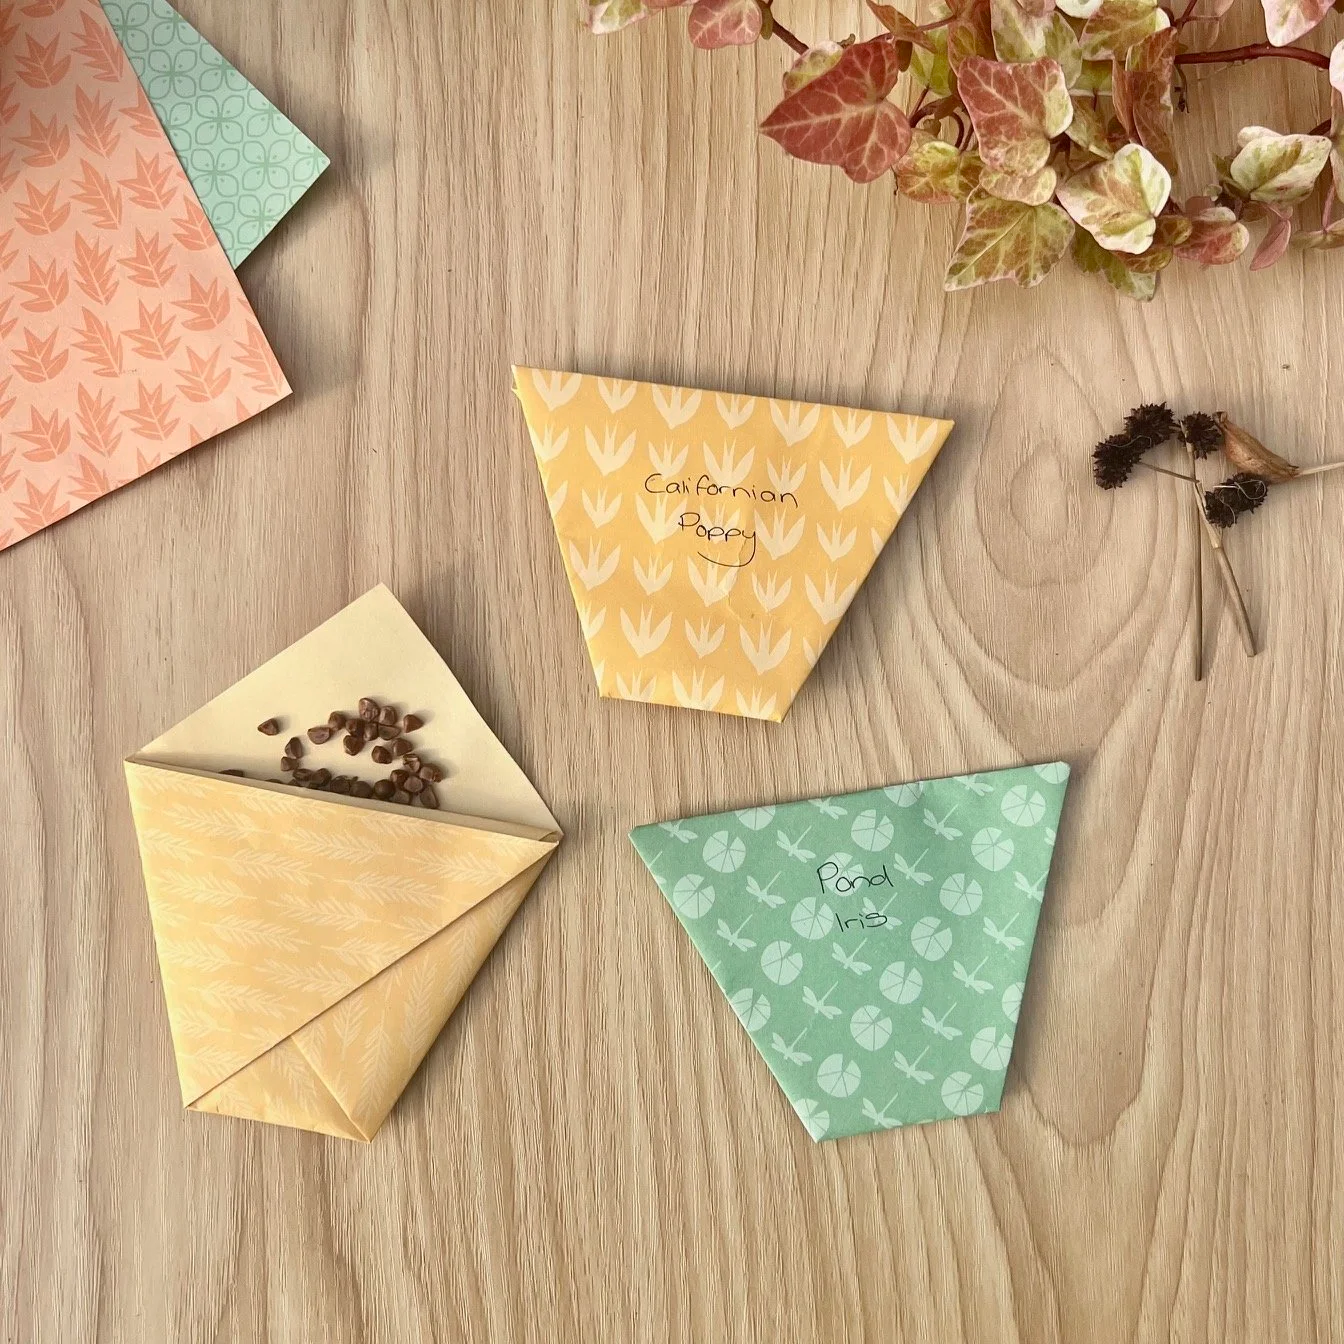
Create a tiny ecosystem in your hands! Write a private “Spore Story,” fold it into an origami pouch, and fill it with the ingredients for the cycle of life. By combining wildflower seeds with mushroom mycelium, you are building a “story” of growth, patience, and decomposition.
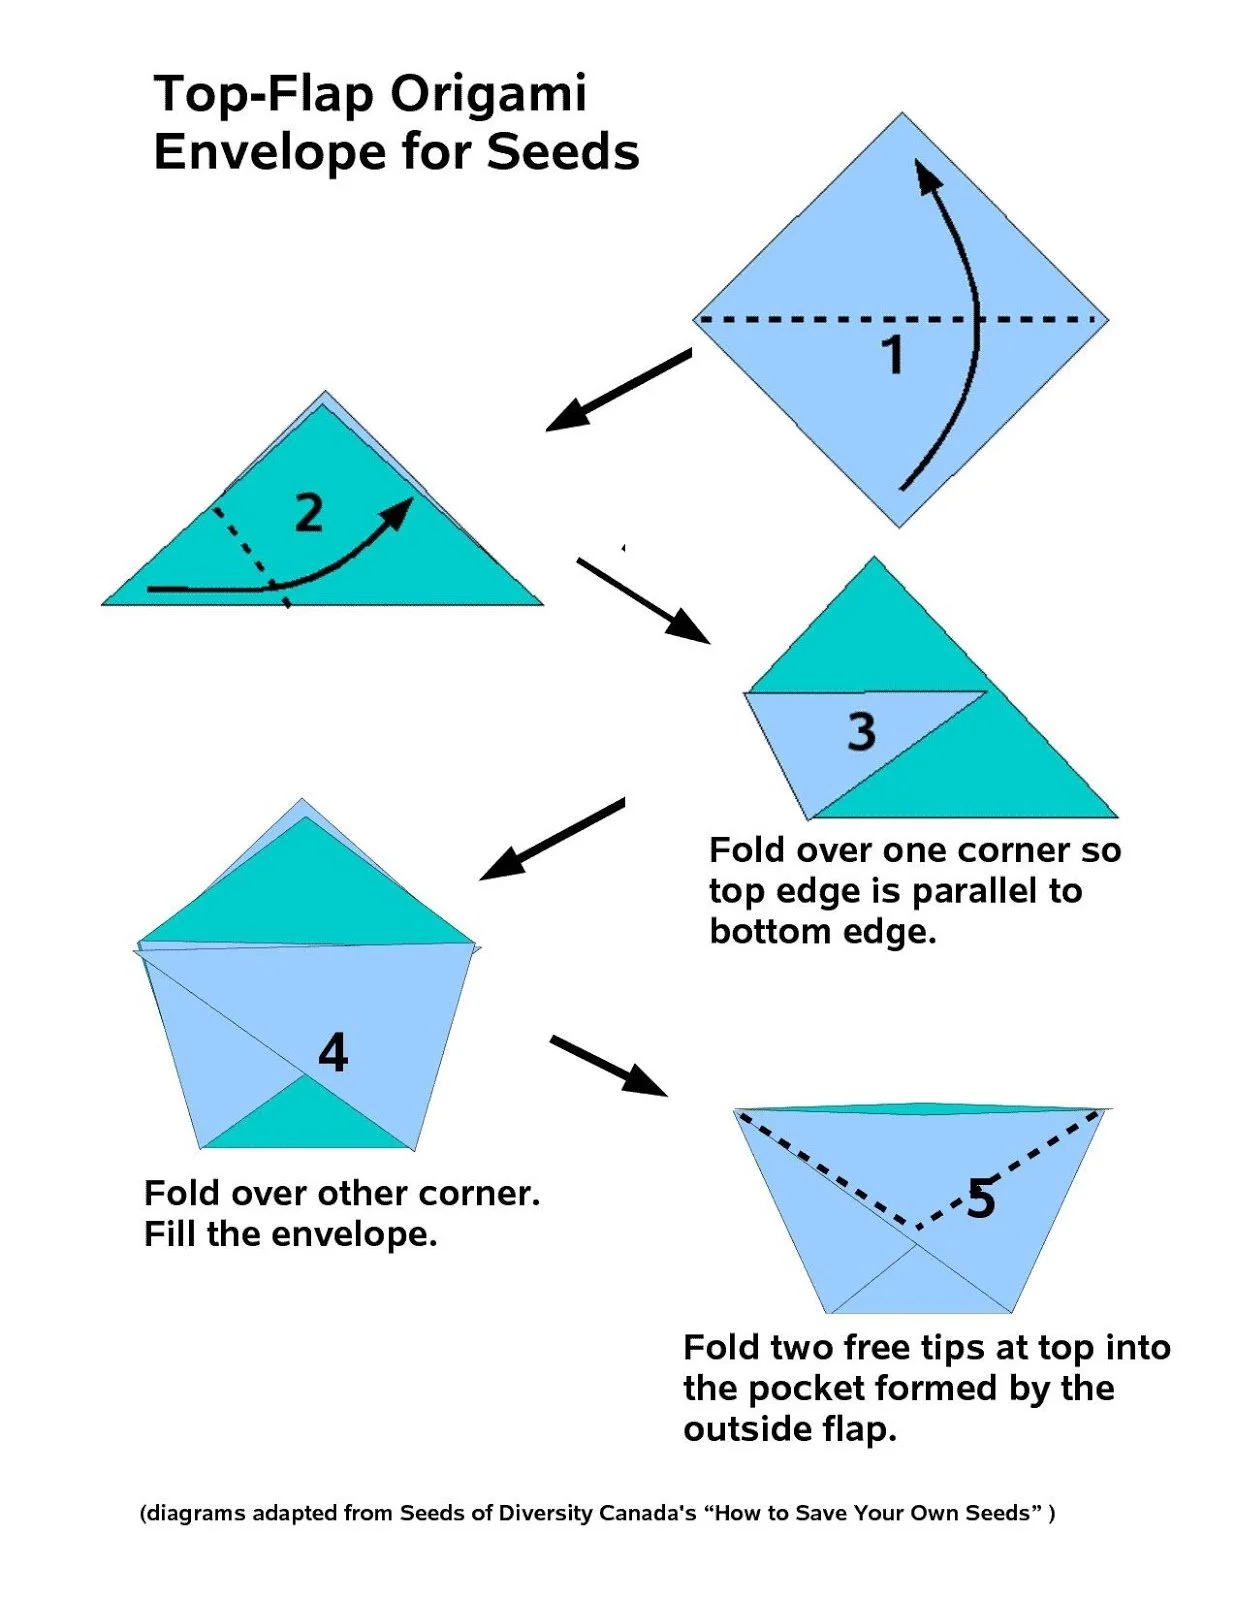
Plant a Mushroom + Wildflower Garden
Create a tiny ecosystem in your hands! Write a private “Spore Story,” fold it into an origami pouch, and fill it with the ingredients for the cycle of life. By combining wildflower seeds with mushroom mycelium, you are building a “story” of growth, patience, and decomposition.
Materials:
Square Paper: origami, seed paper or scrap paper
Spent Mushroom Block: Broken into chunks
Texas Wildflower Seeds: A native mix
Potting Soil: For filling the pouch
Spoon or Scoop
Step 1: Write Your Story (The Heart)
Learn: Draw one new thing you learned about mushrooms.
Release: Write a worry you want to “bury” and let go of.
Dream: Draw a wish for yourself or the planet.
Important Note: This is private. You don’t need to share it.
Step 2: Fold the Pouch (The Vessel)
Start: Place your paper face-down (story side hidden).
Triangle: Fold the paper in half diagonally to make a triangle.
2-3. Points: Fold the left and right corner points so the flat edge is parallel to the bottom center point to create a diamond shape.
4. Tuck: Fold the one flap down and tuck it into the pocket the diamond.
Step 3: Fill the Pouch (The Ingredients)
Mycelium: Take a small chunk of the mushroom block and crumble it into the bottom of your pouch.
Soil: Add a spoonful of potting soil on top of the mycelium.
Seeds: Sprinkle a pinch of wildflower seeds into the mix.
Mix: Gently stir with a spoon or your finger.
Close: Fold free tips at top into the pouch form by the outside flap
Step 4: Plant & Grow (The Future)
Planting: Take your pouch home and plant it in a pot or garden. The paper will also decompose.
Water: Keep the soil damp, not soaking.
Watch: Observe the decay and your “Spore Story” as the wildflowers sprout in Spring!
⚠️ Critical Tips for Success
Clean Up: Always wash your hands after touching soil or mushroom blocks.
Privacy: Respect everyone's "Spore Story." It is a personal reflection.
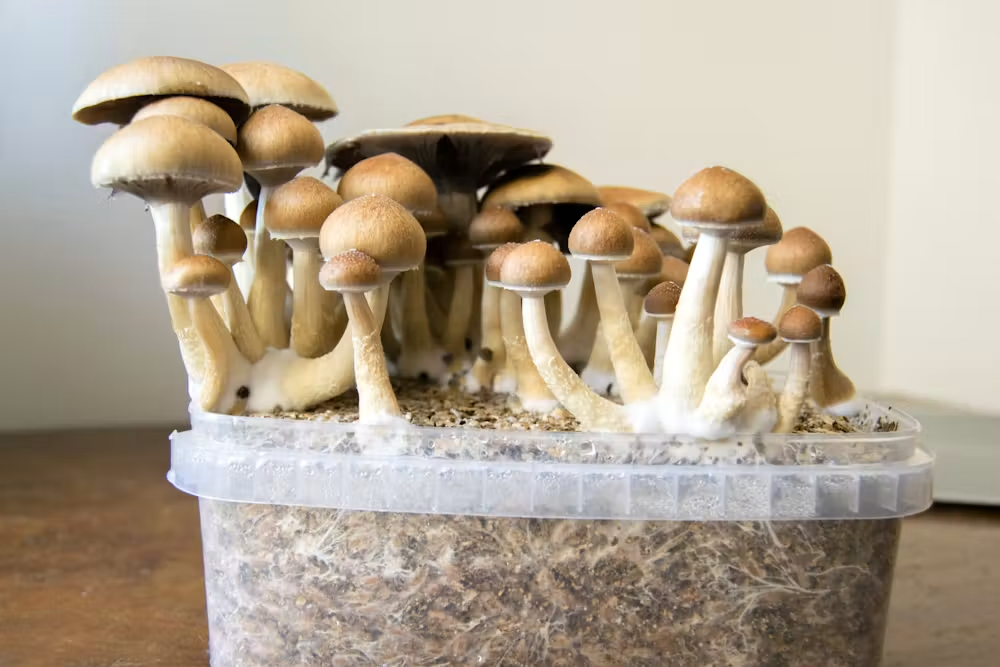
The Complete Guide to Growing Dung-Loving Mushrooms: Step-by-Step Instructions, Glossary & Supplies
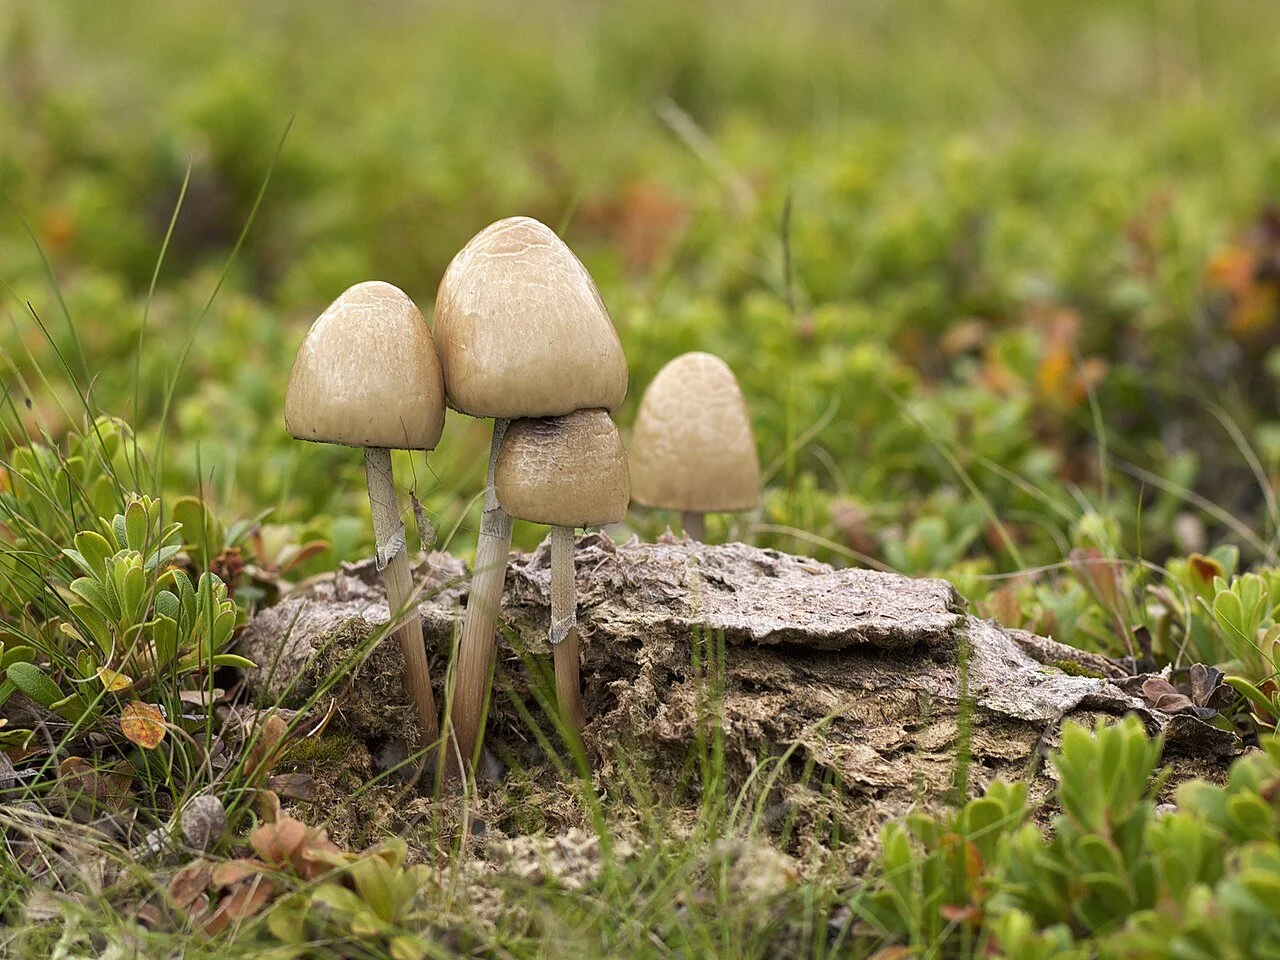
Growing mushrooms that thrive on compost and manure-based substrates—often referred to as coprophilous or dung-loving species—is a rewarding project for home cultivators. These species, which include many gourmet and specialty varieties, have specific needs that set them apart from wood-loving types like oysters or shiitake .
This guide provides a clear, step-by-step framework, a glossary of essential terms, and a supply list to help you get started. As with all cultivation, it is crucial to check your local and state laws before beginning any mushroom growing project .
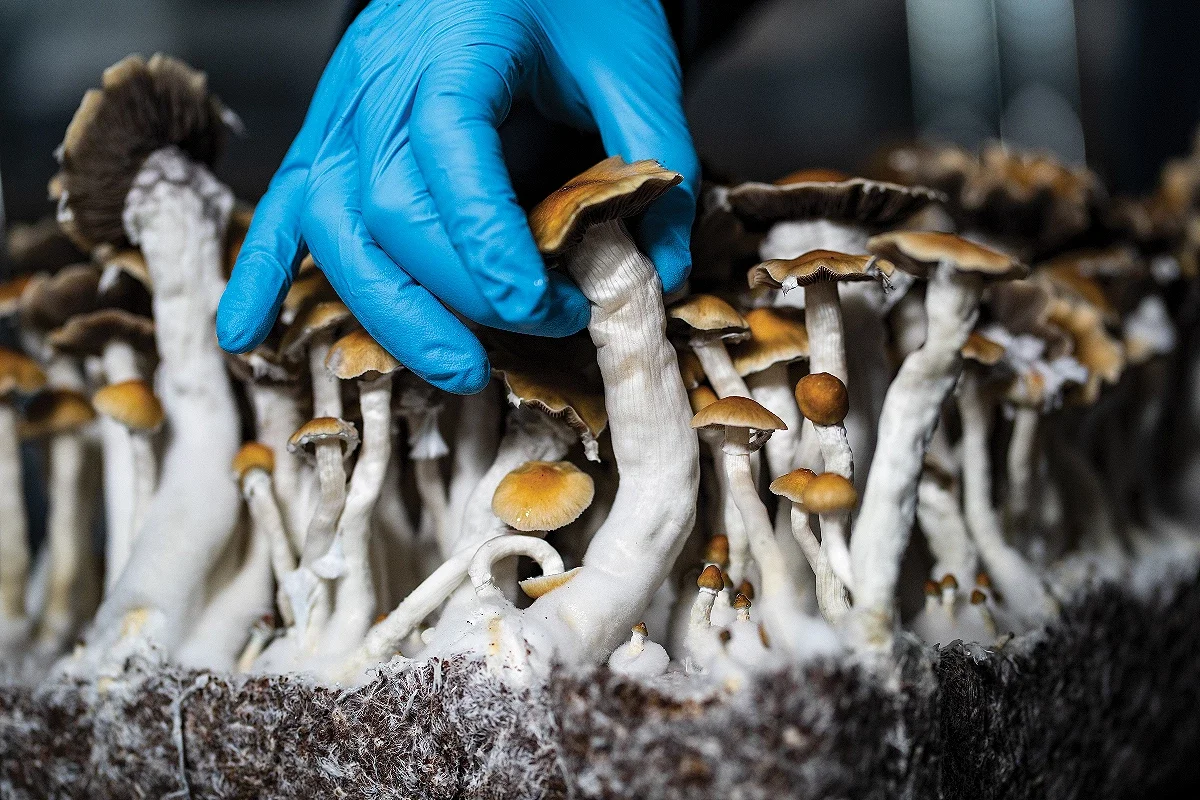
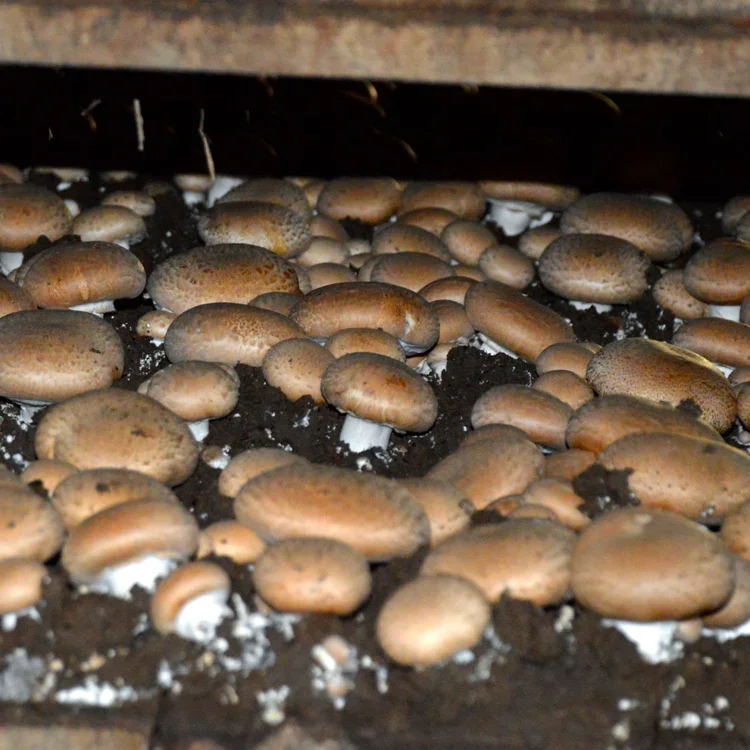
Growing mushrooms that thrive on compost and manure-based substrates—often referred to as coprophilous or dung-loving species—is a rewarding project for home cultivators. These species, which include many gourmet and specialty varieties, have specific needs that set them apart from wood-loving types like oysters or shiitake .
This guide provides a clear, step-by-step framework, a glossary of essential terms, and a supply list to help you get started. As with all cultivation, it is crucial to check your local and state laws before beginning any mushroom growing project .
Glossary of Key Terms
Here is a quick reference for the essential terminology used in mushroom cultivation.
Coprophilous: A term for organisms, including certain fungi, that grow on animal dung. Many coveted species are coprophilous and thrive on manure-rich substrates .
Substrate: The material on which the mushroom mycelium grows. For dung-loving species, this is often a mix of coco coir, vermiculite, and gypsum (CVG). Note that CVG provides structure and moisture retention but is not itself nutritional—manure is what provides nutrition.
Grain Spawn: A substrate (like rye, millet, or wheat berries) that has been sterilized and colonized by mushroom mycelium. It acts as the "seed" to start new grows .
Mycelium: The vegetative, root-like part of a fungus. It's the network of white, thread-like cells that colonizes the substrate and eventually produces mushrooms .
Inoculation: The process of introducing mycelium (via grain spawn, a spore syringe, or liquid culture) to a sterile substrate.
Liquid Culture (LC): A solution of sterilized nutrients (like honey or malt extract) that is colonized by mycelium. LC syringes are a popular and fast way to inoculate substrate .
Sterilization: The process of eliminating all life forms (bacteria, mold spores) from equipment and substrate, typically using a pressure cooker. This is a critical step for success .
Still Air Box (SAB): A simple, clear plastic box with arm holes that creates a low-draft environment for sterile work. Useful but optional—strong sterile habits in a still-air room can also work. Turn off your AC an hour before you need to do sterile work.
Break and Shake: A technique where a colonizing bag of grain or substrate is gently broken up and shaken to redistribute the mycelium, speeding up the process .
Flush: A single harvest cycle of mushrooms. You can typically expect several flushes from a single substrate block before it is exhausted .
Essential Supplies for Growing Mushrooms
To get started, you'll need to gather these core materials. Many of these can be found at mycology supply stores.
Grain Spawn: This is your mycelium's starting point. You can purchase pre-sterilized grain bags or jars.
Substrate Mix: For dung-loving species, a "CVG" mix (Coco Coir, Vermiculite, Gypsum) is a highly effective, manure-free alternative that mimics their preferred environment .
Grow Bags: Filter-patch grow bags are essential. They allow for gas exchange while keeping contaminants out. An "all-in-one" bag, which combines grain and substrate, is a great choice for beginners .
Pressure Cooker: Necessary for sterilizing your own grain and substrate to kill off competing organisms. Again you can purchase pre-sterilized grain spawn and substrate bags. An Instapot can also work.
Spore Syringe or Liquid Culture: This contains the mushroom genetics to start your grow. Liquid culture colonizes much faster than spores .
Sterile Equipment:
70% Isopropyl alcohol
Nitrile gloves
A torch or lighter for sterilizing needles
Fruiting Environment: A grow tent or a dedicated space where you can control temperature, humidity (85-95%), and fresh air exchange .
Step-by-Step Instructions
Step 1: Prepare Your Workspace
Cleanliness is everything in mycology. Turn off fans and air conditioning to let particles settle. Wipe down all surfaces with 70% isopropyl alcohol and put on gloves. If you have one, work inside a Still Air Box (SAB) or in front of a laminar flow hood .
Step 2: Inoculate the Grain or All-in-One Bag
Spray the injection port and your syringe with 70% alcohol.
Flame-sterilize your syringe needle until it glows red, then let it cool.
Insert the needle through the injection port and inject 2 mL of liquid culture per pound of grain.
Seal the bag and place it in a dark, clean area with a stable temperature between 70-78°F.
Step 3: Incubation and "Break and Shake"
Store the inoculated bag in a dark place at a consistent temperature (ideally 70-78°F for dung-loving varieties) .
Leave the bag undisturbed for 10-14 days. You should start to see white, cottony mycelium growing.
Once you see about 15-20% colonization, perform a "break and shake." Gently massage and break up the colonized grain and mix it thoroughly within the bag. This redistributes the mycelium and speeds up colonization .
Re-form the mixed contents into a solid block shape, seal the bag, and return it to incubation .
Step 4: Colonization and Fruiting
Once the grain bag is fully colonized (completely white and firm), it's time to add it to your bulk substrate.
In a clean workspace, break up the colonized grain spawn into individual kernels.
Open your substrate bag and add the colonized grain. A good ratio is roughly 1 part grain spawn to 2-3 parts substrate by volume.
Mix the grain and substrate thoroughly so the spawn is evenly distributed.
If desired, add a thin casing layer of plain substrate over the top. Lightly scratch the surface to create texture for pinning.
Fold the top of the bag and secure it with clips. Return the bag to incubation at ~75°F.
Colonization of the substrate usually takes about 2 weeks. Resist opening or disturbing the bag during this time.
Step 5: Initiate Fruiting
Once the substrate is fully colonized and white, it's time to initiate fruiting.
Cut a 1-2 inch slit or "X" in the plastic of the grow bag just below the filter patch. This allows fresh air to enter.
Place the bag in an area with ambient light and temperatures around 75°F.
Mist the inside of the bag to maintain high humidity (85-90%). Fan the bag a few times a day if needed for fresh air exchange.
The bag itself is the fruiting environment—no separate chamber is required.
Step 6: Harvesting & Post-Harvest Care
Harvest your mushrooms when the caps begin to flatten and just before the veil breaks.
Gently twist and pull or cut the mushroom at the base.
Continue to mist the block and maintain fruiting conditions to encourage additional flushes (usually 3-4 total).
After each harvest, fill any holes with leftover substrate, lightly ruffle the surface, mist deeply, and return to incubation.
Disclaimer: This article is for informational and educational purposes only. It is the user's responsibility to be aware of and comply with all local, state, and federal laws regarding the cultivation of mushrooms, including the legality of spores, mycelium, and the specific species involved
How to Build a Lasagna Garden Bed with Mushroom Blocks
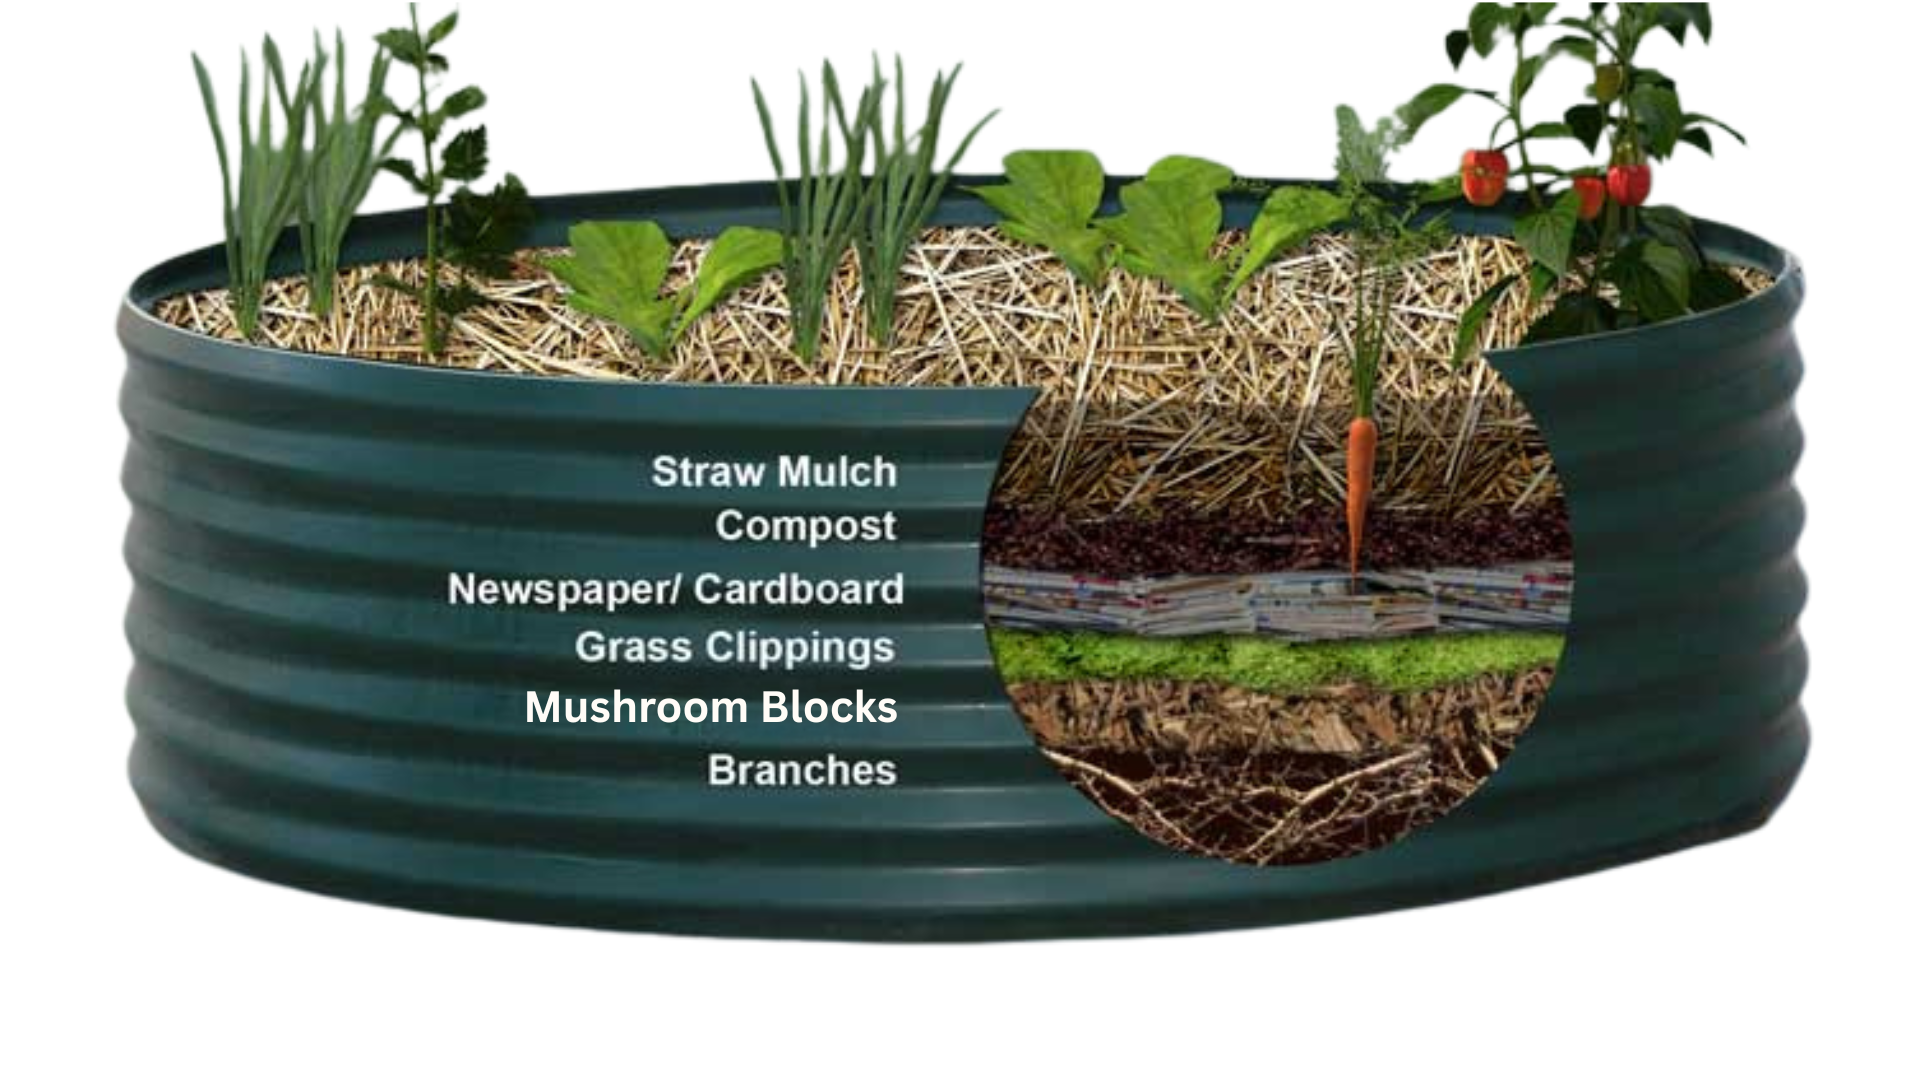
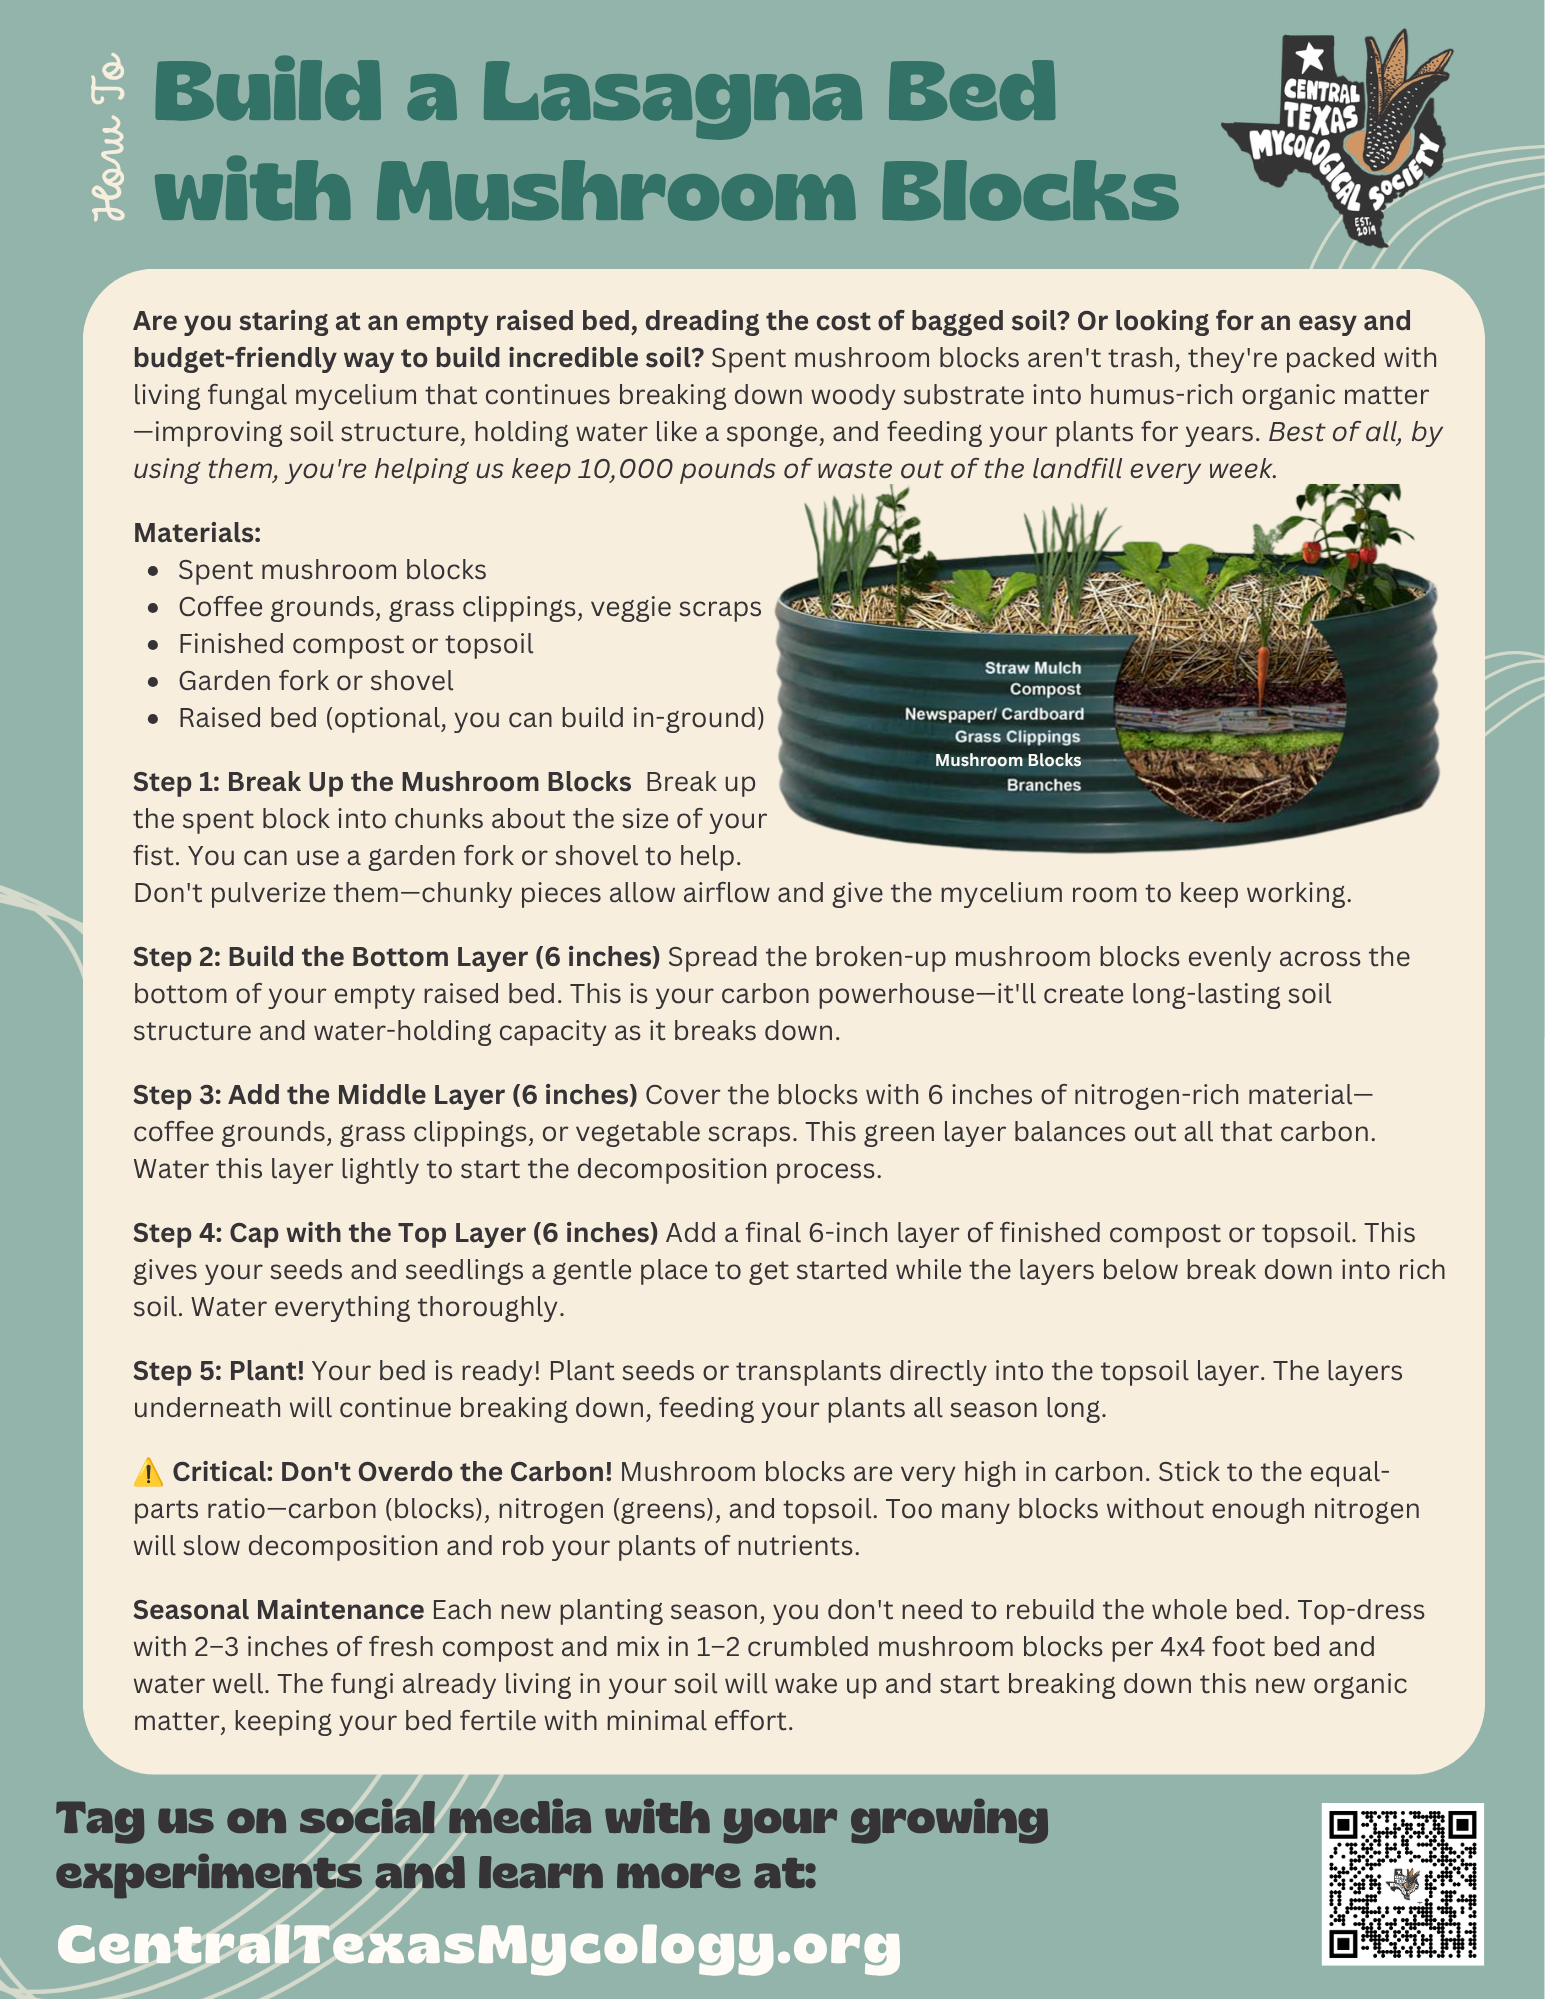
Are you staring at an empty raised bed, dreading the cost of bagged soil? Or looking for an easy and budget-friendly way to build incredible soil? Spent mushroom blocks aren't trash, they're packed with living fungal mycelium that continues breaking down woody substrate into humus-rich organic matter—improving soil structure, holding water like a sponge, and feeding your plants for years. Best of all, by using them, you're helping us keep 10,000 pounds of waste out of the landfill every week.
Download Printable PDF
Are you staring at an empty raised bed, dreading the cost of bagged soil? Or looking for an easy and budget-friendly way to build incredible soil? Spent mushroom blocks aren't trash, they're packed with living fungal mycelium that continues breaking down woody substrate into humus-rich organic matter—improving soil structure, holding water like a sponge, and feeding your plants for years. Best of all, by using them, you're helping us keep 10,000 pounds of waste out of the landfill every week.
Materials:
Spent mushroom blocks
Coffee grounds, grass clippings, veggie scraps
Finished compost or topsoil
Garden fork or shovel
Raised bed (optional, you can build in-ground)
Step 1: Break Up the Mushroom Blocks
Break up the spent block into chunks about the size of your fist. You can use a garden fork or shovel to help. Don't pulverize them—chunky pieces allow airflow and give the mycelium room to keep working.
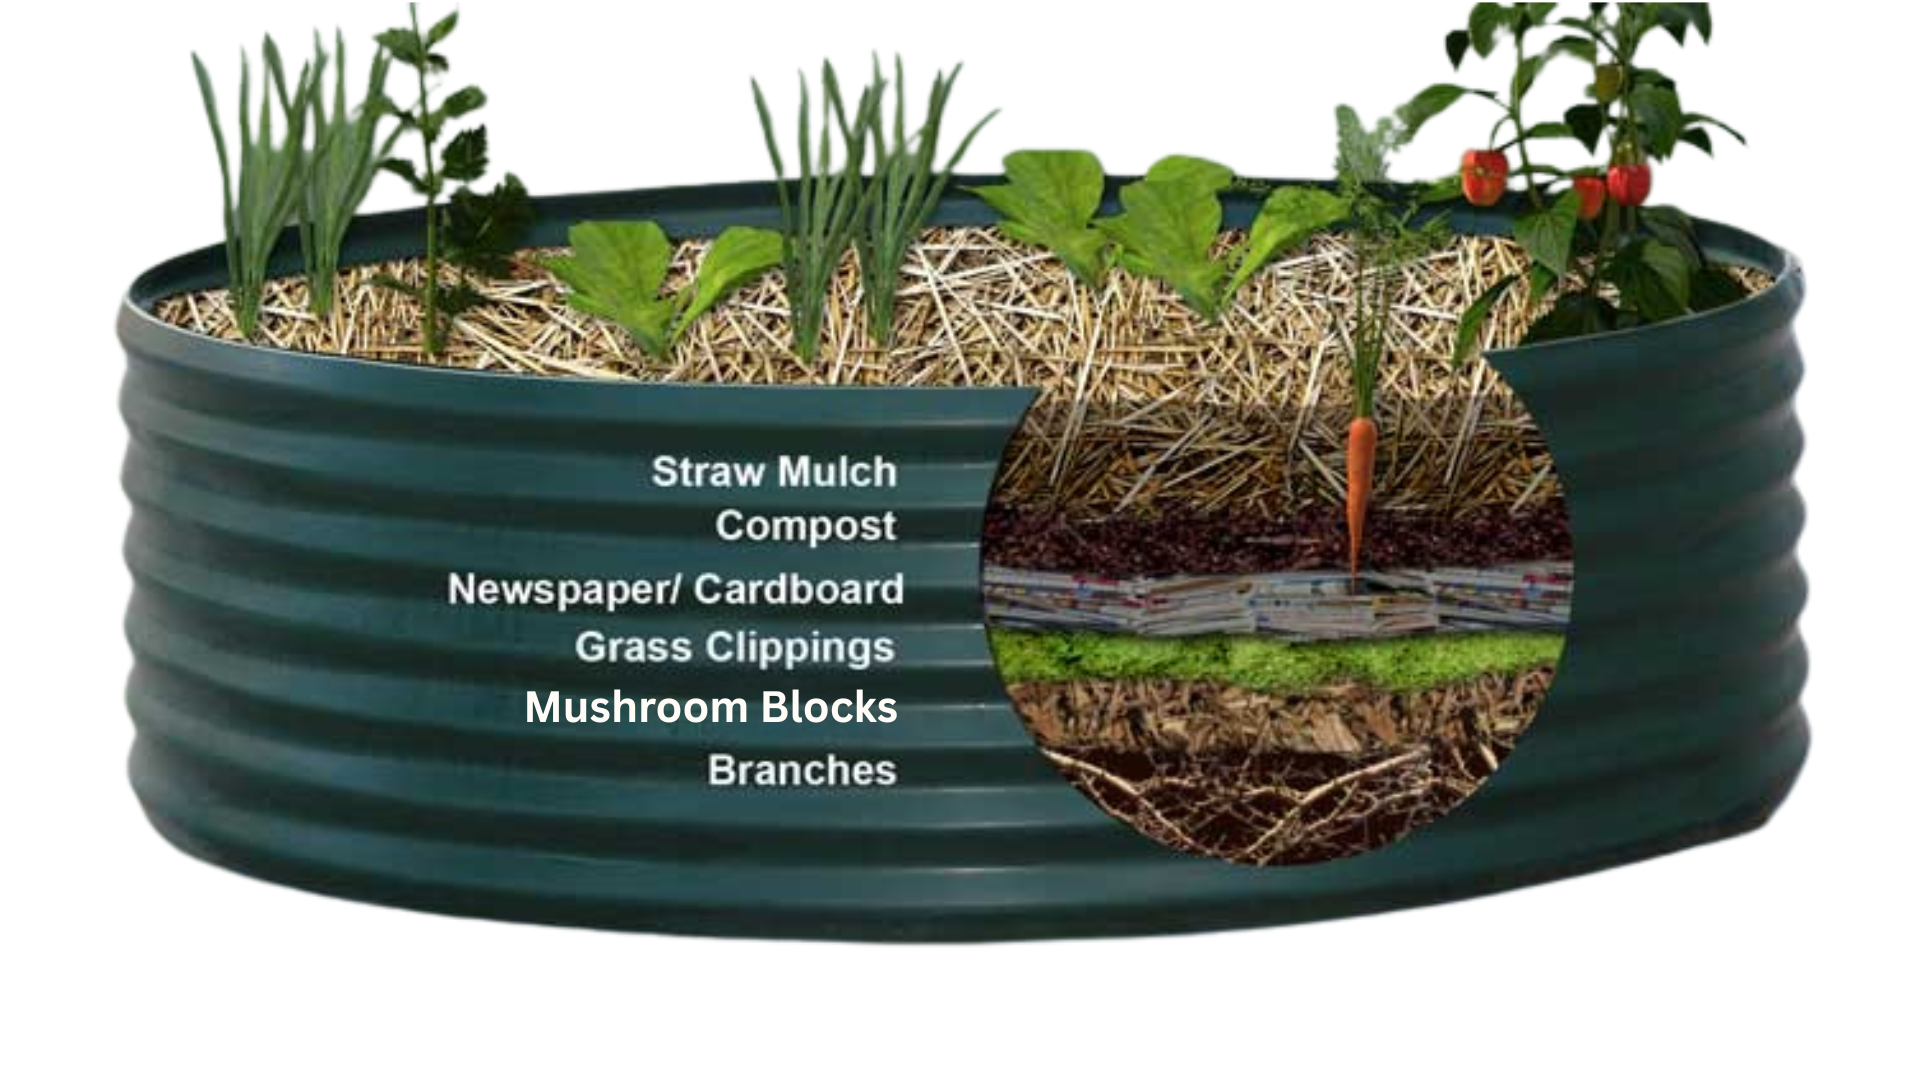
Step 2: Build the Bottom Layer (6 inches)
Spread the broken-up mushroom blocks evenly across the bottom of your empty raised bed. This is your carbon powerhouse—it'll create long-lasting soil structure and water-holding capacity as it breaks down.
Step 3: Add the Middle Layer (6 inches)
Cover the blocks with 6 inches of nitrogen-rich material—coffee grounds, grass clippings, or vegetable scraps. This green layer balances out all that carbon. Water this layer lightly to start the decomposition process.
Step 4: Cap with the Top Layer (6 inches)
Add a final 6-inch layer of finished compost or topsoil. This gives your seeds and seedlings a gentle place to get started while the layers below break down into rich soil. Water everything thoroughly.
Step 5: Plant!
Your bed is ready! Plant seeds or transplants directly into the topsoil layer. The layers underneath will continue breaking down, feeding your plants all season long.
⚠️ Critical: Don't Overdo the Carbon!
Mushroom blocks are very high in carbon. Stick to the equal-parts ratio—carbon (blocks), nitrogen (greens), and topsoil. Too many blocks without enough nitrogen will slow decomposition and rob your plants of nutrients.
Seasonal Maintenance
Each new planting season, you don't need to rebuild the whole bed. Top-dress with 2–3 inches of fresh compost and mix in 1–2 crumbled mushroom blocks per 4x4 foot bed and water well. The fungi already living in your soil will wake up and start breaking down this new organic matter, keeping your bed fertile with minimal effort.
Bring Huitlacoche to Your Garden - 2026
The Central Texas Mycological Society is launching a new experimental crop, huitlacoche or Mycosarcoma maydis.
If you are in Austin area, we are giving away spores and corn seed. Seeds available at the 78702 mushroom block pick-up until gone.

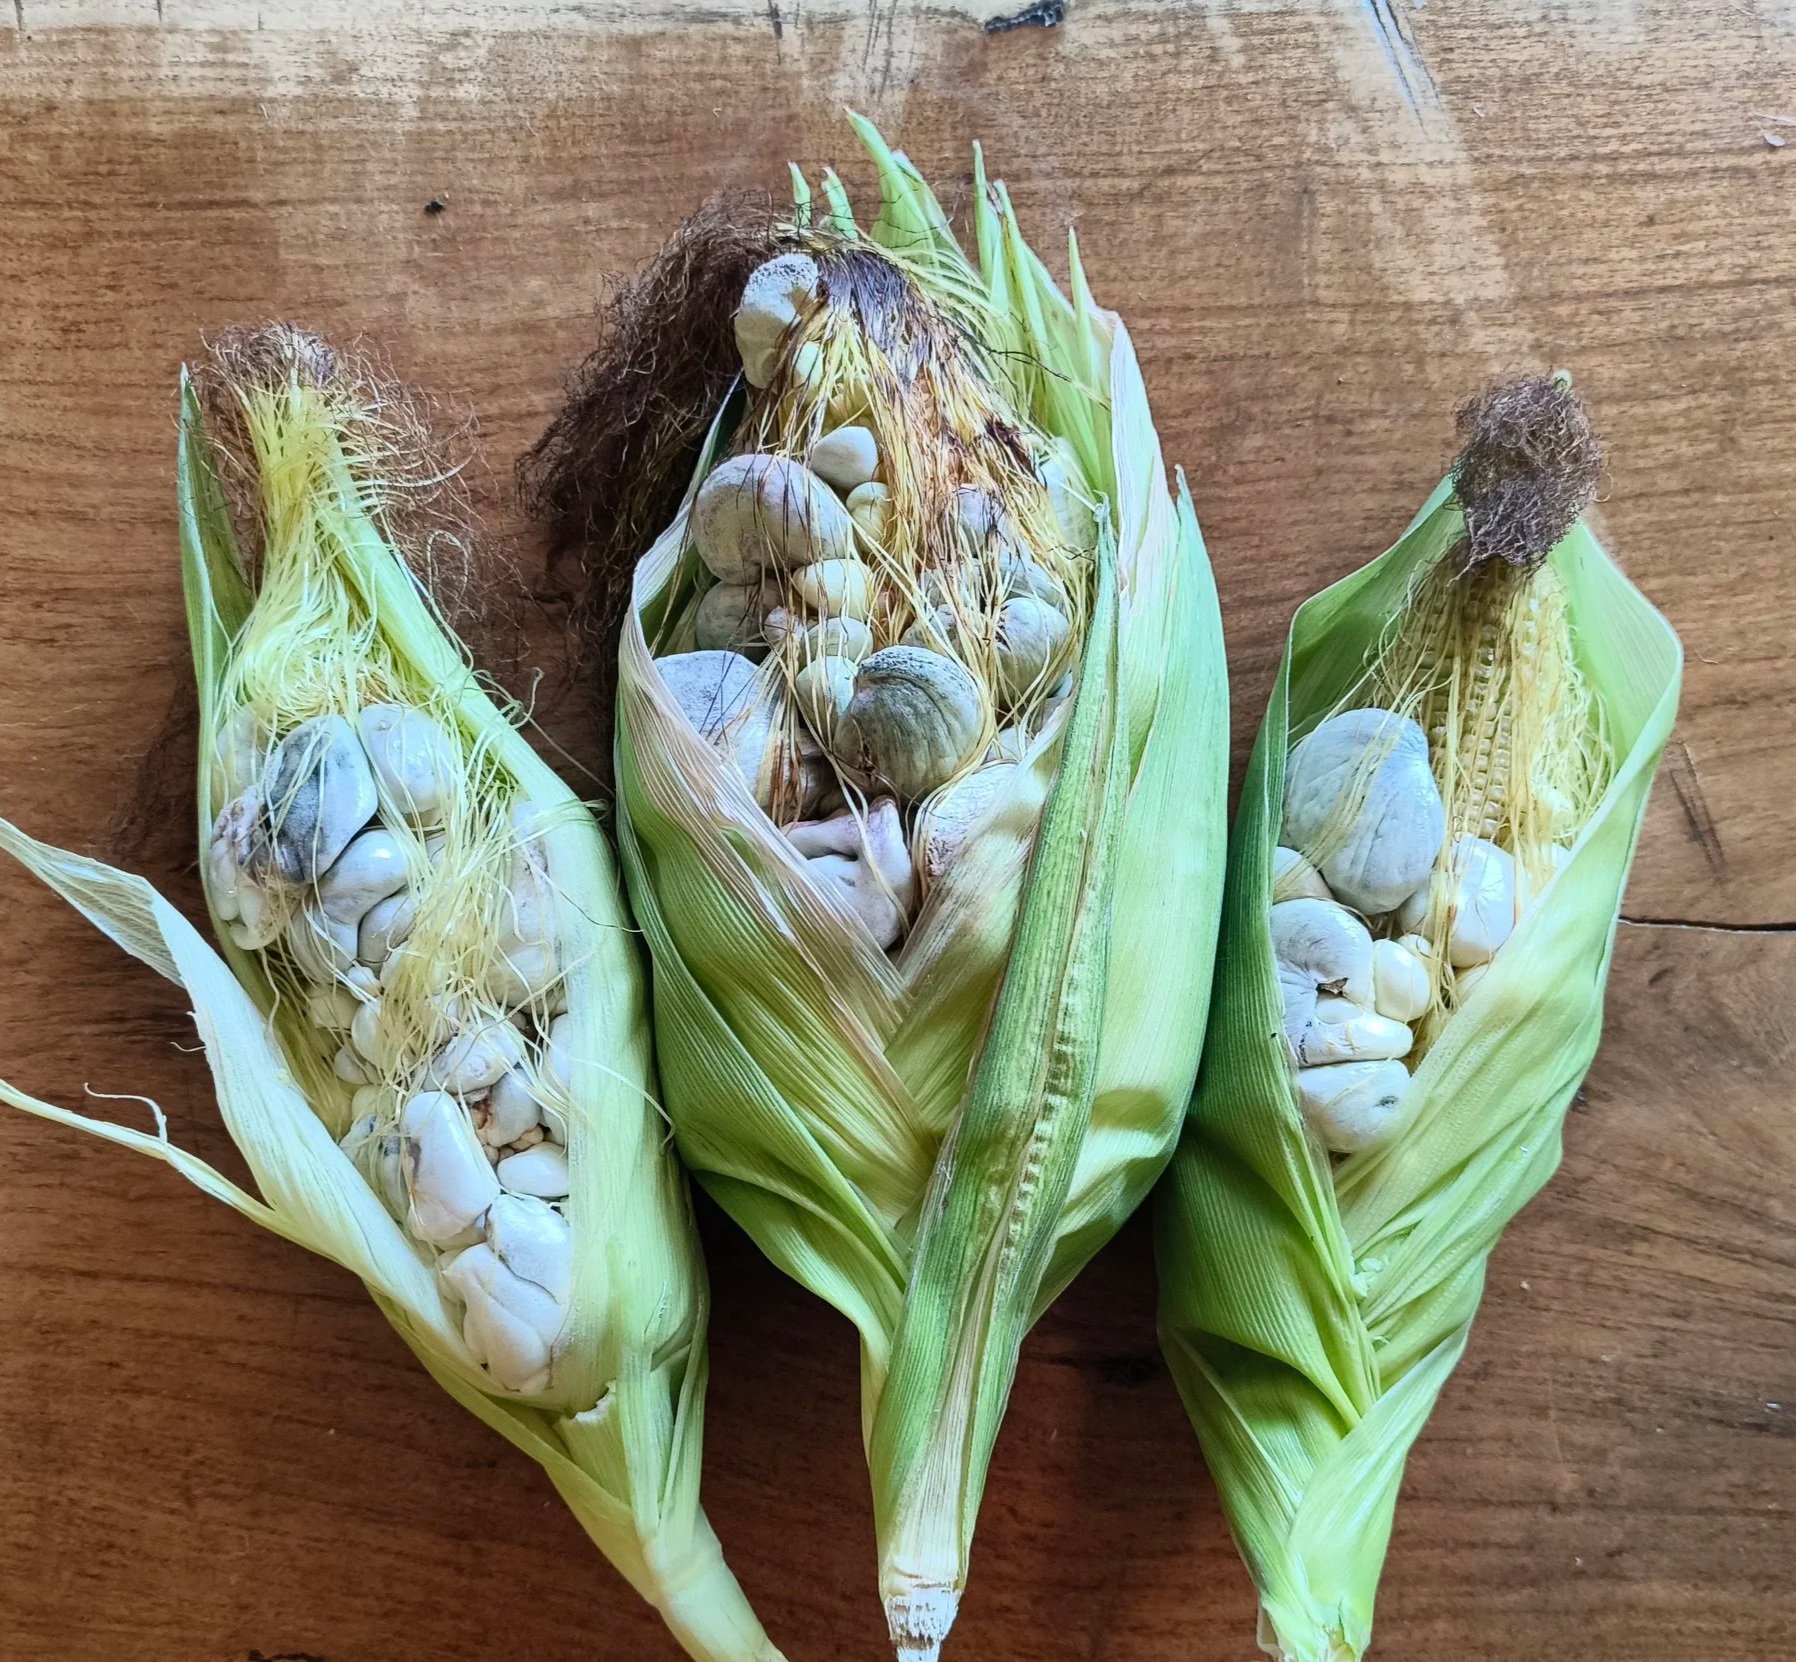
You are looking at corn infected with the smut producing fungus Mycosarcoma maydis. Does it look edible to you? Not only is it edible, it is outstanding.
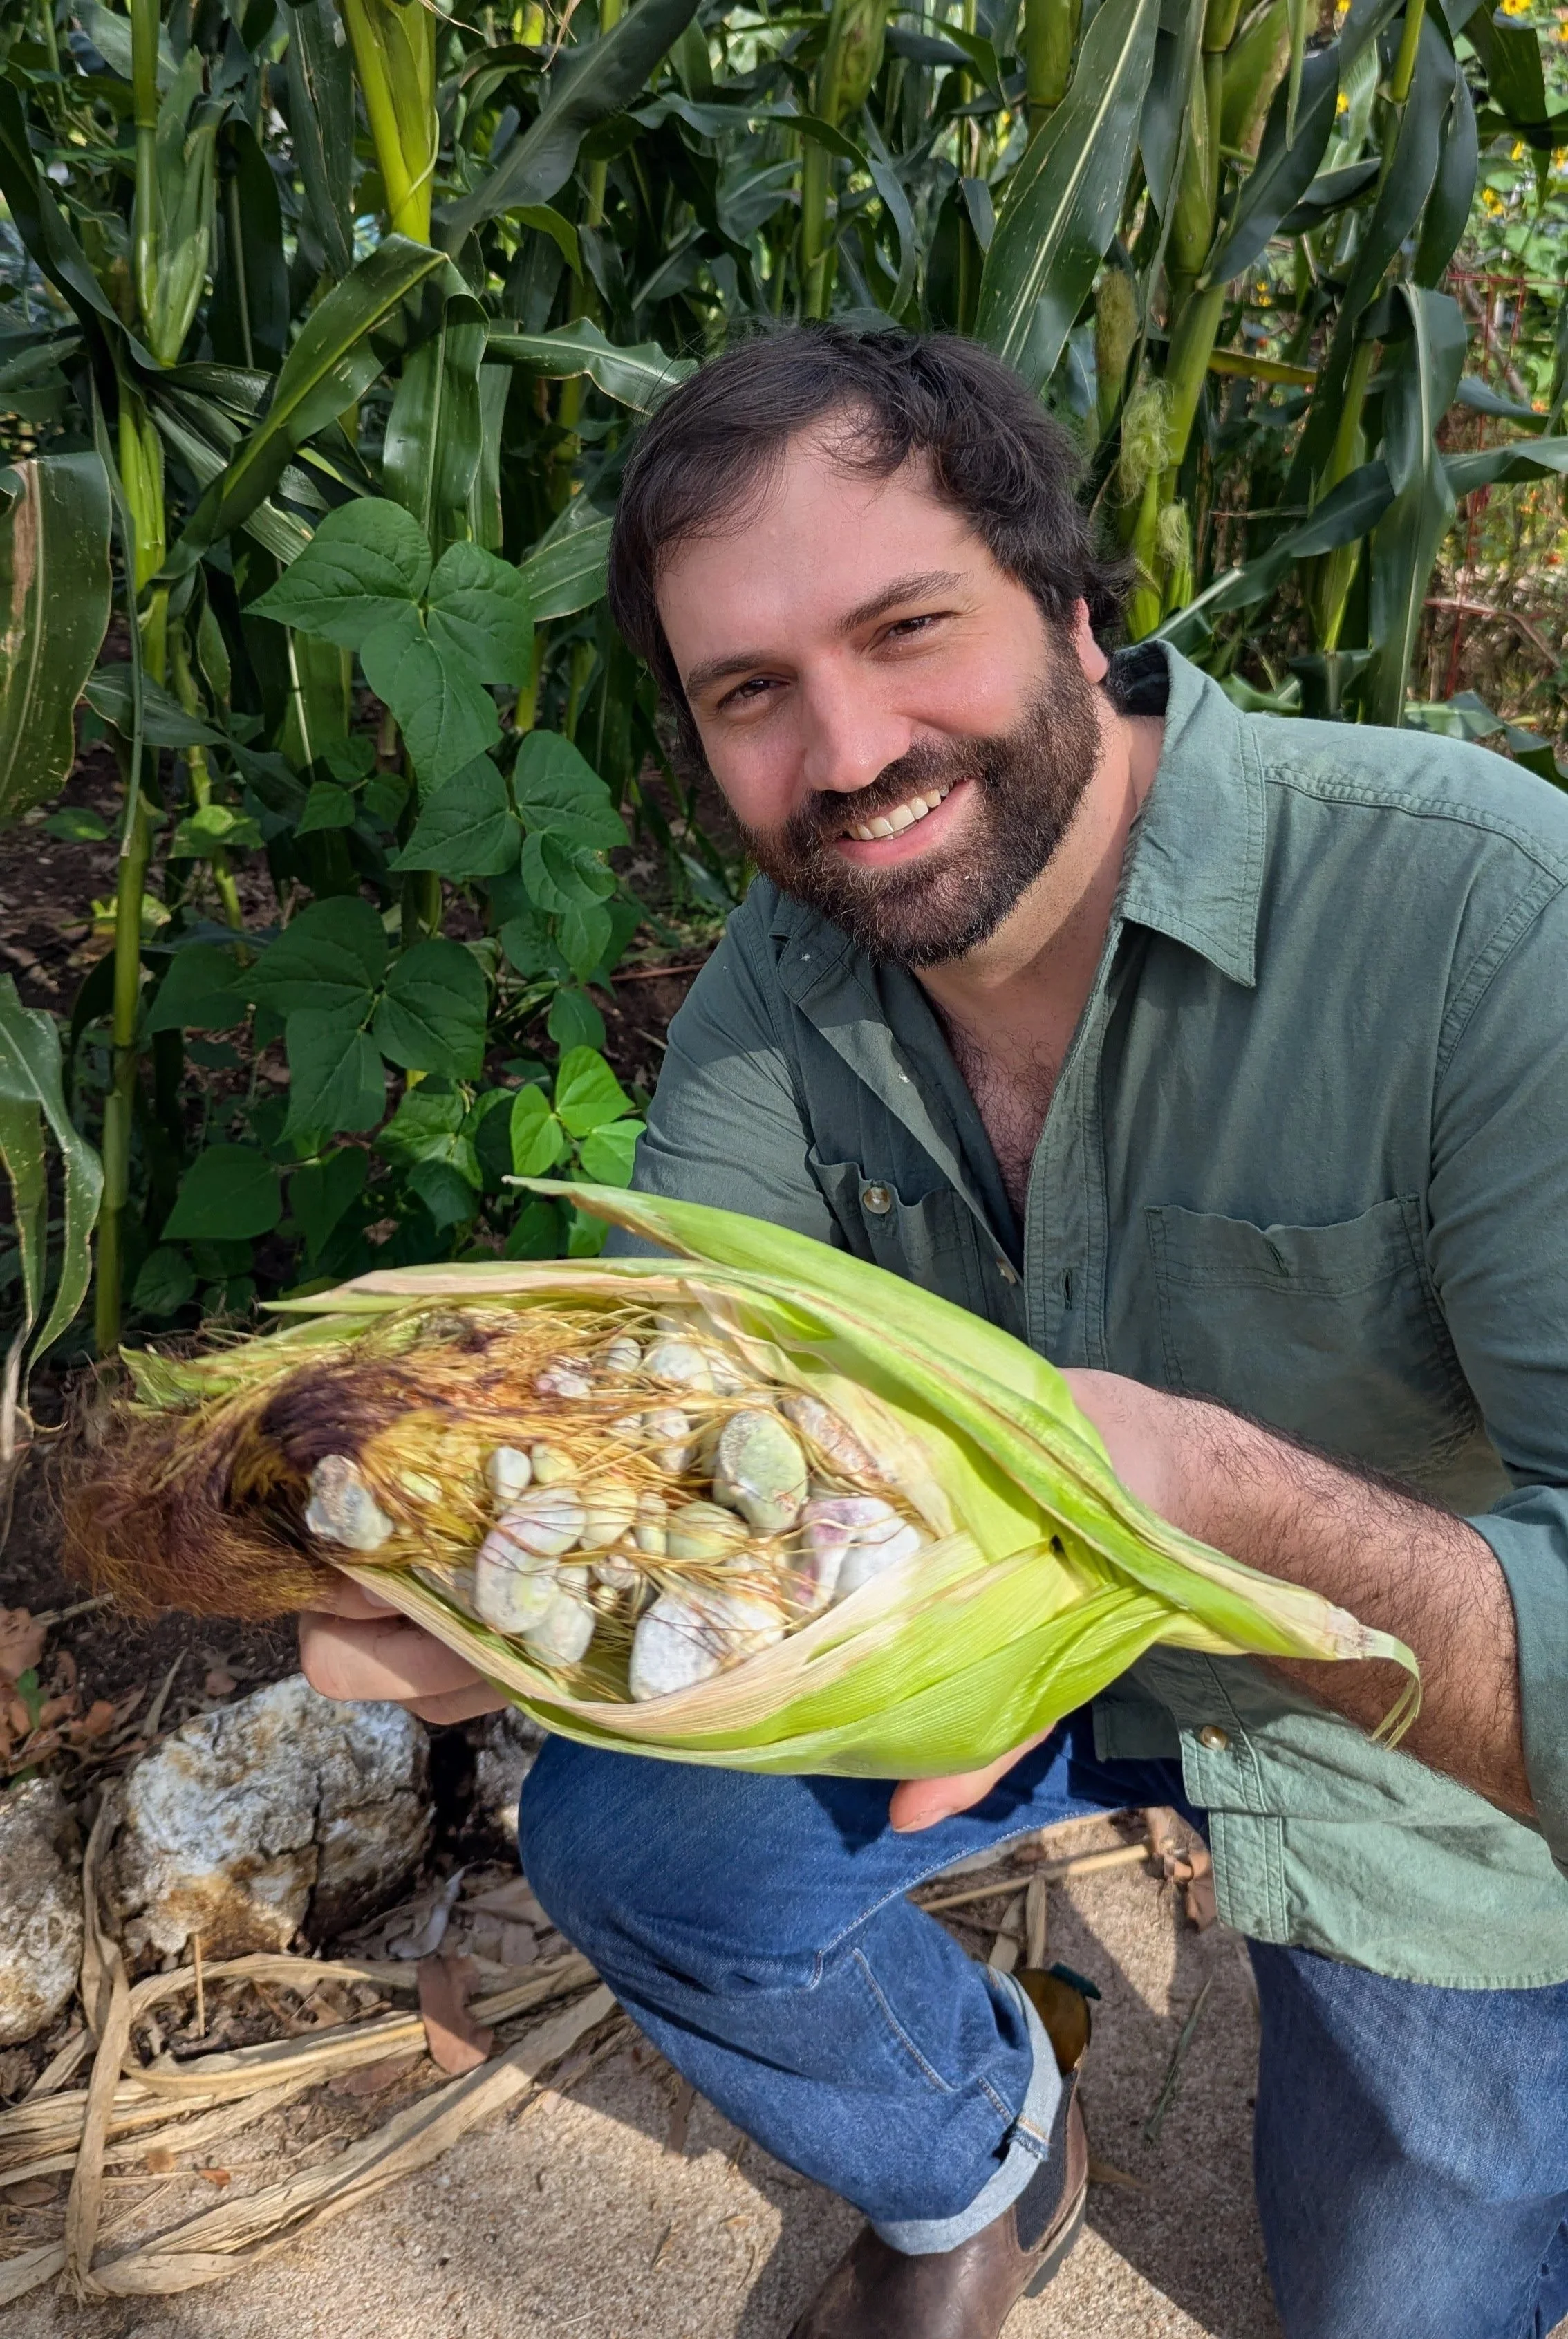
We harvested 5 lbs of huitlacoche from one plot in 2026
The Central Texas Mycological Society (CTMS) is launching a new experimental crop, huitlacoche or Mycosarcoma maydis. Like many of our mycological friends, huitlacoche straddles the line between a symbol of decay and a delicacy. To the corn farmers of the American plains, it is known as corn smut, a common and undesirable crop disease that forms in particularly hot humid summers. To the maize-centric cultures of Central Mexico, huitlacoche is a traditional part of the diet, a prized crop in itself, and a culinary delicacy. Much the same way that, for example, Chicken of the Woods is the object of many on a foray for a foraging mycologist but, to an arborist, it is a pathogen hollowing out the heartwood of a great old tree, now not long for this world.
Mycosarcoma maydis infects the kernels of the corn primarily, producing huitlacoche though it can also infect the tassel and stalk. Infection causes the kernels to form into distended darkened galls that are a culinary treasure, though a blight to the producers. The majority of the resources referring to huitlacoche for US based institutions are written as profiles on diseases and pathology, for example the pages from Texas A&M Agrilife Extension and the Wisconsin University Horticulture Extension with passing references to its consumption. Such articles are detailed accounts of how to diagnose and avoid Corn Smut infection but, with a slight change in perspective of the reader, they become useful guides in how to induce smut formation.
If you want to try huitlacoche before you dive in (though there’s more to the experience of cultivation than just the eating) you can purchase it at a few different Mexican specialty markets and restaurants. Fresh huitlacoche is highly seasonal, coinciding with the corn season, so calling ahead is recommended before going to either a restaurant or market, however, some import the corn flash frozen and can stock it year round. If you’re in the Central Texas area, CTMS has compiled a map of restaurants that serve huitlacoche or have in the past, if you know of others, please let us know.
Over the past few years, we have learned a great deal about how to successfully cultivate huitlacoche specifically in the climate of Central Texas. In spring 2026, we harvested 5 pounds from a single small plot in Central Austin, proving it to be a viable crop for Central Texan gardeners.
If you are interested in growing huitlacoche, contact CTMS, we have earmarked a portion of our harvest to be used to produce the spores to be distributed for future cultivation.
What do you need to grow Huitlacoche?
Humid summers, high temps below 95°
A small area or few pots to grow corn
Spores (or liquid culture) of M. maydis
Picking your Corn variety
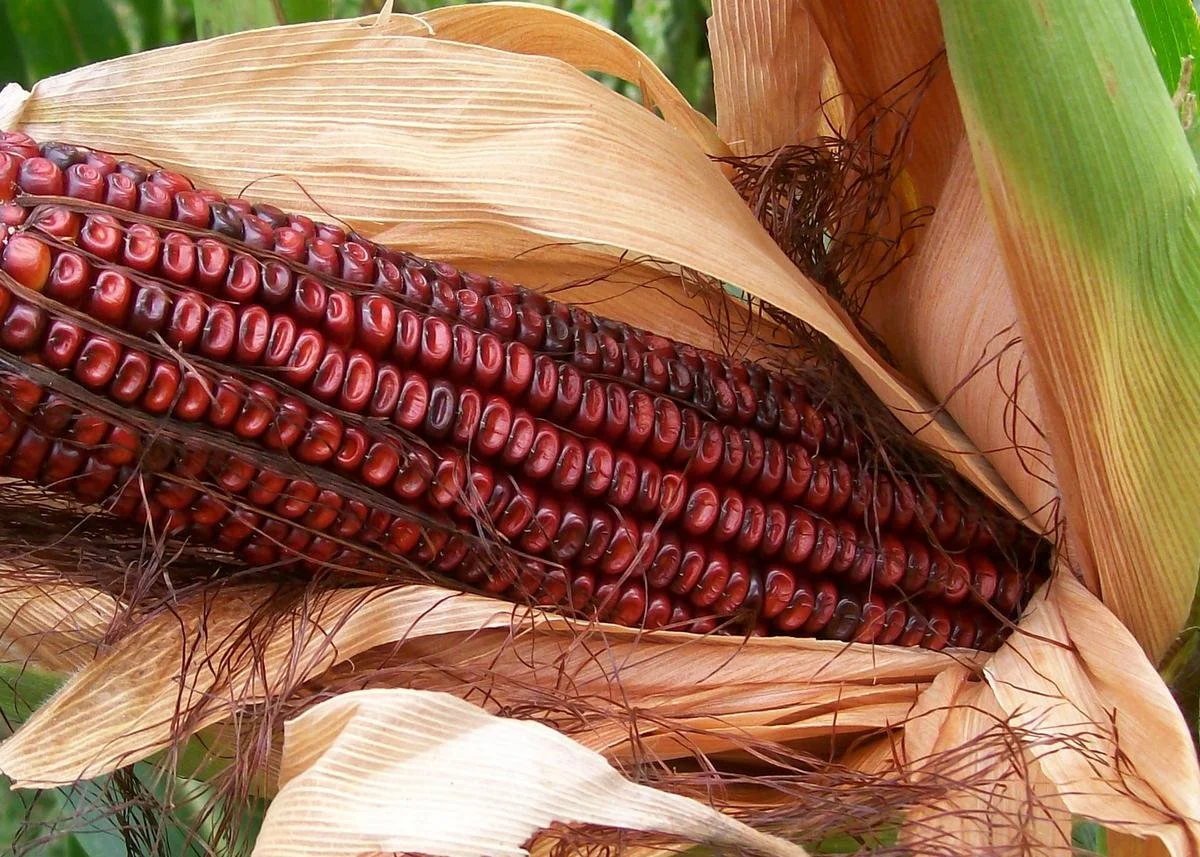
Bloody Butcher Corn from Southern Exposure Seeds is well suited to Central Texas
If you are not in Central Texas, here are links to where we bought our seeds. Liquid culture of M maydis is available online but we had little success with it. Spores are harder to find.
The first step to cultivating huitlacoche is growing corn. Texas Gourdseed was selected for the first test plots of CTMS (alongside some other strains), an heirloom variety from Central and South Texas. It is drought and flood tolerant and disease resistant generally though susceptible to smut infection which represents a high probability of successful huitlacoche production. Later seasons used Bloody Butcher and a crossbred variety of Gourdseed with great success.
The variety of corn affects the flavor of the resulting smut. Sweet corn and hybrids are often used among American producers and yield a sweeter, less traditional tasting huitlacoche. Avoid popcorn varieties as the exceptionally hard pericarp makes it more difficult for the mycelium to penetrate into the kernel. Varieties marketed as resistant to fungal infection should be avoided, including GMO varieties which are generally resistant.
Non GMO, Heirloom varieties
Especially susceptible to smut
Open pollinated for higher likelihood of desirable environment
3+ ears per stalk
Taste, sweet corn yields sweeter huitlacoche, not traditional
TTM - Time To Maturity - pick a variety that will mature when conditions are right
Plant Cultivation
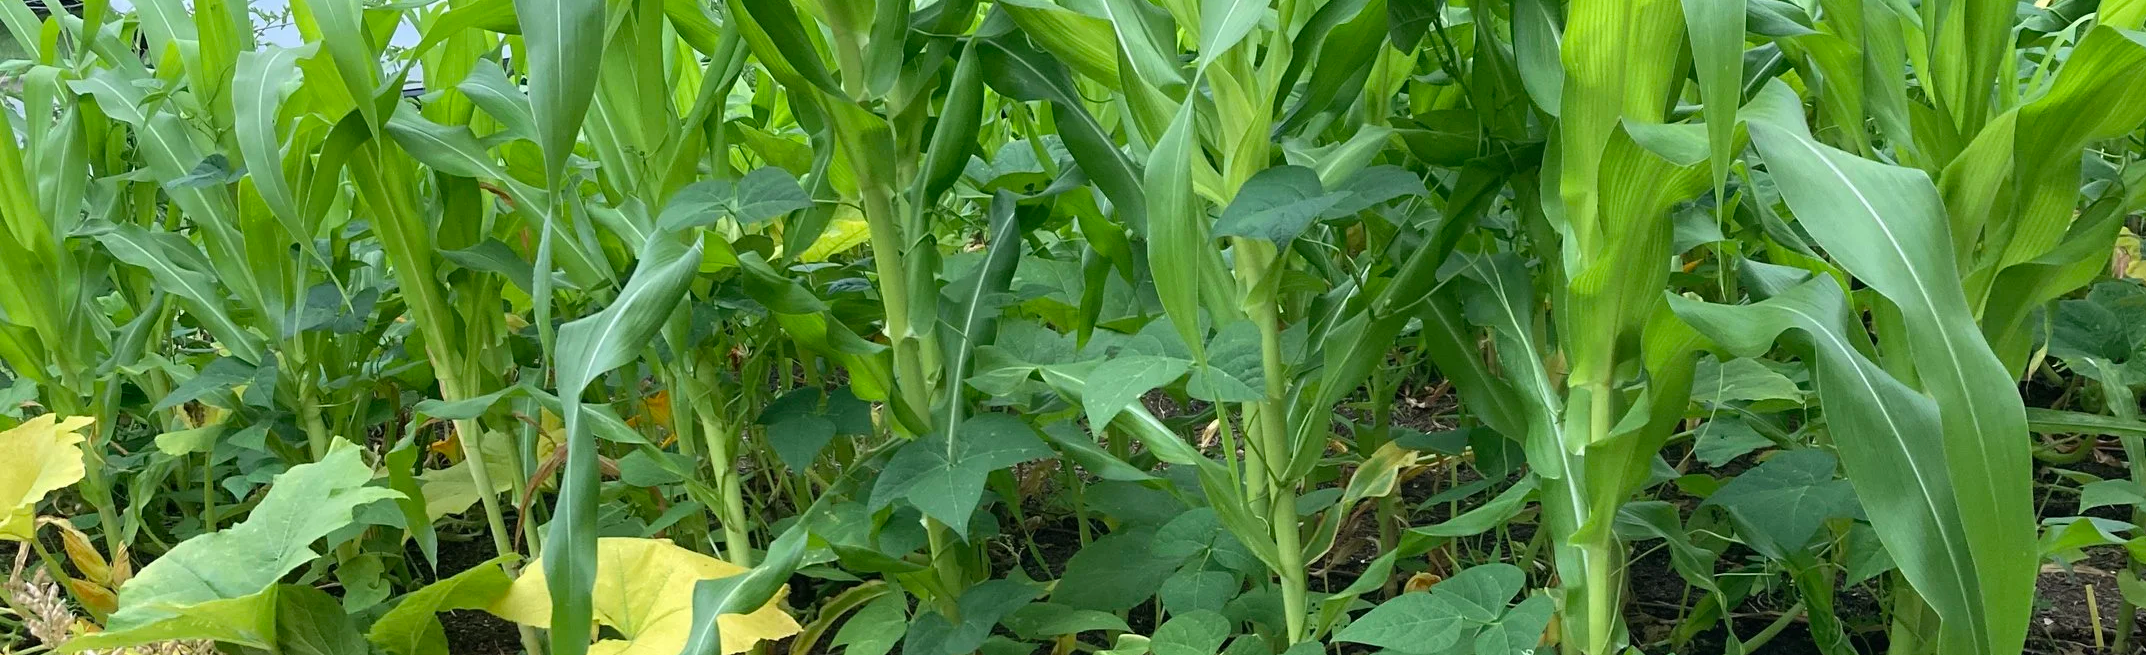
Find a guide with a planting strategy that suits your needs. Fertilize, water, monitor, and generally care for the plants exactly how you would for a regular corn crop with a few exceptions.
Plant your corn so that it will mature when high temperatures are between 85° and 95° degrees. Look at the time to maturity on your corn variety and the almanac for your region to count back to when you should plant. For example if your corn has 90° day TTM and your almanac says that high temps are 95° in July, plant in April. I generally aim for a late February or early March planting for a spring crop. The same goes for fall; you are looking for high temps above 85° which is early October, so you would plant in early July for a fall crop after counting back 90 days. Greenhouses also allow you to control temperature and humidity, so you can plant after July, decreasing your reliance on the external environment. Just make sure to keep your greenhouse from getting above 95° in the daytime.
Most corn planting strategies are built around pollination, however for huitlacoche we do not actually want our plants to be pollinated. Huitlacoche infection is most effective before pollination occurs. This means that you don’t have to commit to a large corn crop like most of the growing guides will tell you. You can attempt to cultivate huitlacoche in pots, small raised beds, even window boxes if you don’t mind corn stalks blocking your window like prison bars. A surprising step in cultivating huitlacoche, unlike corn, is that you can even de-tassel the corn plants to prevent pollination.
Another major departure from traditional corn planting guides is the pattern of planting. For huitlacoche, your corn plants must be accessed frequently. This is unlike typical corn cultivation, where growers need to access the crop only when it is planted and harvested. The plants must be accessed to monitor ear development. When the time is right, huitlacoche growers will inoculate each ear as they form over a couple of weeks. Then once inoculation occurs, monitor gall development and harvest the ear before the galls turn to spores. All of this requires regularly walking among your plants, for this reason we recommend leaving generous row spacing and not companion planting with squash (we do companion plant with beans though) as you will likely trample the vines.
The tassel is the male pollen producing portion of the corn plant. It grows at the very top of the plant and showers pollen upon the ears of corn below that take in the pollen via the silk that extends beyond the end of the ears. De-tasseling is a common procedure to artificially select for corn plant genetics. By planting two varieties of corn side by side and de-tasseling one of them, you can assure hybridization in that corn as they must have been fertilized by the other tasseled variety. De-tasseling is not required but it is an effective way to increase huitlacoche yield especially if you do not care about having a corn harvest. This is an important caveat. If you choose to detassel your corn you will have no fully formed ears of corn. If you are trying to produce both, you simply need to be vigilant in your inoculation and make sure you are intervening early before the ears are pollinated.
If you want to try a mixed crop of corn and huitlacoche (or if you have a neighbor growing corn nearby that would expose your corn to tassels) shoot bags can be used to prevent pollination of some ears while leaving others available to produce corn. There are specialized shoot bags for corn as well as other crops that emphasize hybridization like cannabis production that are permeable to particles smaller than the size of the particular plants pollen allowing maximum ventilation for the plant. However this can be done with simple paper bags, ideally ones that are waxed if there is rain or heavy dew in the forecast. We purchased our shoot bags from Seed Savers Exchange. Simply place the bag over the ear before the silk has emerged and pinch off a little to draw it tight to the stalk below the ear and secure it with a staple or paper clip in the loose flap of paper. You can even inoculate the ear by piercing the syringe through the bag if you want without risking exposing it to pollen in the open air.
Liquid Culture

We have found liquid culture to be far less effective in cultivating huitlacoche, however, it is easier to acquire online than spores and is nearly infinitely expandable, so it is useful as a tool of necessity. It is much more delicate than spores both to storage and environmental conditions when injected. It is also likely to be weak from senescence if the culture has been repeatedly expanded. You should also check your liquid culture under a microscope to ensure that it is indeed a Mycosarcoma maydis at all, sometimes, over years of expansion yeast or other infection can completely replace the initial sample.
There are many online guides for the production of Liquid culture (LC) that the reader can follow. We will link a few at the bottom of this article. For the purposes of our first trials, a 5% corn syrup (other sugars are perfectly acceptable) solution was sterilized in a pressure cooker and injected with LC syringes purchased from online vendors.
Typical mycelial cultivation which is done with sterilized jars or bags of cooked grain or wood pellet substrate, where the contents are dead and a perfect growing environment for any manner of infection that is introduced through the thin barrier separating the vulnerable substrate from the outside world, teeming with eager bacteria and spores. However, for huitlacoche, the substrate is a living ear of corn. Live corn has an intact innate immune system which offers partial protection against infection from poorly suited would-be invaders such as bacteria and molds. Secondly, the manner of injection is inherently unsanitary as it will be performed in the garden, outdoors, exposed to the rich ecosystem of microorganisms of soil ecology and airborne spores and bacteria. This means that some basic, limited contamination of the LC reservoirs, while not ideal, does not render the LC useless as the corn can resist some infection.
Spore Solution
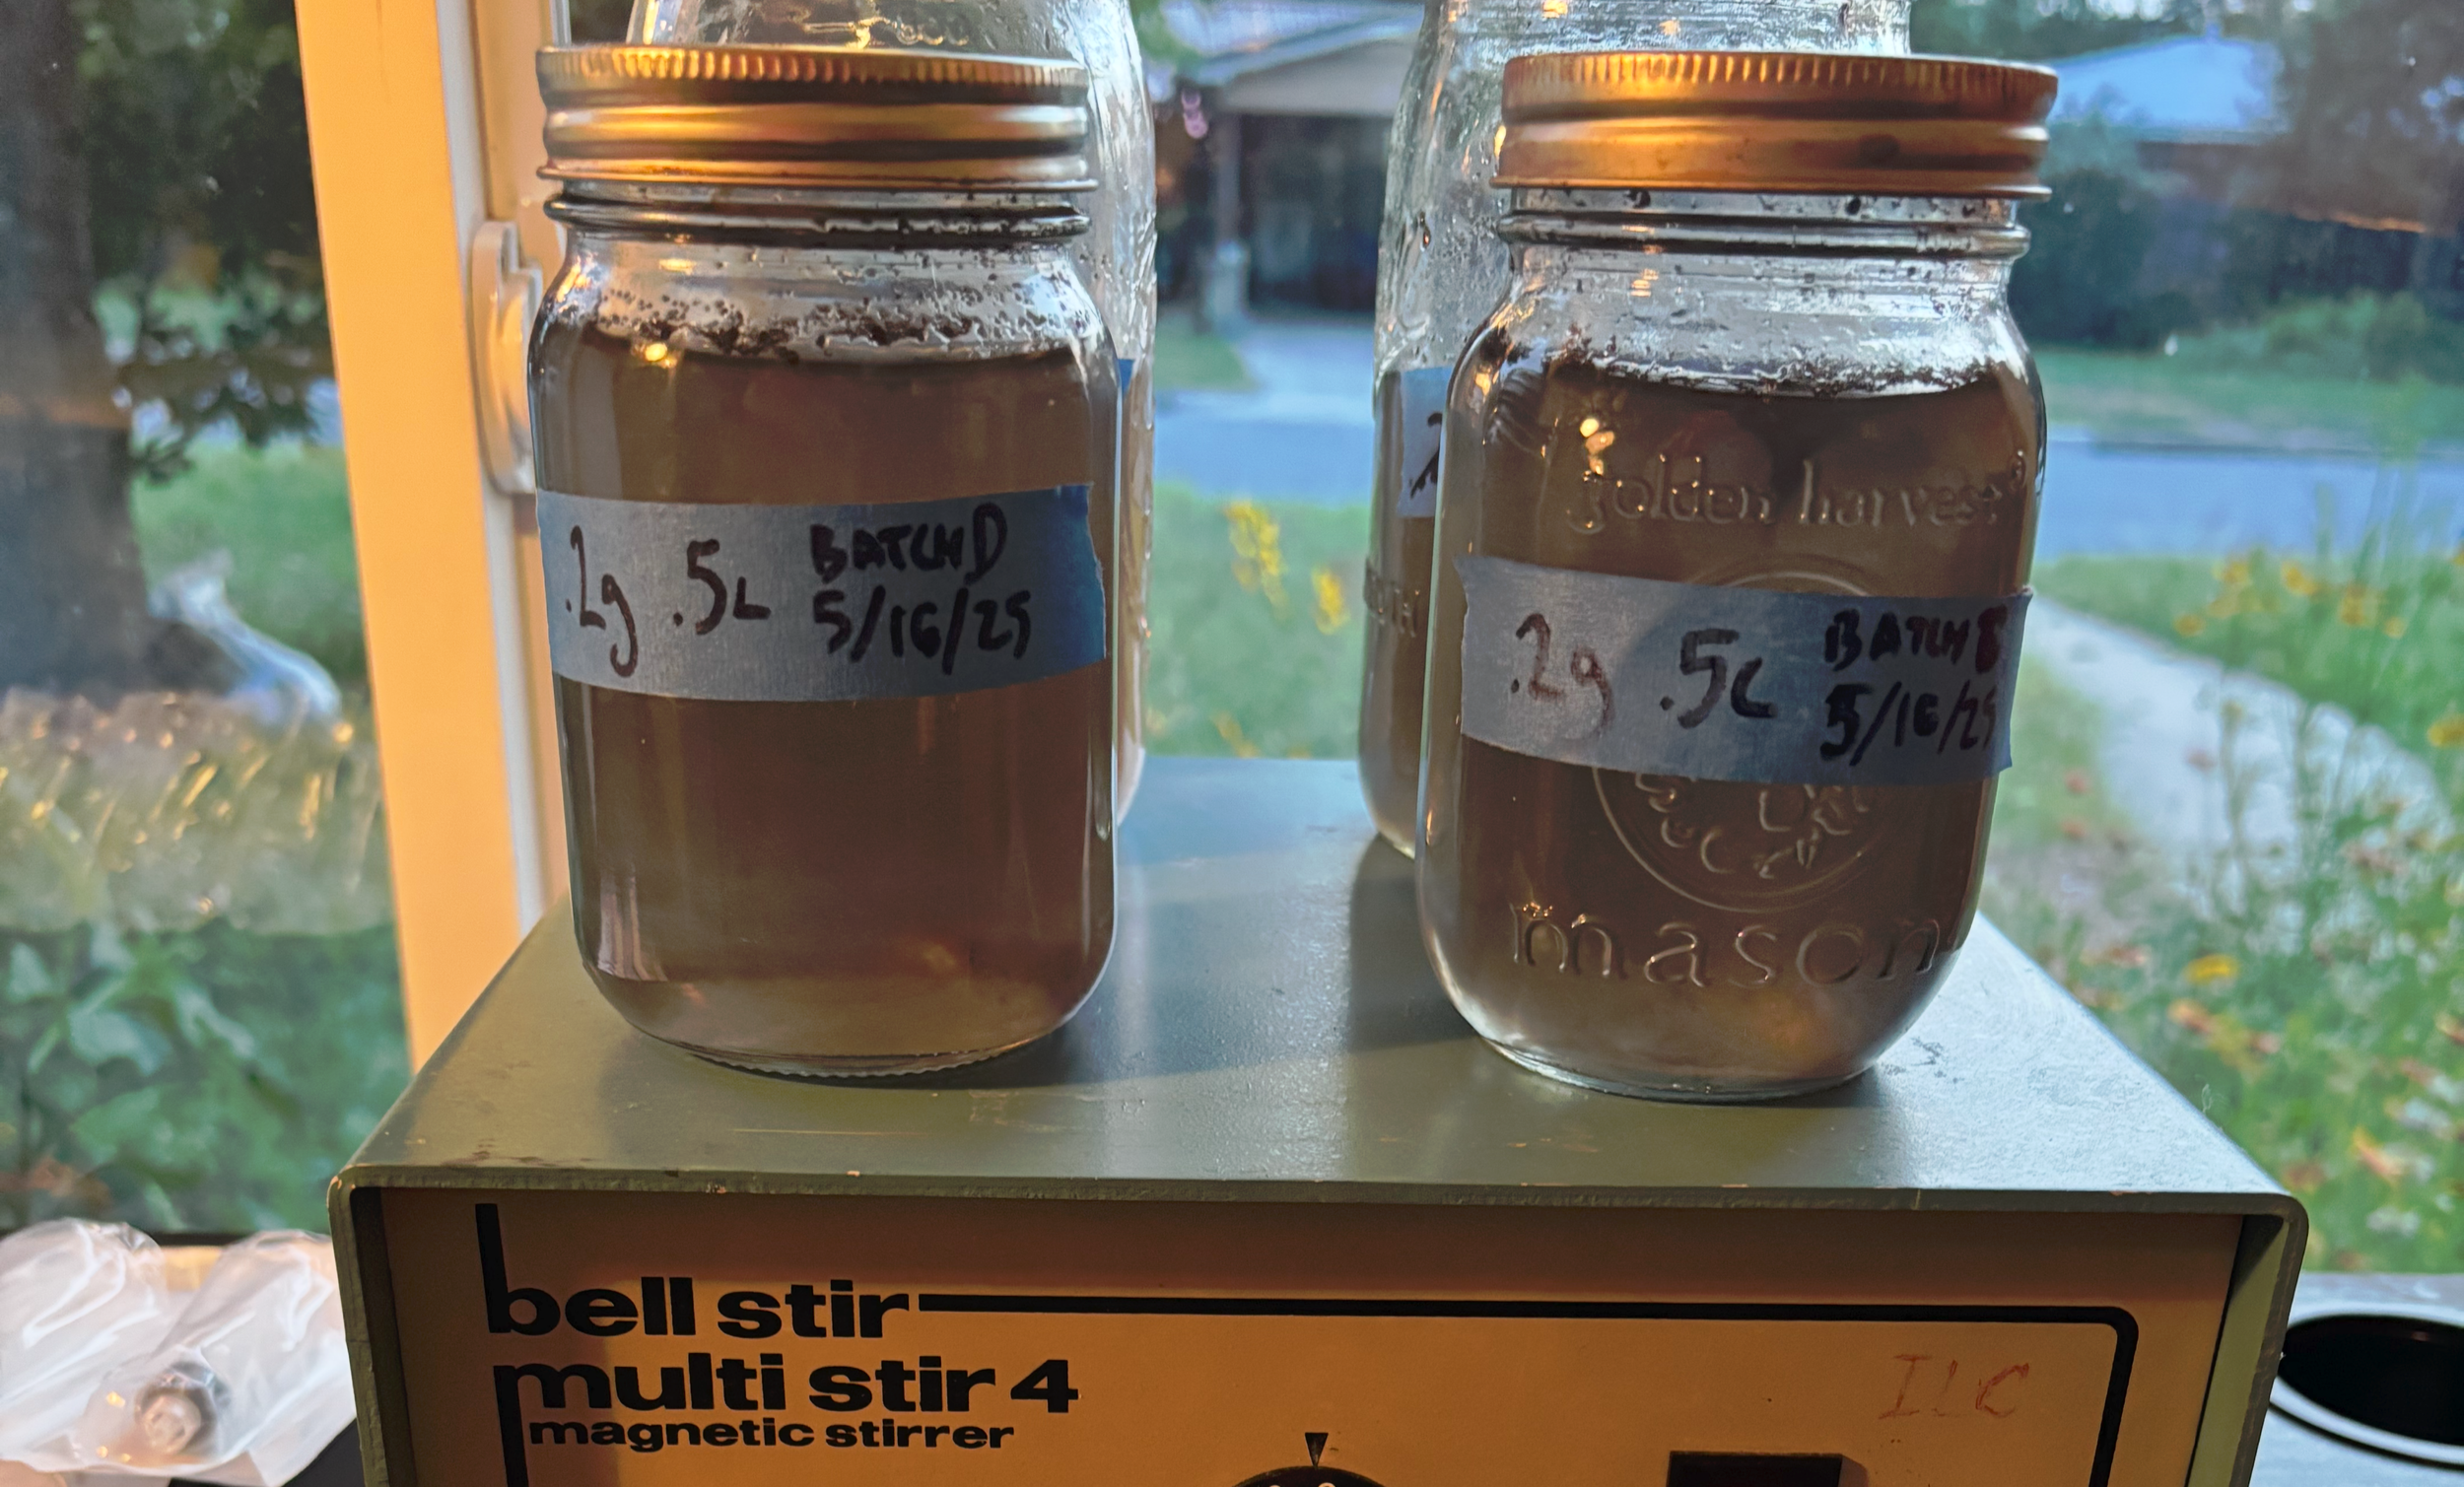
Preparation of spore solution for the fall 2025 crops.
Spore solution is the traditional and preferred method of cultivation. Cultivation goes back to ancient times where there are records of Central American people dipping flint knives into a slurry of spores and slicing into the ears of corn to inoculate. Today livestock syringes with a reservoir of spore solution are used.
To prepare the huitlacoche specimens for spore solution, allow the galls to continue to develop and dry, I usually do this in a container that allows air flow but does not allow fruit flies to enter, like a paper bag or a screen covered container. Once the specimen has dried remove the galls and crush them gently in a molcajete or blender. Once you sieve out the larger pieces the resulting spore powder should store in a jar in a cool, dark place for years. I save the larger pieces and mix them in with the next crop’s seed corn before planting. Always wear an N95 mask when working with spores, even non toxic varieties can cause breathing issues and asthma attacks.
Once your corn has been planted and your ears have started to develop, create your spore solution as needed. We used a .4g to 1g/L solution, between one half and one gram of spores per liter of distilled water or sterile water. M maydis spores, like most fungal spores, are highly hydrophobic, meaning they will resist mixing with water and will separate out over time. This is not an issue, just shake your jar before filling your syringes and shake your syringe (without sticking yourself) before injecting your ears to mix the spores back into solution. Everything should be clean but this is not a sterile process, the spores will have dirt, bug feces, and molds mixed in already, and the inoculation occurs out in the field, hardly sterile. A still air box can help contain the spores while working with them but is not necessary for sanitation purposes.
If you are in Austin area, we are giving away spore syringes and corn seed. Seeds available at the 78702 mushroom block pick-up until gone.
Inoculation
When the ears of corn are approximately cigar sized, which is around the time that the silk has emerged from the top of the ear, they are ready for inoculation. You can do a simple test on a sample ear to ensure they have not been fertilized. This is not strictly necessary especially if you can ensure that there has been no exposure to tasseled corn within approximately ¼ mile.
Most huitlacoche grown in the US in small quantities is produced via liquid culture, unlike in Central Mexico where spores are used. The most traditional method, employed since pre-columbian times is to take a sharp knife and successively dip it in a thick solution of spores and water and nick through the husks of unfertilized young ears of maize to produce infection. Modern producers in Central Mexico typically use syringes attached by hose to a reservoir of spore solution made with spores from previous harvests. Most producers in Mexico inject inoculant into the ears twice, a couple of inches from the top and bottom of the ears, targeting the silk channel, in between the husk and the kernels.
With liquid culture in the United States most small producers inject 5-10 ml of LC into the ear at the top, inserting the needle along the silk inline with the ear (silk channel inoculation) instead of through the side of the husk. For subsequent planting, the spores saved from previous harvests are generally used though some producers do continue to use LC.
The most important part of inoculation is that you want the spores or liquid culture to reach the entire ear top to bottom, for this reason multiple injections is recommended.
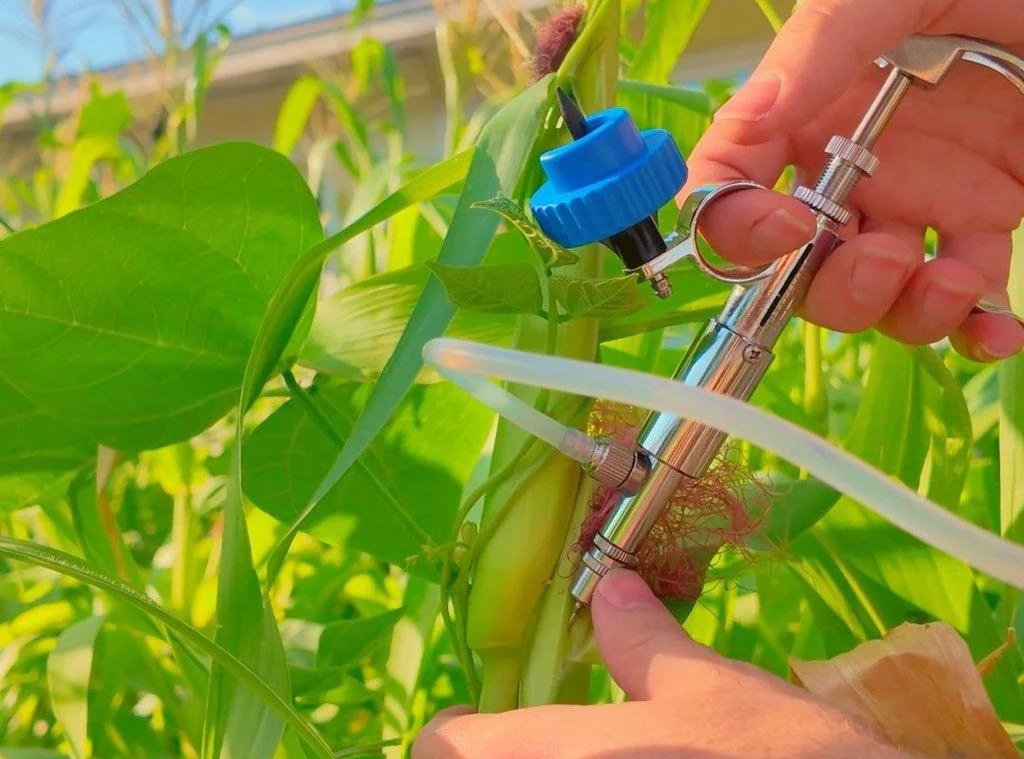
Inoculate when ears are still skinny and cigar sized
Right before silk emergence or just after
Seriously, don’t stab yourself with the syringe
Shake syringe to mix into solution
When inserting the syringe, try to find the silk channel between the cob/kernels and the husk.
Inject ~1ml of solution 1-2 inch down from the top of the ear
Inject ~1ml of solution 1-2 inch up from the bottom of the ear
Label the ear with the date using a sharpie
Watch the ear over the coming weeks to monitor the development
Timing varies, 10-40 days
Bulges will form below the husk
Harvest once galls have enlarged and turned gray/black but before infected kernels turn powdery inside
Harvest
Ears should be harvested once the galls have developed but before sporulation has occurred. Various time frames are given for this in different sources as local environmental effects as well as inoculation techniques can change the length of time necessary for development. LC develops faster than spores. Warm temperatures and higher humidity increase the speed of growth. Recommendations vary from 14-16 days to others stating 12-14 days is already too late. The essential point is to harvest before the galls have turned powdery inside. Once the spores have fully developed in a gall and began to turn powdery, consumption of that gall can cause considerable gastrointestinal upset; save those galls for future spore solution.
The galls can be peeled or cut from the cob and refrigerated separately or on the cob for shorter periods. If you’re blessed by the maize gods with a successful crop of huitlacoche, there are some great recipes to try out. The most common is a huitlacoche quesadilla with sauteed huitlacoche, diced onions, and epazote inside. Simple and delicious. We’ve even made tamales where the whole tamale, husk, masa, and filling are all from the same corn plant. There’s no wrong way to enjoy it. Huitlacoche is a fantastic ingredient in soups, tacos, and traditional Mexican crepes, so invite some friends over and get to cooking.