How to Build Your Own Laminar Flow Hood


⚠️ Important Safety Warning ⚠️
Building this device involves working with mains electricity (120V). If you are not 100% confident in your ability to wire components safely, hire a licensed electrician to perform the electrical connections. Faulty wiring can lead to electrical shock, fire, or damage to the components.
Overview of the Project
This project involves building a Laminar Flow Hood (also called a Horizontal Flow Bench). It uses a high-powered blower (a "can fan") to push air through a High-Efficiency Particulate Air (HEPA) filter. The filter removes contaminants (mold spores, bacteria, dust) from the air, creating a sterile, laminar (smooth, non-turbulent) flow of clean air in which you can perform sterile mycology work.
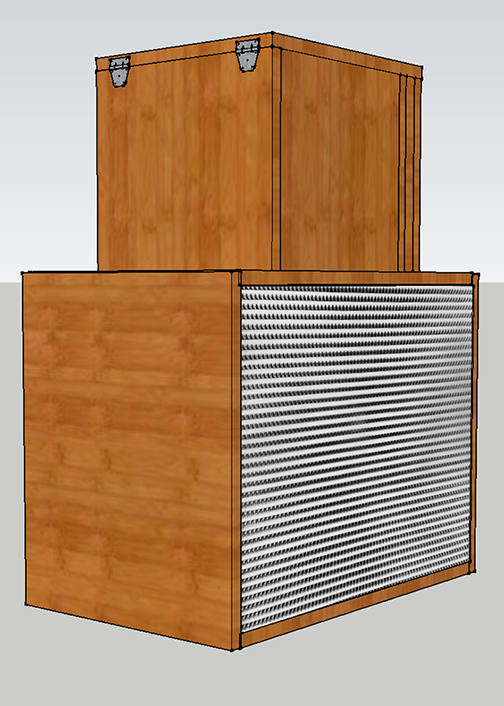
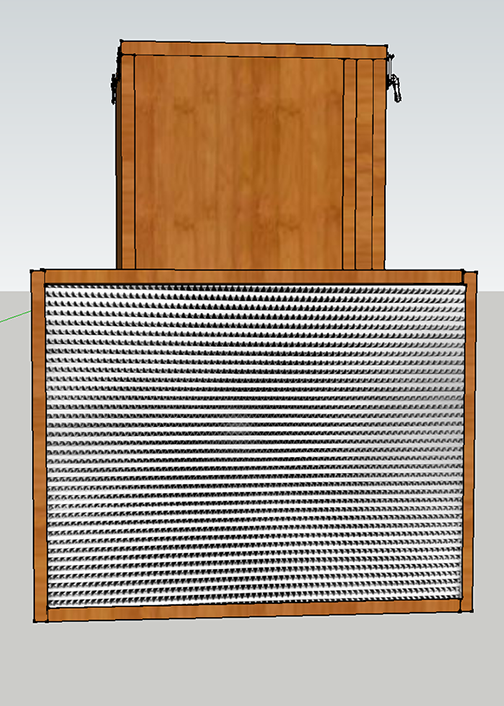
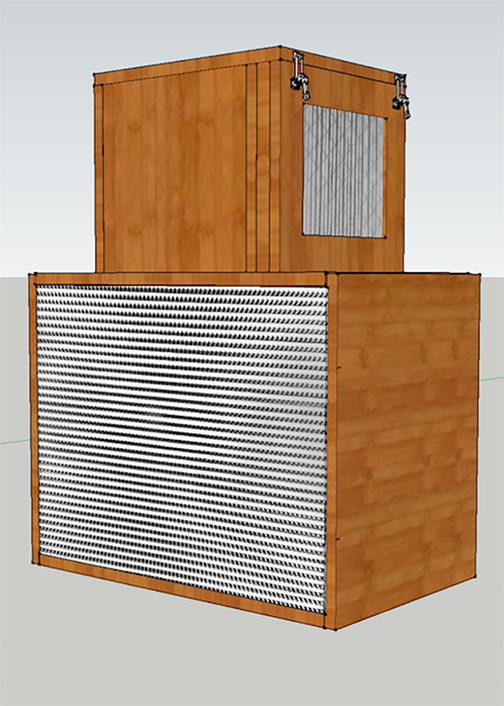
Final Result: You will have a self-contained unit with a pre-filter, a powerful fan, a HEPA filter, and a sealed work box.
Parts & Materials List
(Based on the Shroomery post)
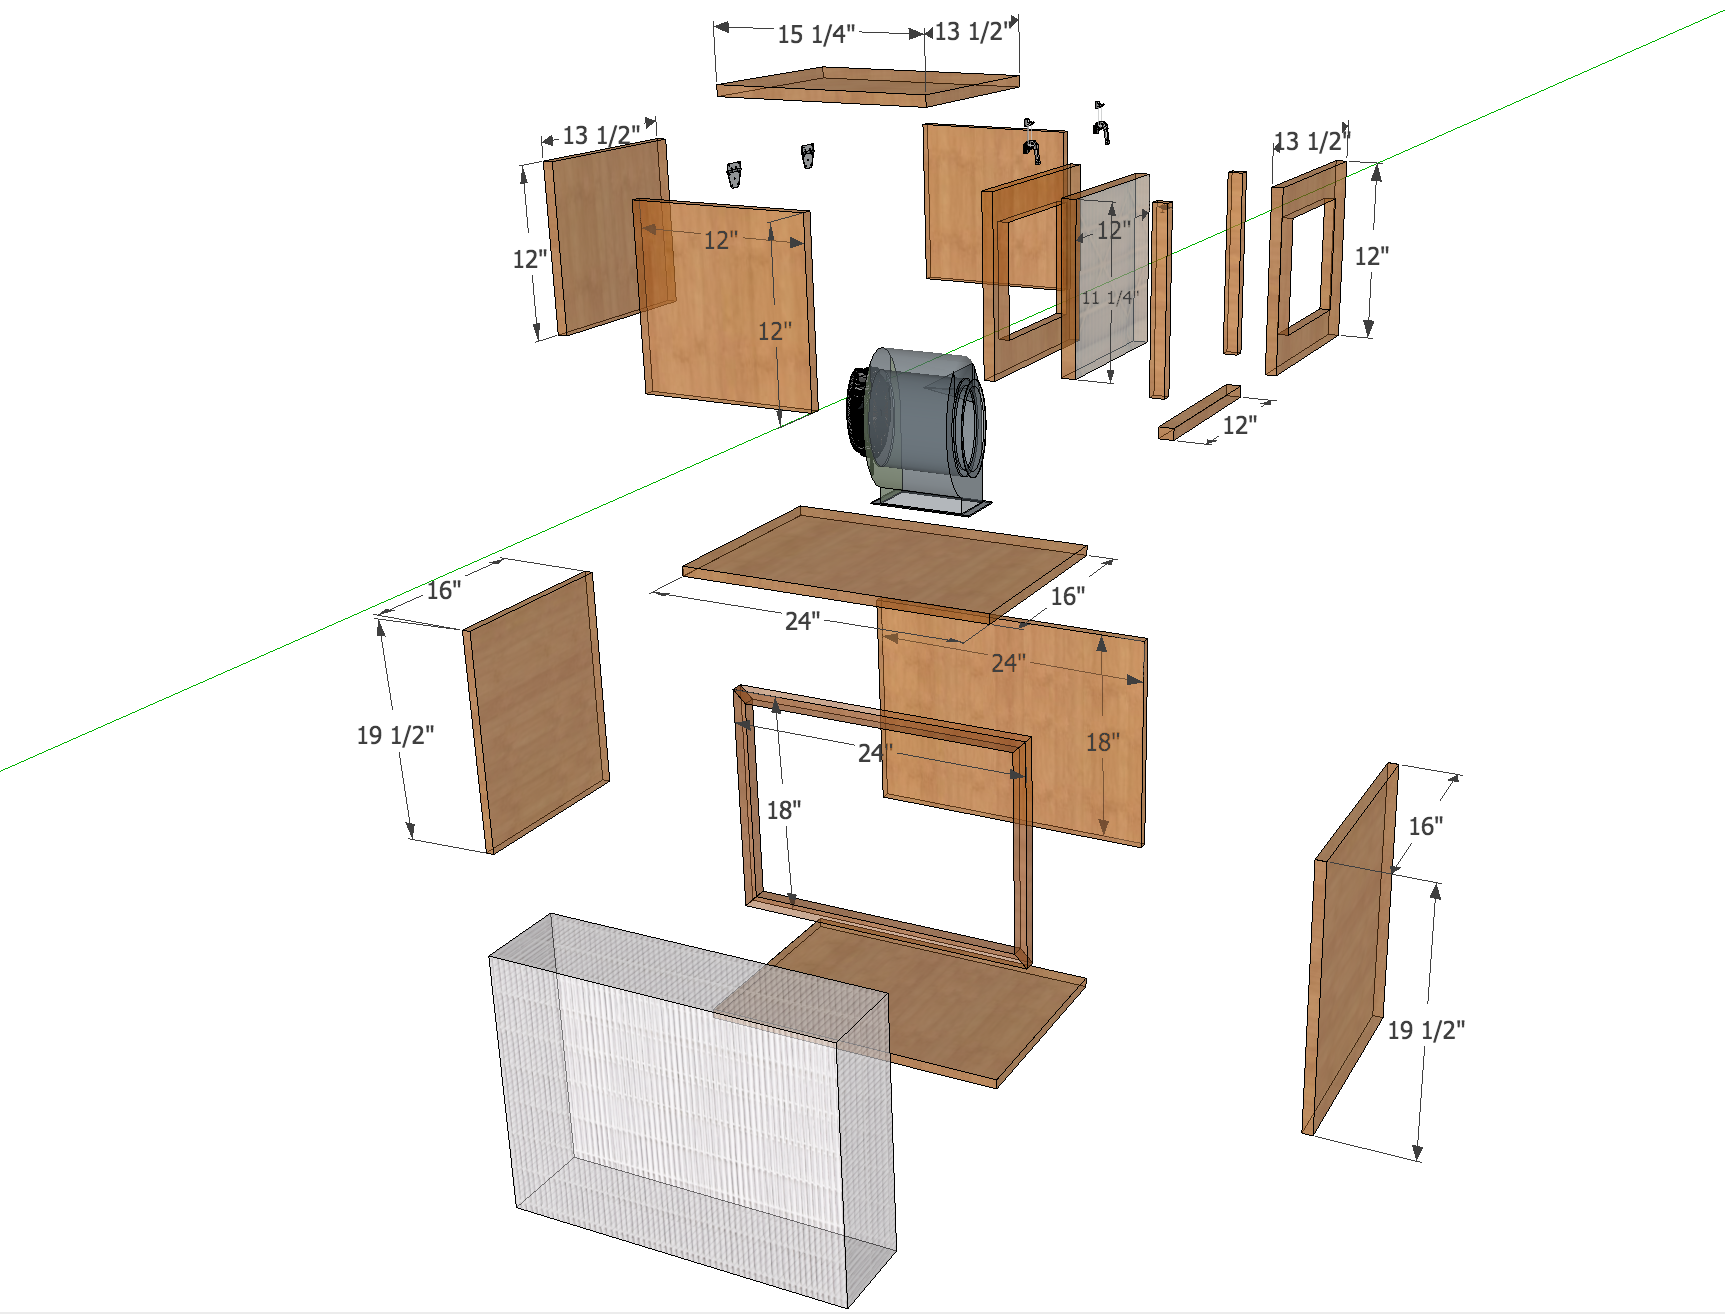
Fan/Blower: Dayton 1TDT2 Blower, 549 CFM, 115V, 2.05 Amp, 1640 RPM. This is the heart of the unit.
Filter: 12" x 24" x 12" HEPA Filter (99.99% efficient @ 0.3 µm). This is the most critical component for sterility.
Pre-Filter: A basic furnace filter (e.g., 12x24x1") to extend the life of the expensive HEPA filter by catching large dust particles.
Box Construction:
3/4" Plywood or MDF - A single 4' x 8' sheet will be more than enough.
1x2" or 1x3" Pine Boards - for bracing and framing.
Silicone Sealant (100% Silicone) - for creating an airtight seal.
Wood Glue, Screws (1.5" and 2.5"), Nails.
Electrical:
Standard Power Cord (lamp cord or computer power cable).
Wire Nuts or Wago Connectors.
Electrical Tape.
Other:
Aluminum Filter Tape (foil tape) - for sealing joints.
Paint or Polyurethane - to seal the wood inside and out, making it easy to clean and preventing mold growth on the wood itself.
Tools Required
Tape Measure & Pencil
Circular Saw or Table Saw (a circular saw and a straight-edge guide works perfectly)
Jigsaw (for cutting the fan hole)
Drill/Driver with assorted drill bits and screwdriver bits
Staple Gun (optional, for pre-filter)
Caulking Gun (for silicone)
Scissors (for filter tape)
Sandpaper (medium and fine grit)
Safety Gear: Glasses, gloves, hearing protection, dust mask.
Step-by-Step Build Instructions
Phase 1: Design & Planning
Understand the Airflow Path: Air enters through the pre-filter on the back/bottom, is sucked in by the fan, pressurized in the plenum (the sealed box behind the filter), and then forced evenly through the HEPA filter.
Finalize Dimensions: Your box's front face (where the HEPA filter mounts) is determined by the filter size: 12" tall x 24" wide. The depth is up to you, but 16-18 inches is a common and effective depth for the plenum.
Phase 2: Building the Box
Cut the Wood:
Sides (2 pieces): 12" tall x (your chosen depth, e.g., 18") long.
Top (1 piece): 24" wide x (your chosen depth, e.g., 18") long.
Bottom (1 piece): 24" wide x (your chosen depth, e.g., 18") long.
Back (1 piece): 12" tall x 24" wide. This piece will have a large hole cut in it for the fan.
Front Frame (2 pieces): Cut two rails from 1x2" or 1x3" wood to act as a ledge for the HEPA filter to sit on. They should be about 22-23" long to fit inside the box.
Cut the Fan Hole:
Find the center of the back panel. An 8" fan typically requires an ~7.75" hole, but always use the template provided with your specific fan or measure the fan's collar.
Use a jigsaw to carefully cut out the hole.
Assemble the Box:
Apply wood glue to the edges of your side panels.
Attach the top and bottom panels to the side panels using screws. Pre-drill your holes to prevent splitting.
Attach the back panel with the fan hole to the assembly. Do not fully seal this with silicone yet.
Create the Filter Ledges:
Inside the box, on the front opening, attach the two horizontal rails. One will be near the top and one near the bottom. The HEPA filter will sit on these ledges from the front.
Ensure they are level and secure. The filter should sit flush with or slightly recessed from the front of the box.
Phase 3: Installing the Fan & Sealing
Mount the Fan:
Place the 8" Can Fan over the hole on the outside of the back panel. The fan's intake should be pointing away from the box.
Mark and pre-drill the mounting holes.
Apply a thick bead of silicone sealant around the fan's collar where it will meet the wood.
Screw the fan firmly and securely to the back panel. Wipe away any excess silicone.
Seal the Box:
This is the most important step for performance. Every single seam, corner, and joint inside the box must be airtight.
Run a generous bead of silicone sealant along every interior seam. Smooth it with your finger or a tool.
Reinforce the exterior seams with aluminum foil tape.
Let the silicone cure completely as per the manufacturer's instructions (usually 24 hours).
Phase 4: Electrical Wiring
Wire the Speed Controller:
DISCONNECT EVERYTHING FROM POWER.
The router speed controller has an input (line in) and an output (load out).
Connect your power cord to the input terminals on the speed controller.
Connect the wires from the fan to the output terminals on the speed controller.
Follow the specific wiring diagram that came with your speed controller. Typically: Black (Hot) to Black, White (Neutral) to White, Green/Bare (Ground) to Green.
Secure all connections with wire nuts or Wago connectors and ensure everything is tucked safely into the controller's housing.
Phase 5: Finishing & Final Assembly
Paint/Seal the Wood:
Sand the entire box, inside and out.
Apply 2-3 coats of paint or polyurethane to all surfaces. This creates a smooth, cleanable, and non-porous surface that won't harbor contaminants. Let it dry thoroughly.
Install the Filters:
Pre-Filter: Place the 12x24x1" furnace filter over the fan intake on the back of the unit. You can secure it with a simple wooden frame held on with screws or even strong tape for easy replacement.
HEPA Filter: Place the heavy HEPA filter onto the interior ledges on the front of the box.
Seal the HEPA Filter: Apply foil tape all the way around the seam where the filter meets the wooden box. This creates the final, critical airtight seal. Do not use silicone here, as you will need to replace the filter eventually.
Phase 6: Testing
Power On Test:
Place the unit on a stable surface. Plug the speed controller into the wall.
Turn the dial on the speed controller to its lowest setting, then plug in the fan.
Slowly turn the dial up. You should feel a strong, even flow of air coming from the entire face of the HEPA filter.
Airflow Test (The "Smoke Test"):
Use a stick of incense or a smoke pen. Turn the unit on to its operational speed (usually 70-80% power on the dial).
Hold the smoke source about 6 inches in front of the filter and let the smoke rise naturally. The smoke should be blown away in a smooth, laminar flow without any turbulence or back-drafting. If the smoke is chaotic near the filter face, your plenum may be too small or the fan speed may be too high.
Usage Tips
Let the unit run for 20-30 minutes before use to purge any contaminants from the work area.
Always wipe down the work surface with 70% isopropyl alcohol before and after use.
Work in the "laminar flow" zone, which is typically within 6-10 inches of the filter face. Keep your open petri dishes, grain jars, and agar work in this clean airstream.
Replace the pre-filter regularly (every 3-6 months depending on use) to maintain airflow and protect the HEPA filter.
The HEPA filter itself should last for many years in a clean home environment.
Enjoy your new, professional-grade sterile workbench!
